- Published on
Recording Saving and Downloading Blackboard Collaborate Ultra Sessions
- Authors
- Name
- interglobalmedia
- @letsbsocial1


Today I had a test session with a fellow City Tech colleague to make sure that everything would go smoothly for my virtual classes with my students in the upcoming weeks. I found out that Blackboard Collaborate Ultra is even more cool than I already thought, and really simple to use, once you get to know it. I also found a great resource online that helped me get there. I will share the link in the transcript of this podcast in the form of a post on interglobalmedianetwork.com.
The following are the steps necessary to make a recording on Blackboard Collaborate Ultra Screen Sharing, and then to have the ability to download the audio/video afterwards:
You have to go into Blackboard to access Blackboard Collaborate Ultra. For me, I have access to it via my course link on Blackboard.
First I have to log in to Blackboard. For those of us teaching at City Tech, the Home page looks something like the following when we log in:

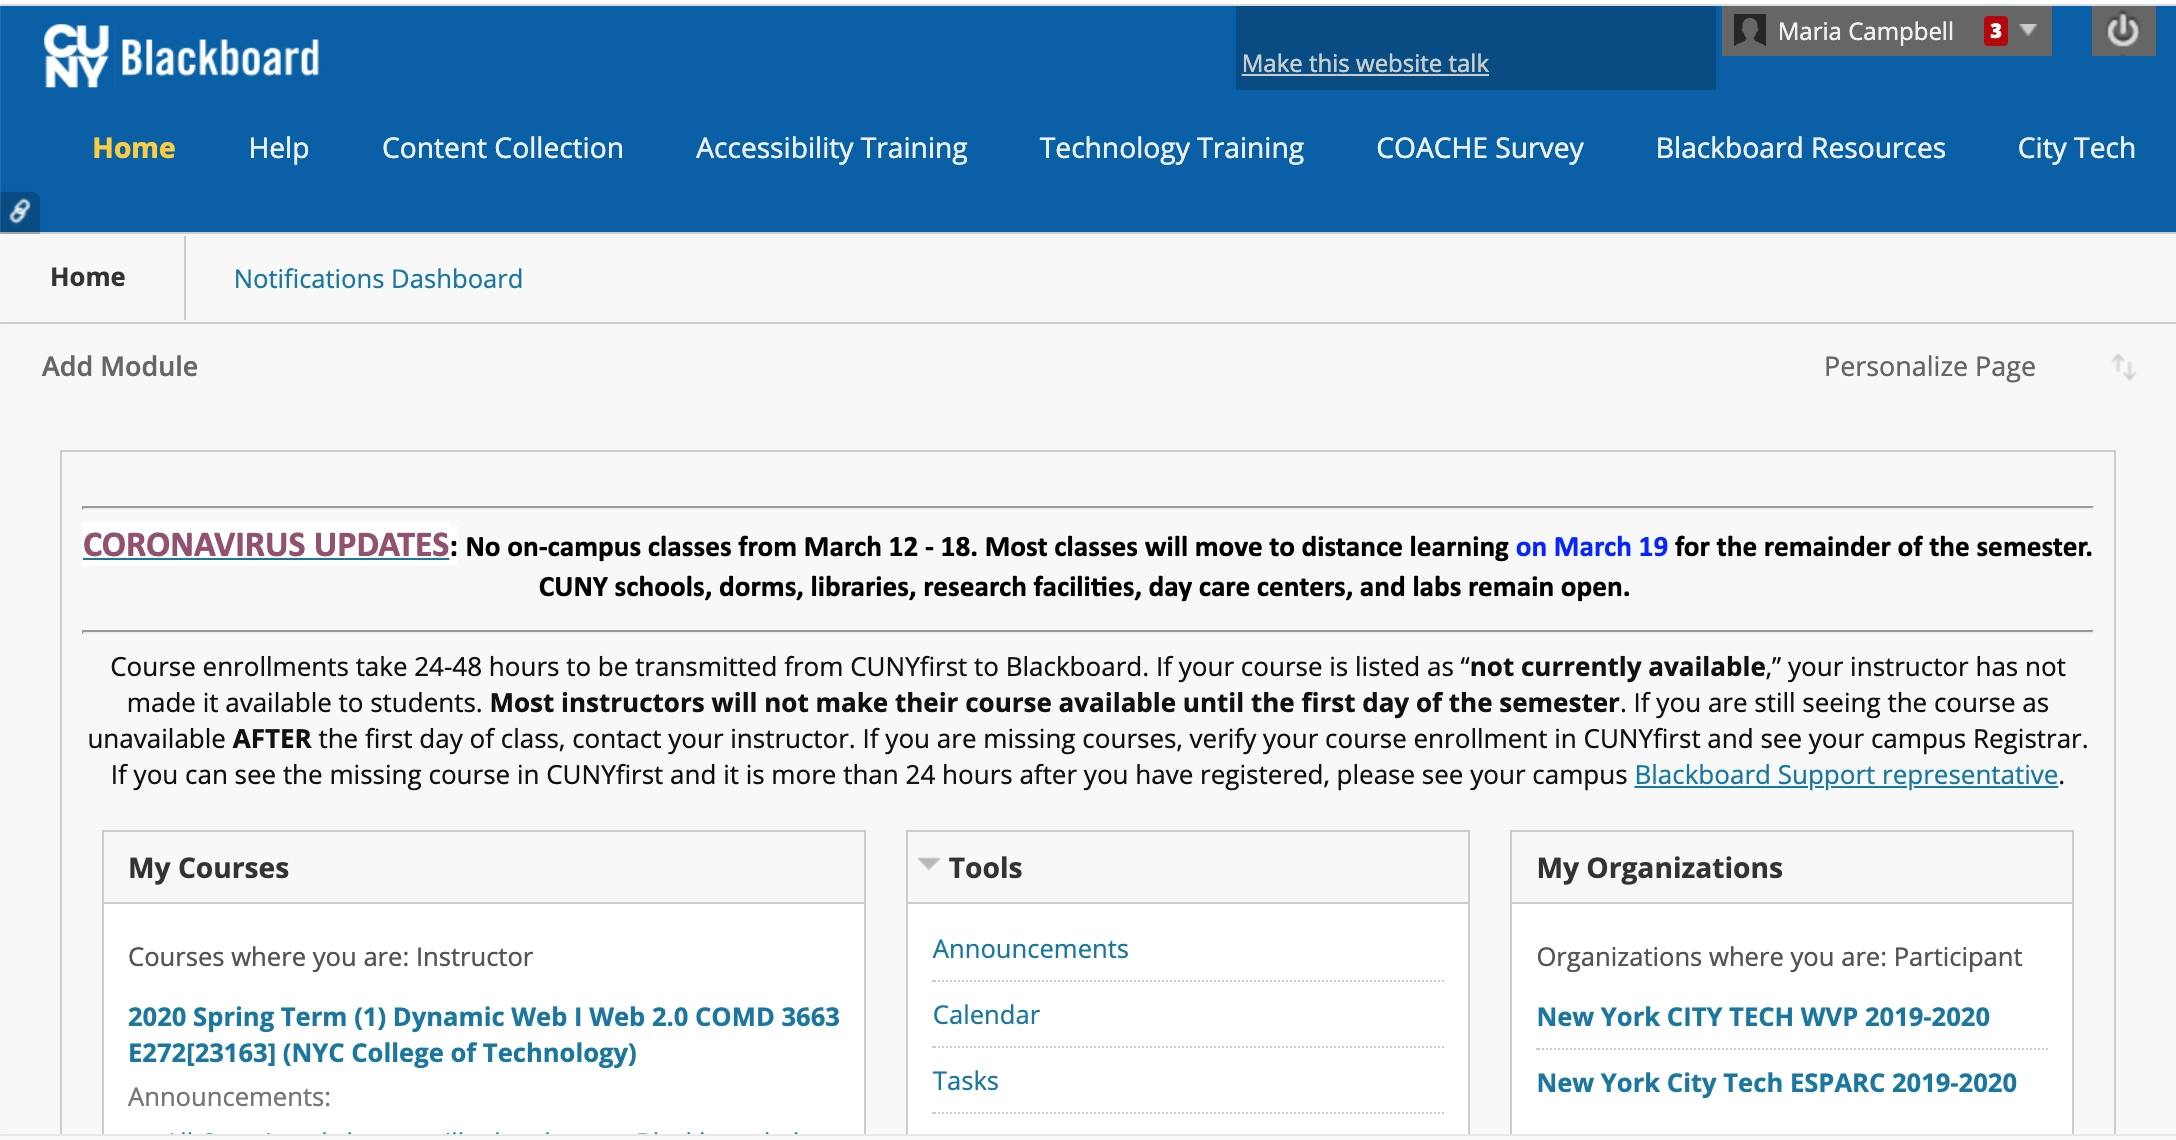
There is a link in the bottom left of the screenshot above. It is the link to my Blackboard related course tools and content. I have to click on it in order to be able to access Blackboard Collaborate Ultra Screen Sharing there.
After I have clicked on my course link, I am taken to my course related content and tools. By default, I land on the Announcements page. But what I really want is to the left of the screen under the title of my course.

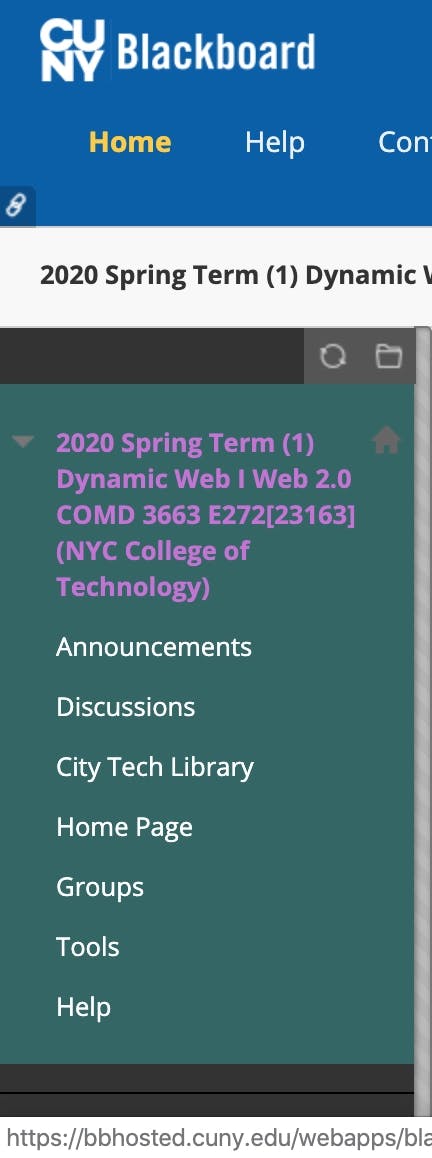
Within the green sidebar, I click on the Tools link. I am taken to the Tools available for my course:

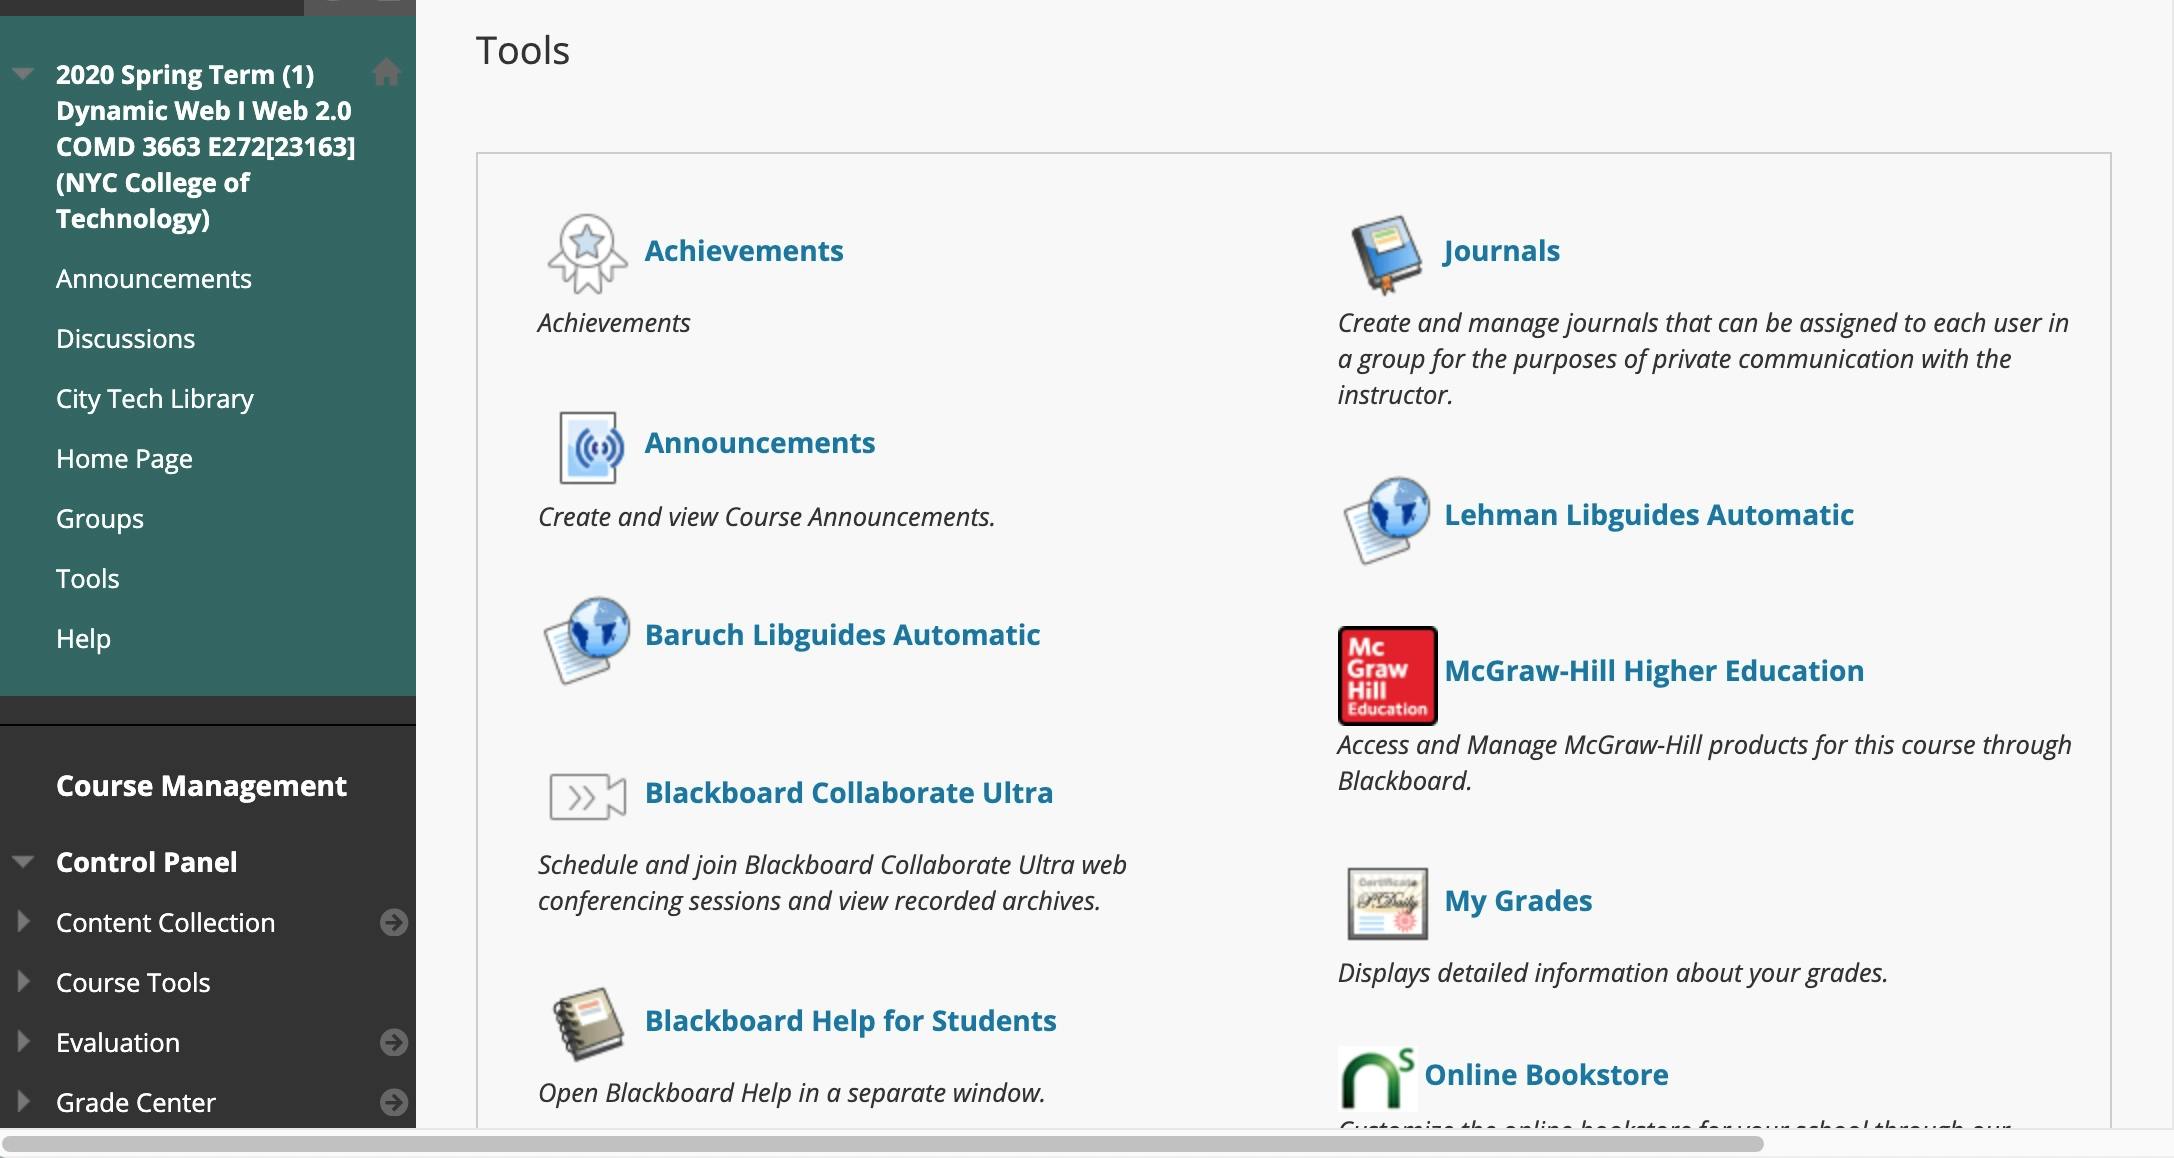
The link to the Blackboard Collaborate Ultra is right there!
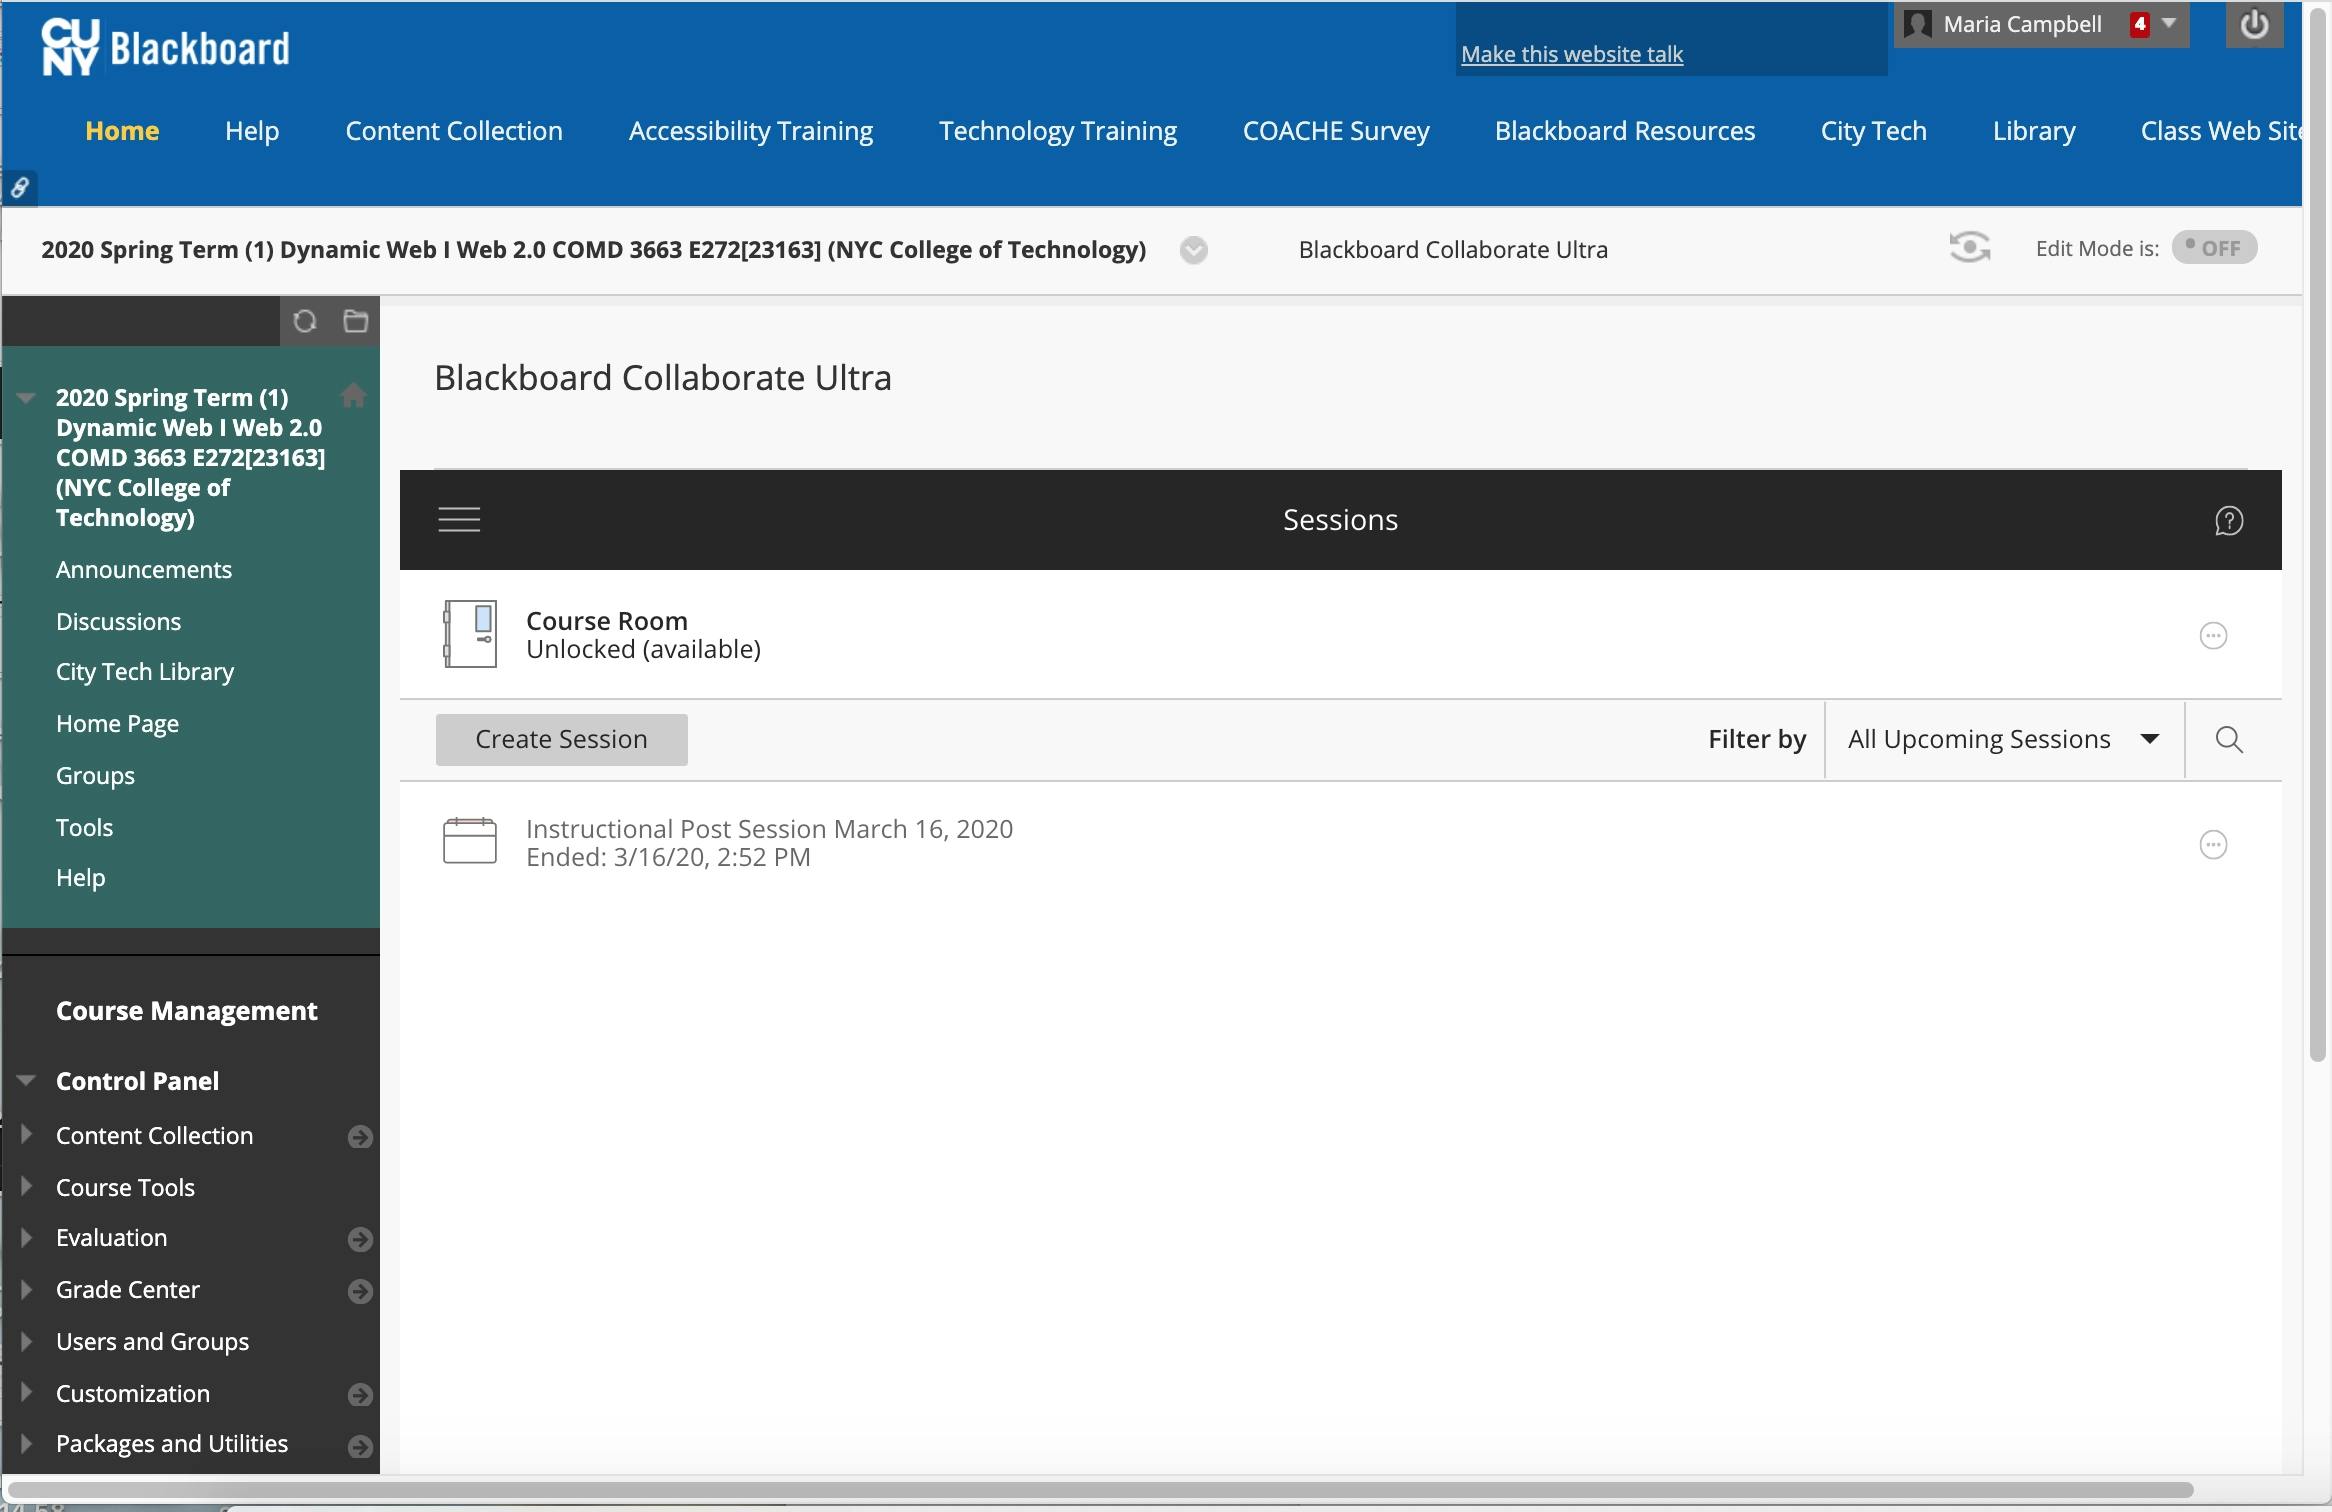
Now I have to click on the Blackboard Collaborate Ultra link to take me into that tool. When I click on the Blackboard Collaborate Ultra link, I am taken to the following:

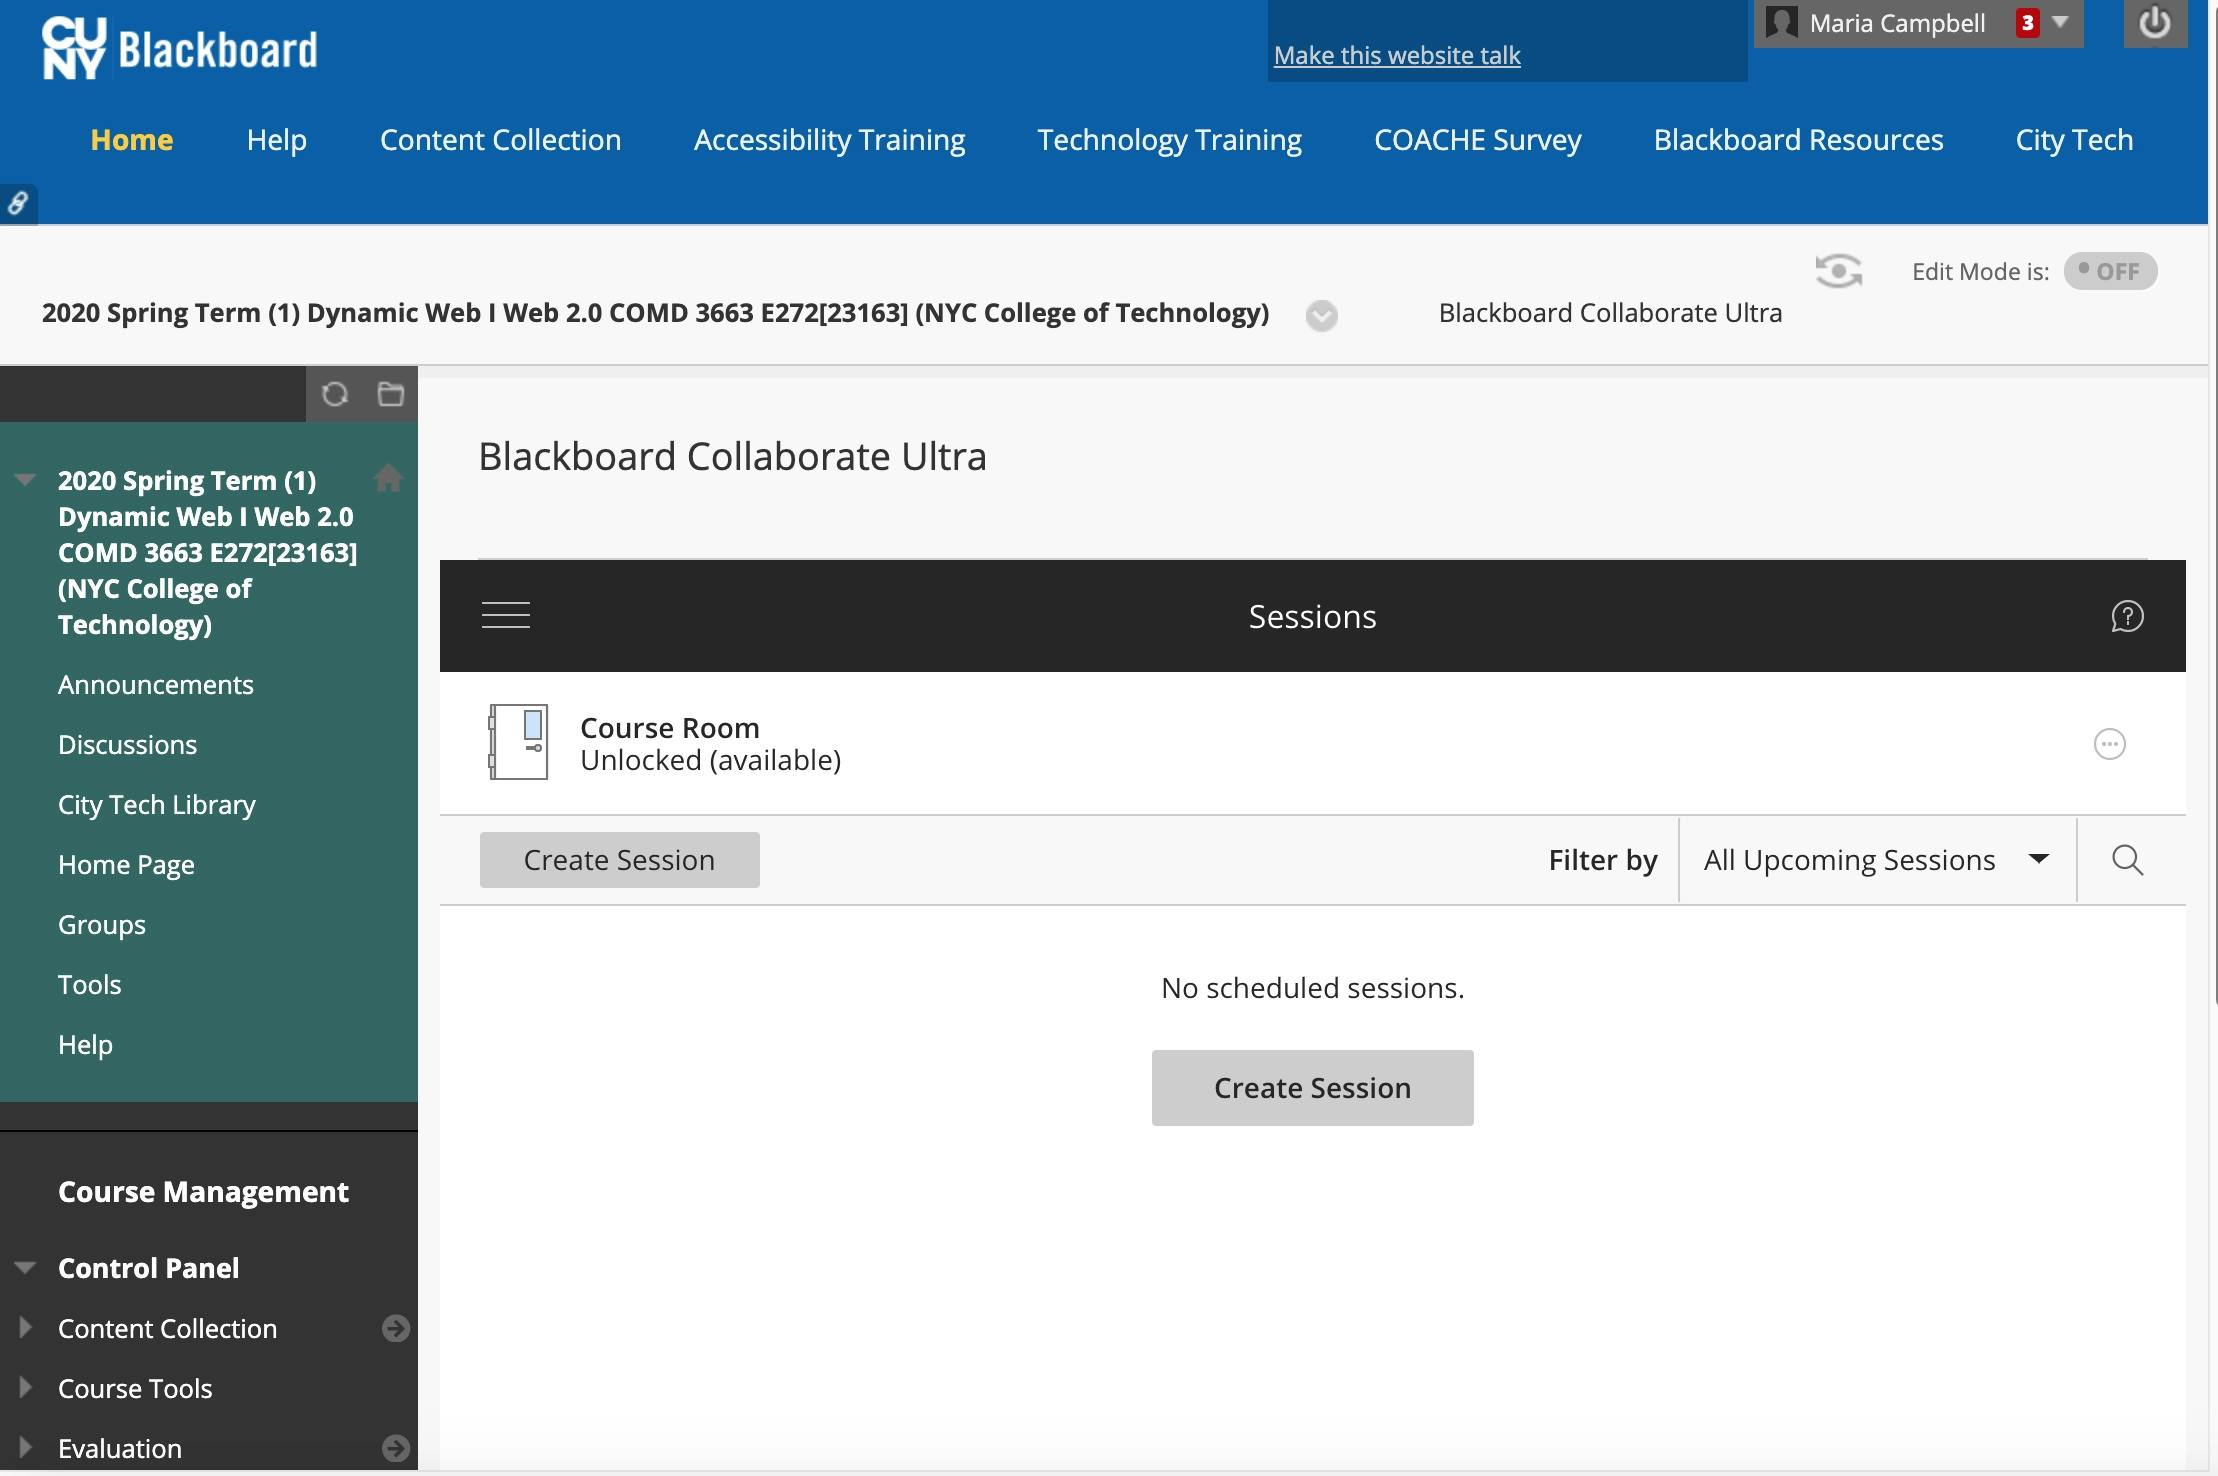
This is where we can create our sessions!
Next I have to click on the "Create Session" button. This is what the window looks like after I have done that:

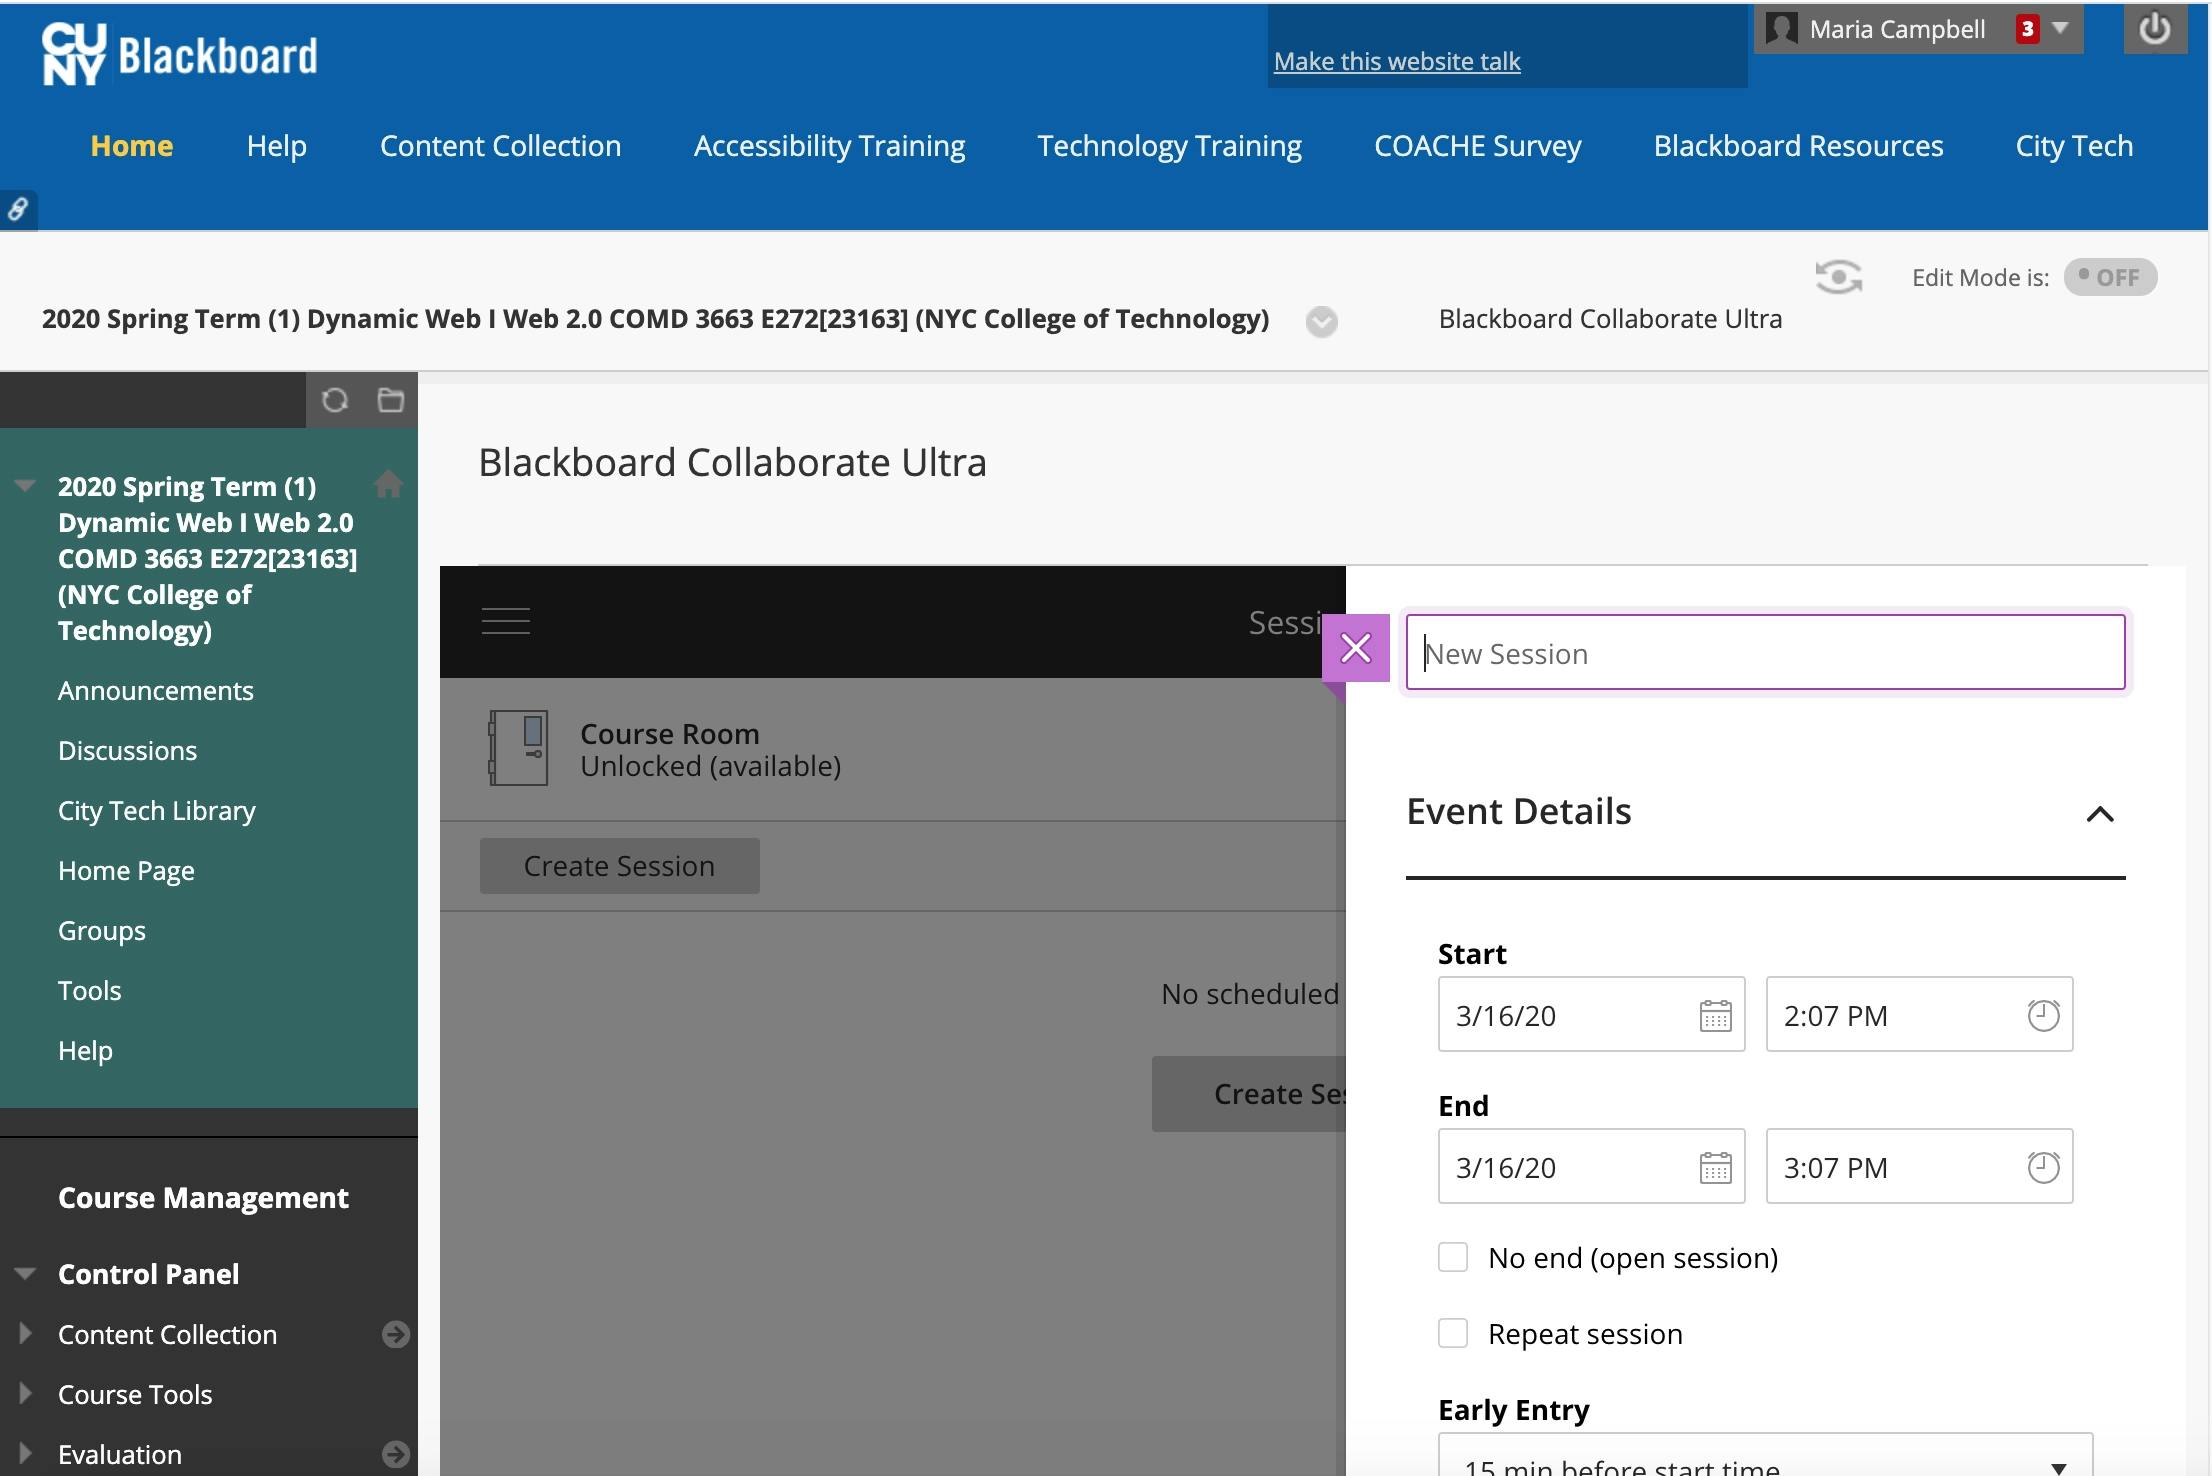
Now I have to create a title for my session. You won't be able to save your session details until you have given the session a name! So let's do that right now.
The name I create for this session (created for the purposes of this instructional post) is "Instructional Post Session March 16, 2020".
Next I want to make sure I have enabled the settings I want for my session.
I just notice that after I add a session name, the button "get secure link" appears. So I click on the "get secure link" button, and it immediately switches to "Join session".
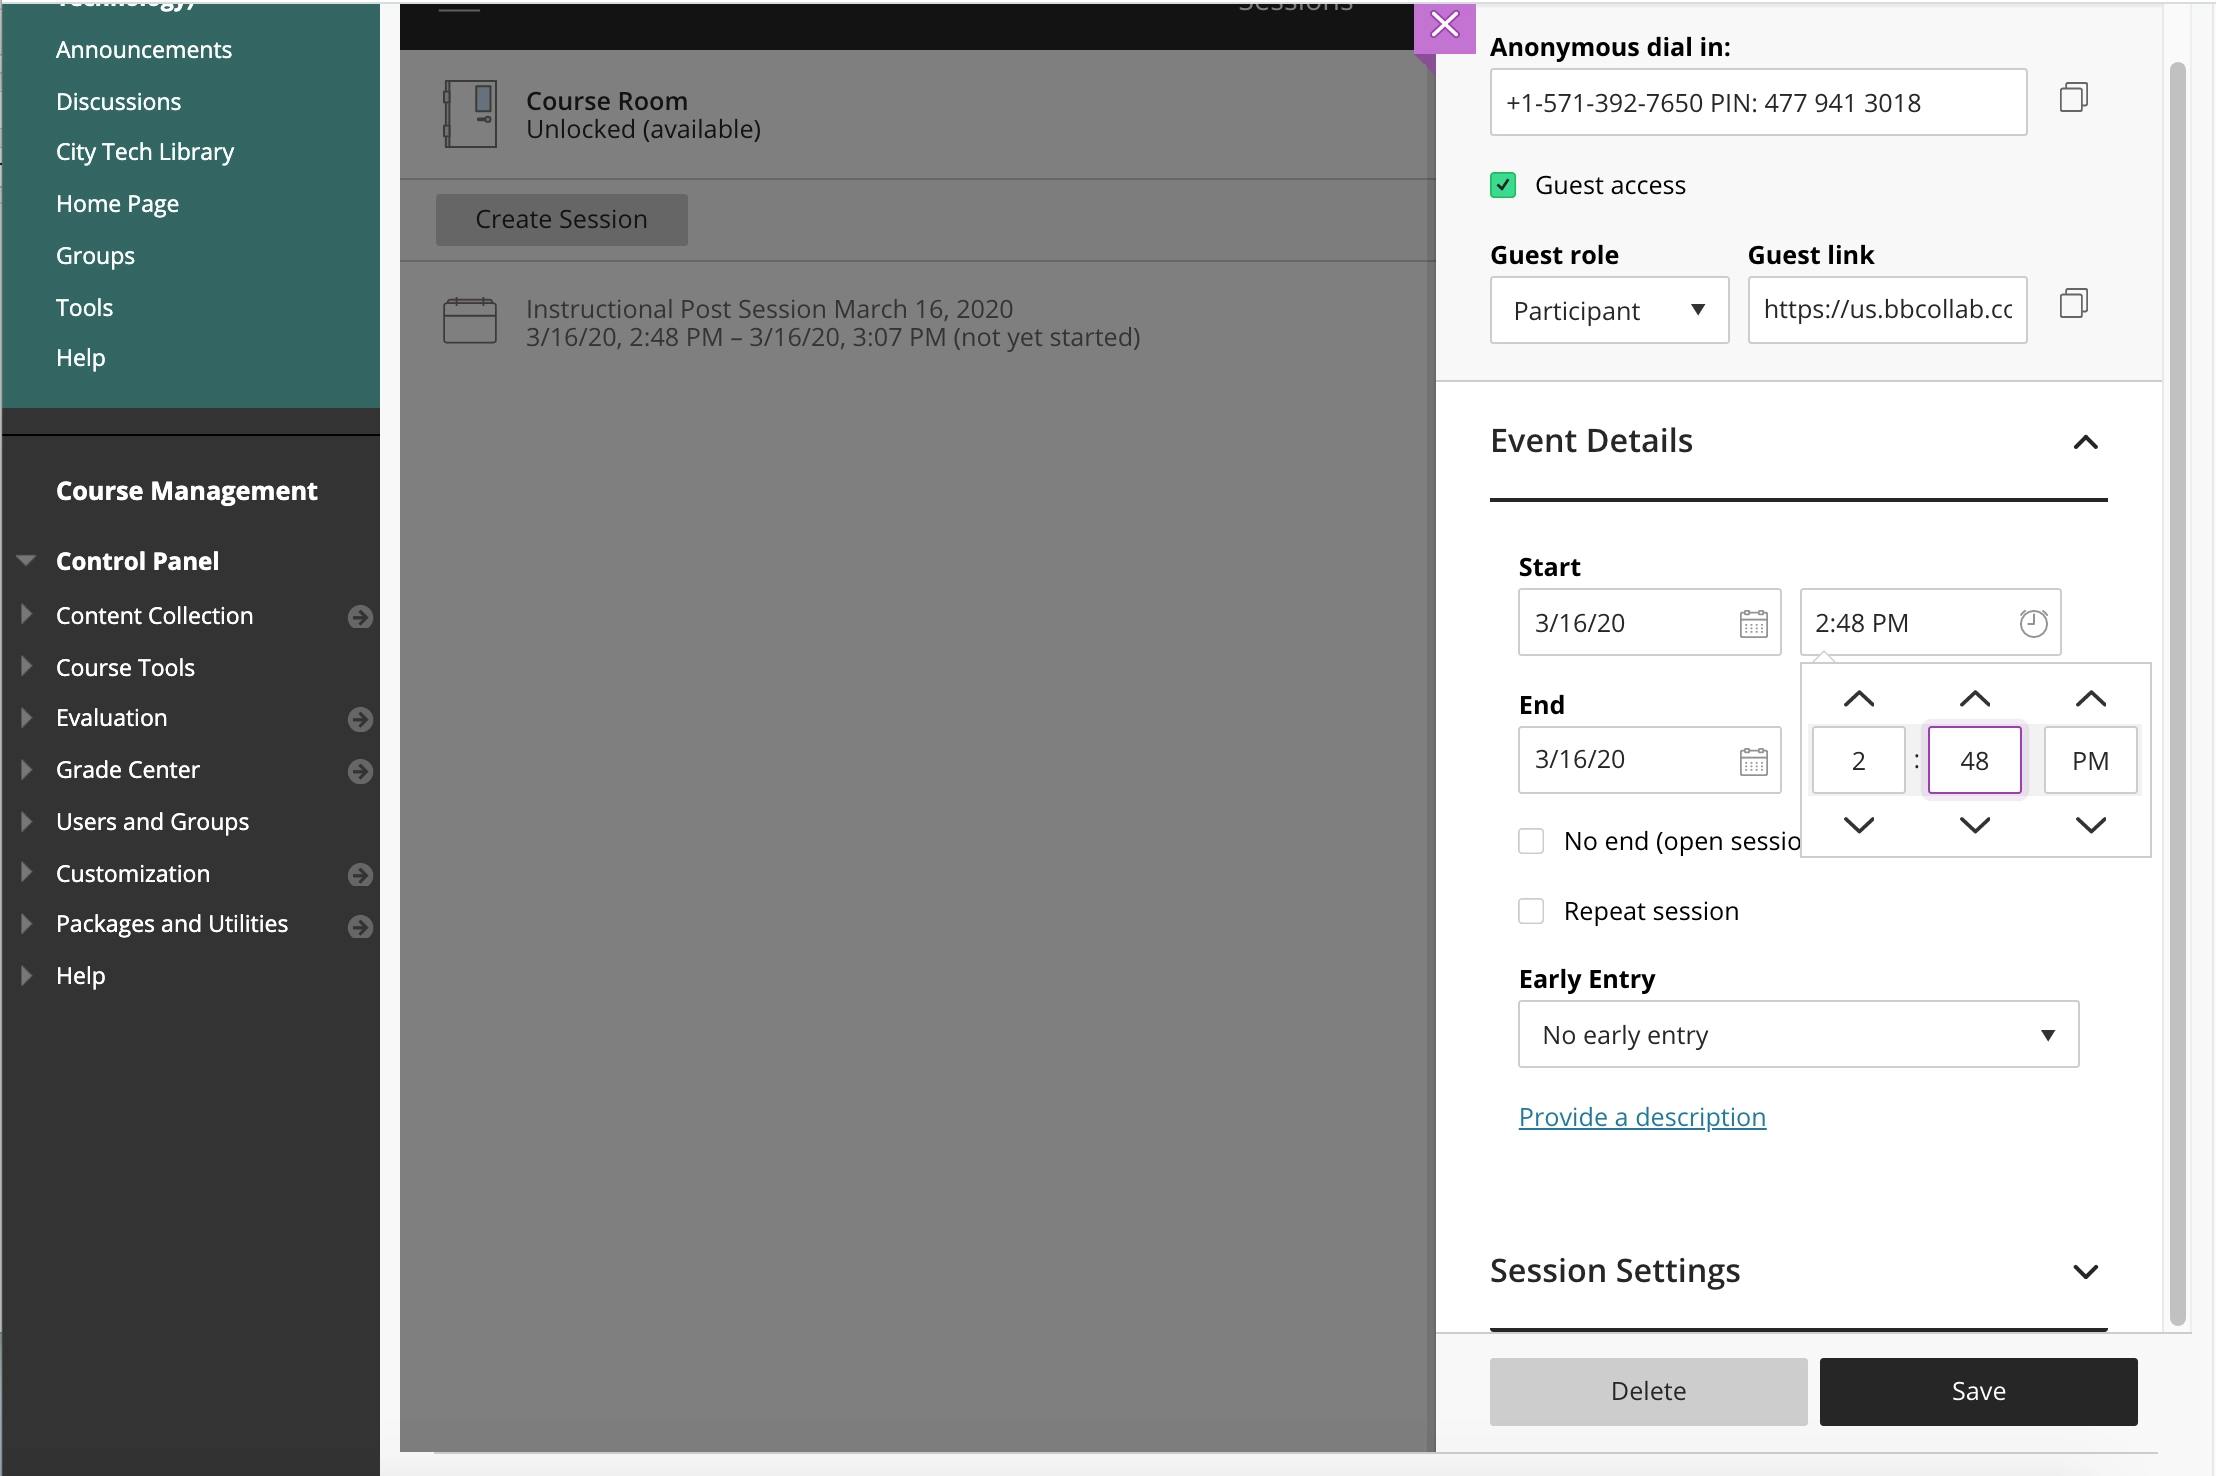
I make sure that the "Guest access" checkbox is checked.
I make sure that "Participant" for the Guest role is selected, and then there is a Guest link to share with people you want to participate in the session. It is indeed a secure link as evidenced by "https".
Next comes the "Event Details". You can select what date you want your session to take place, a start and end time, whether you want it to be an open session (with no end) or a repeat session.
Then you can decide whether you want people to have early entry. I like to choose "no early entry" from the Early Entry dropdown menu.
You can also provide a description for the session. I might actually do that for my class sessions so that my students know exactly what was covered during that particular class. I will probably do the same for my office hour sessions as well.
Next you can customize your session settings within the "Session Settings" area towards the bottom of the session window. You can click on the dropdown icon (⌵) to access the session settings. And this is what is available there:


There is a checkbox for "Allow recording downloads". Make sure to check it!
There is a checkbox for "Share audio". Make sure to check it!
There is a checkbox for "Share video". Make sure to check it!
There is a "Post chat messages" checkbox. Make sure to check it! Students may want to post questions for you to answer, and you may also want to share information or even links with them!
I also selected the "Draw on whiteboard and files" checkbox even though I don't think I will ever use it, but it is good to do it in case!
I also checked the "Allow attendees to join the session using a telephone" even though I don't think any of my students will go that route. But again, I check it just in case!
I don't intend to do any private chatting with my students, but I want to discourage private chatting during class, so I check the "Moderators supervise all private chats" so that no one will want to set up a private chat! They can leave that to Discord!
Next I go back to my "Event Details" section to schedule the session. I want to create a session for a few minutes from now so that I can have a bit of time to complete scheduling it and then joining the session.
First I choose "No early entry" from the Early Entry dropdown menu.
I make the start date today (3.16.20).
I make the start time 2:45pm (right now it is 2:38 pm, which gives me plenty of time to complete the session setup). I make the end time 2:48pm.
I don't want an open session.
I don't want a repeat session.
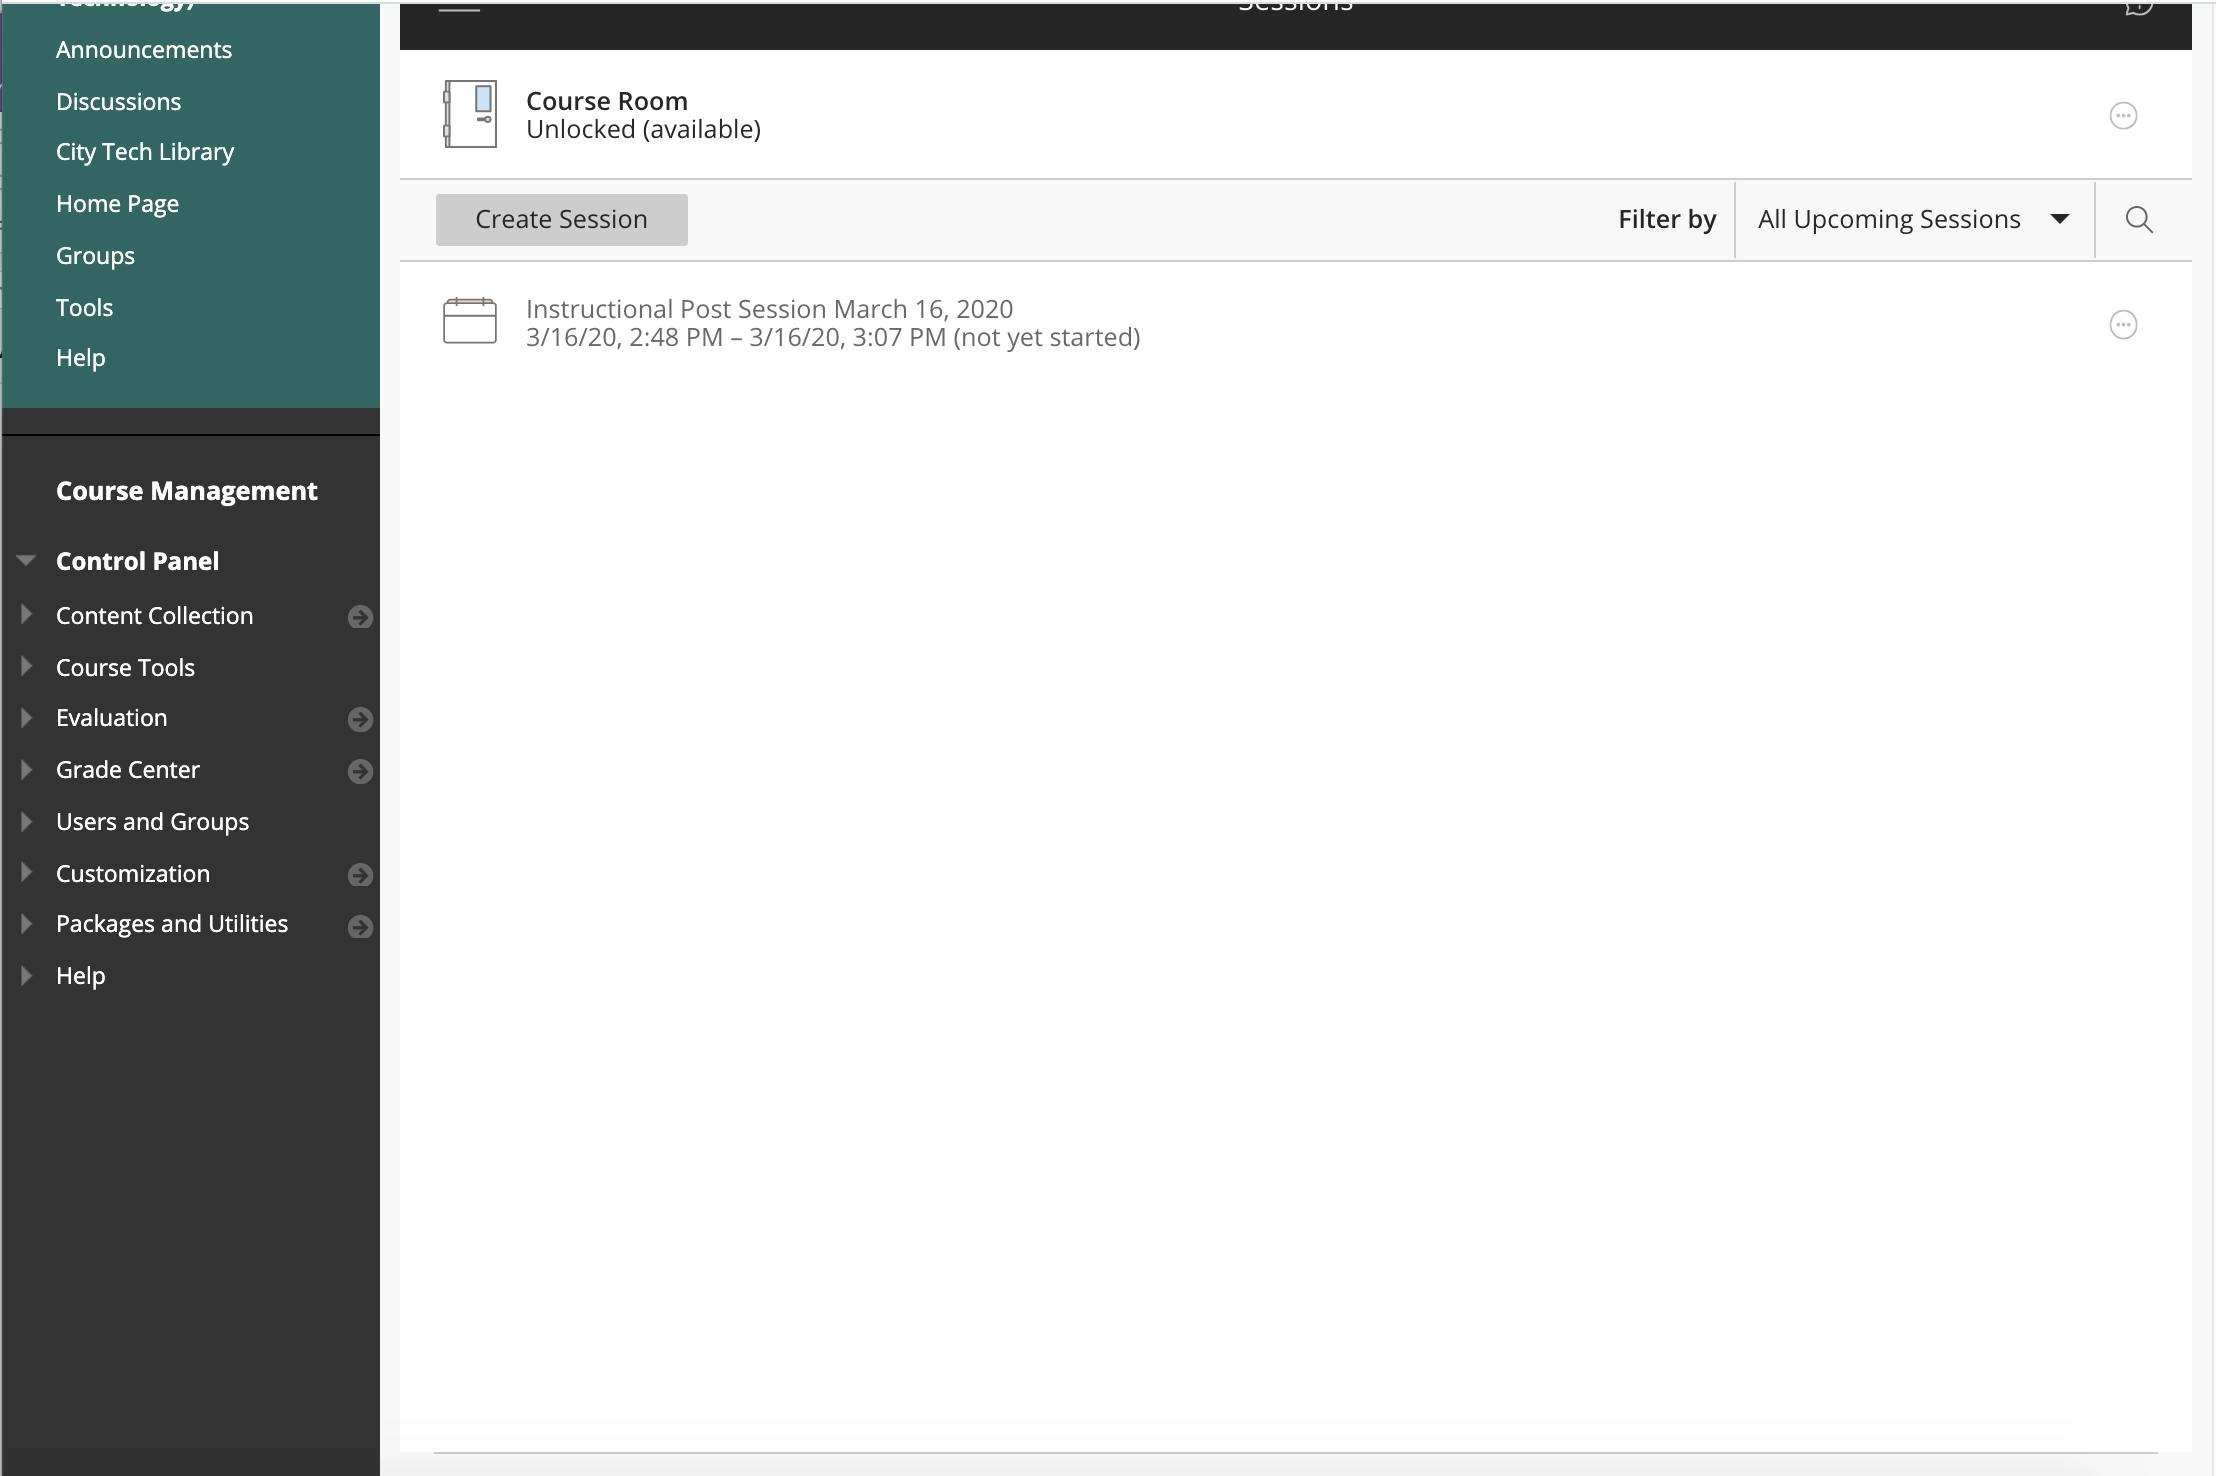
Now all I have to do is wait five minutes! But before anything, I save the session by clicking on the Save button. When I click on the button, I am taken to the following:
When the time arrives, I click on the session link above, and then click on the Join Session button in the window I am taken to. This is what pops up after I click on the Join Session button:

Next I click on the microphone icon and then the video icon (shown right above).
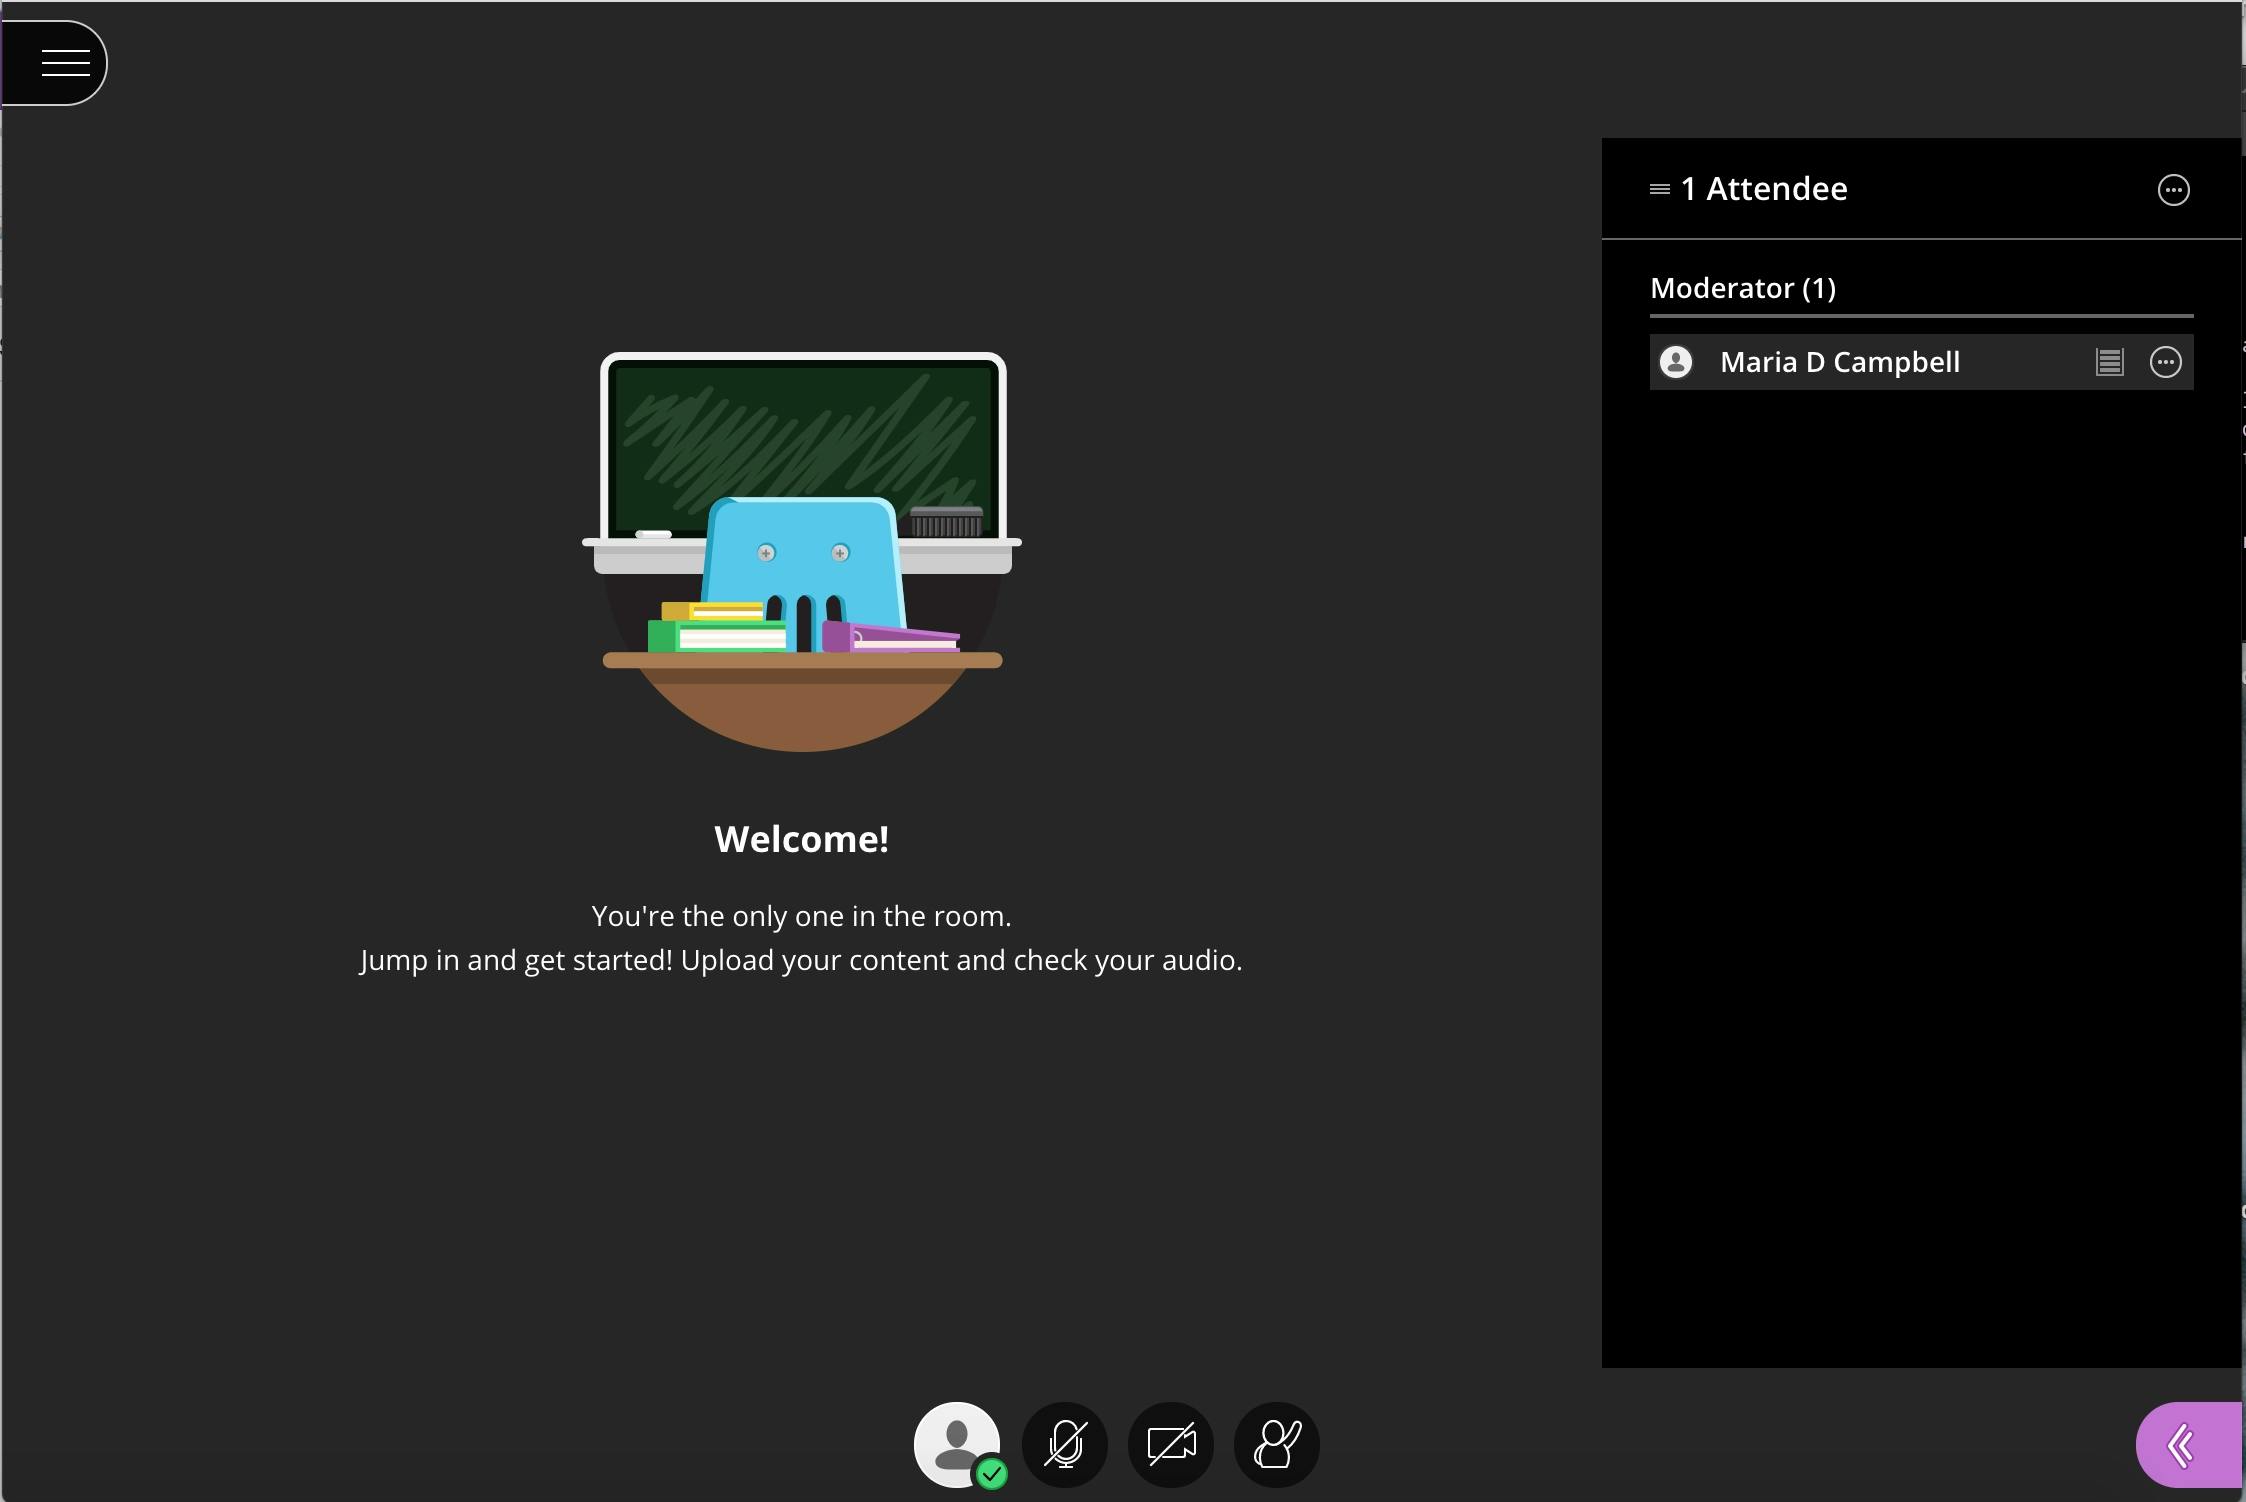
Then I click on the video icon, which takes me to a video preview. There, two buttons appear under the video preview. One is cancel, and the other is Share video. Click on the Share Video button. When you have clicked on the Share video button, you are taken to the following:
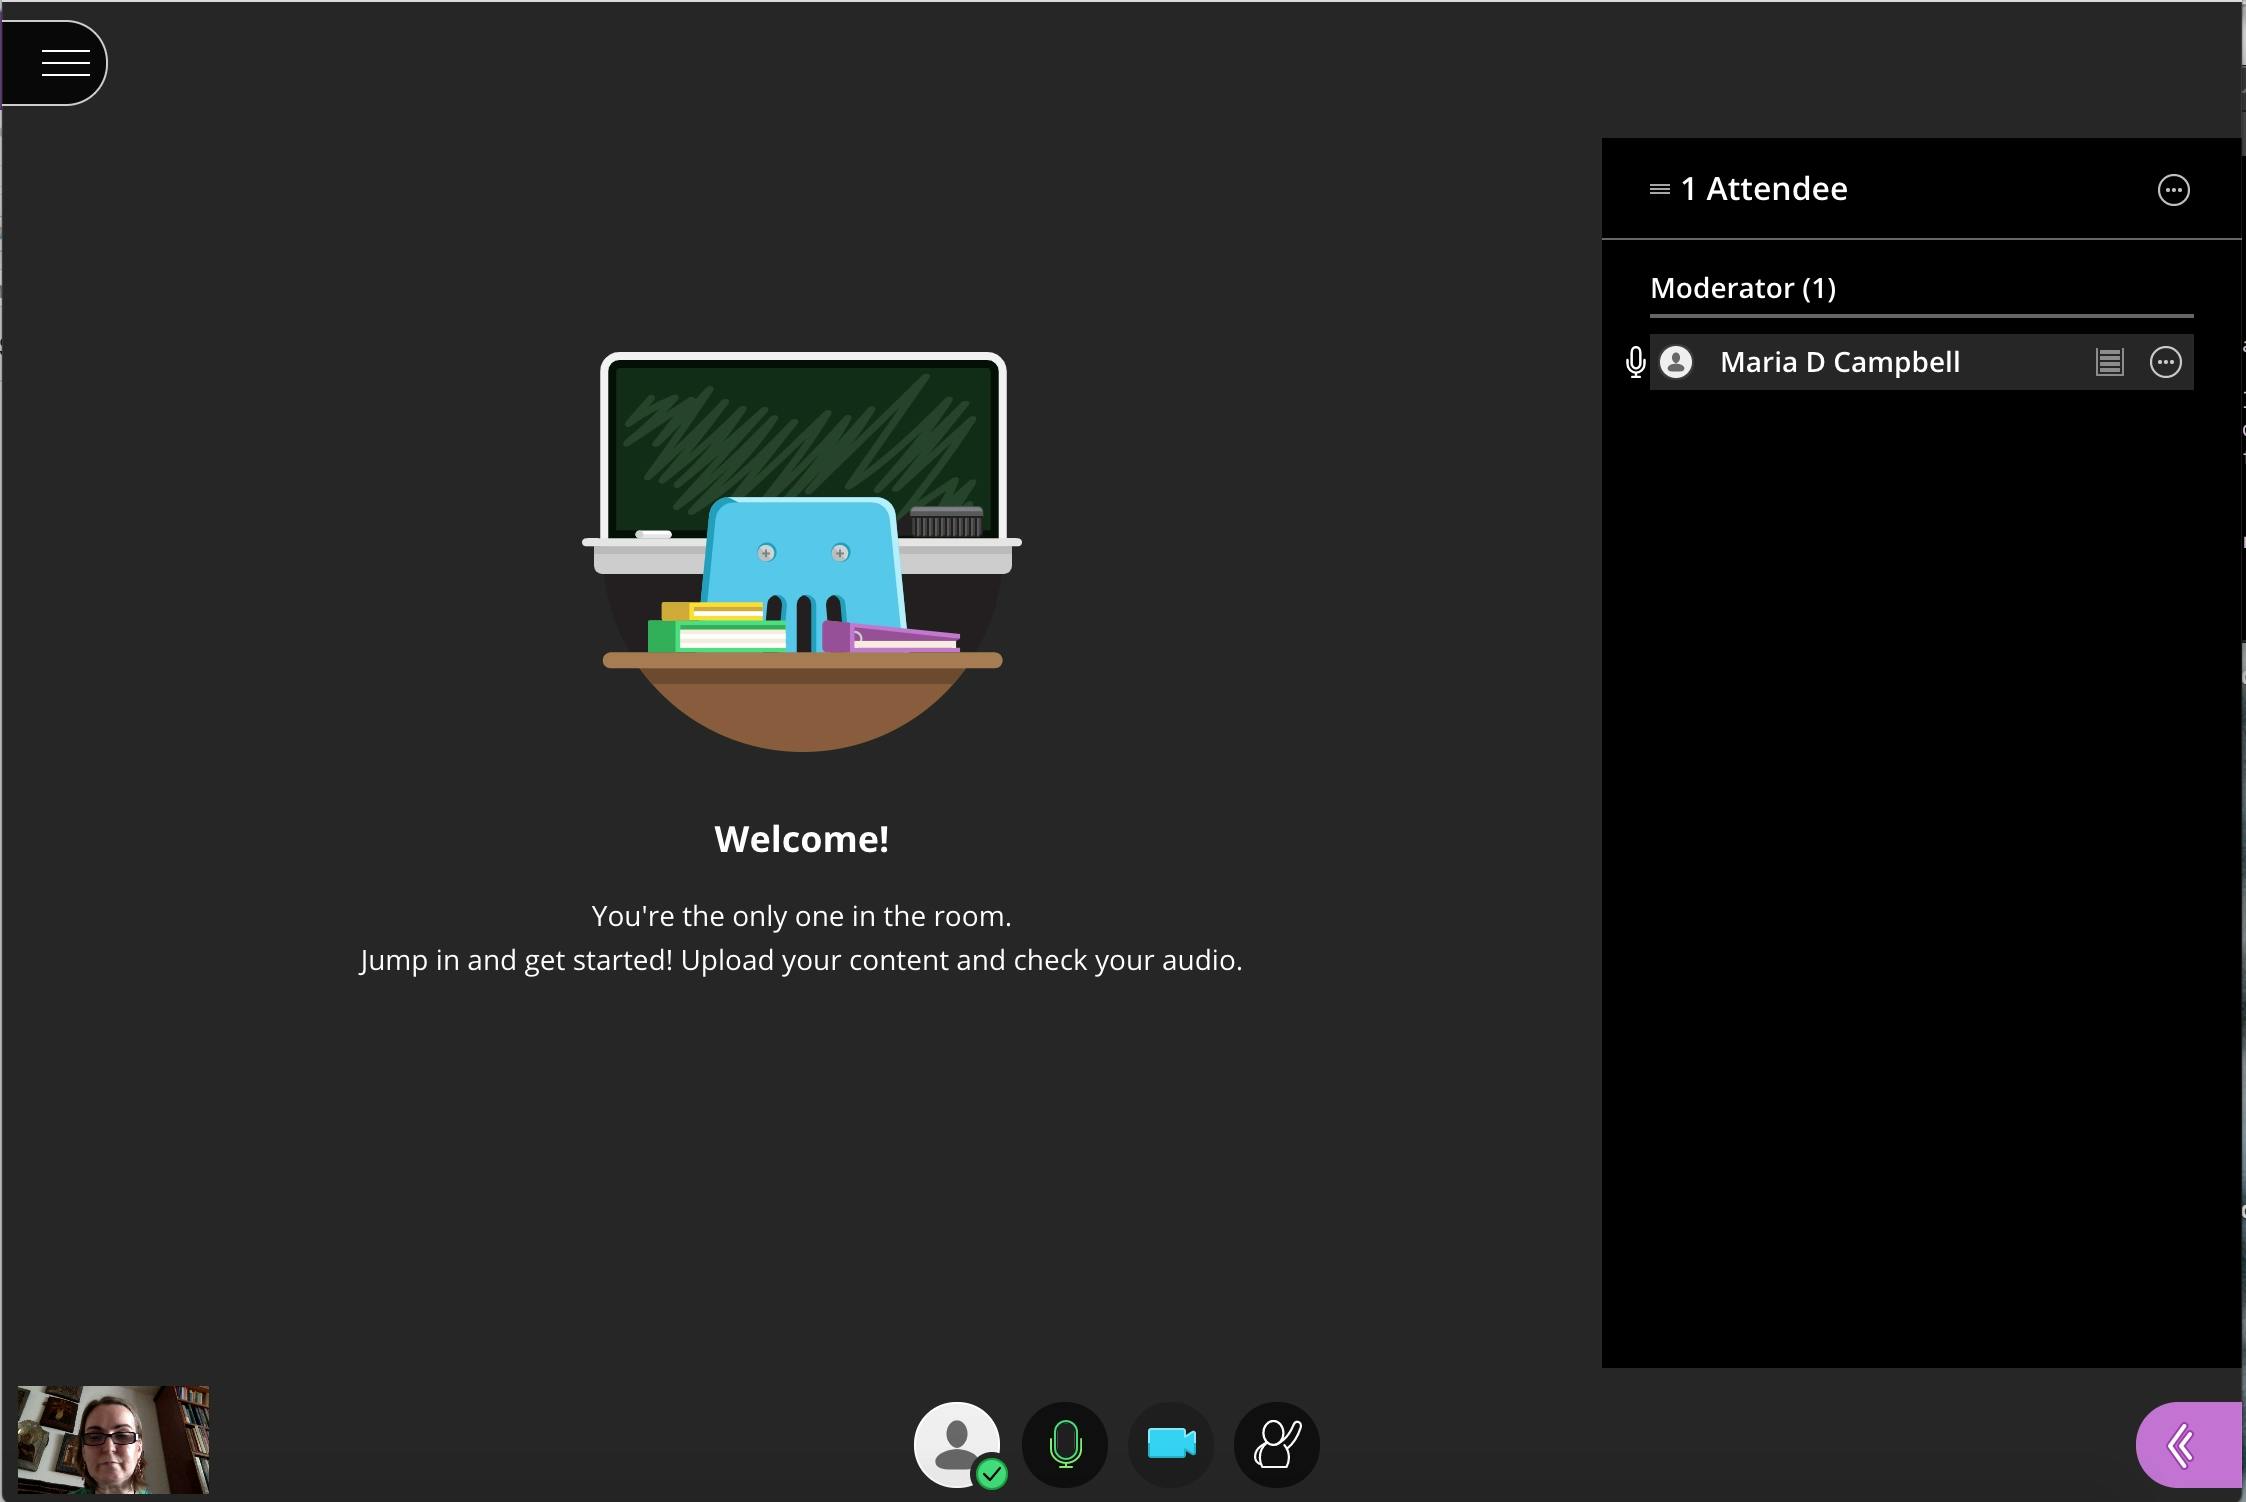
You will see there is a little window to the bottom left of the screenshot of me. That means that my video share was successful!
Next I click on the little pink double arrow tab to the bottom right of the screen. (see above).
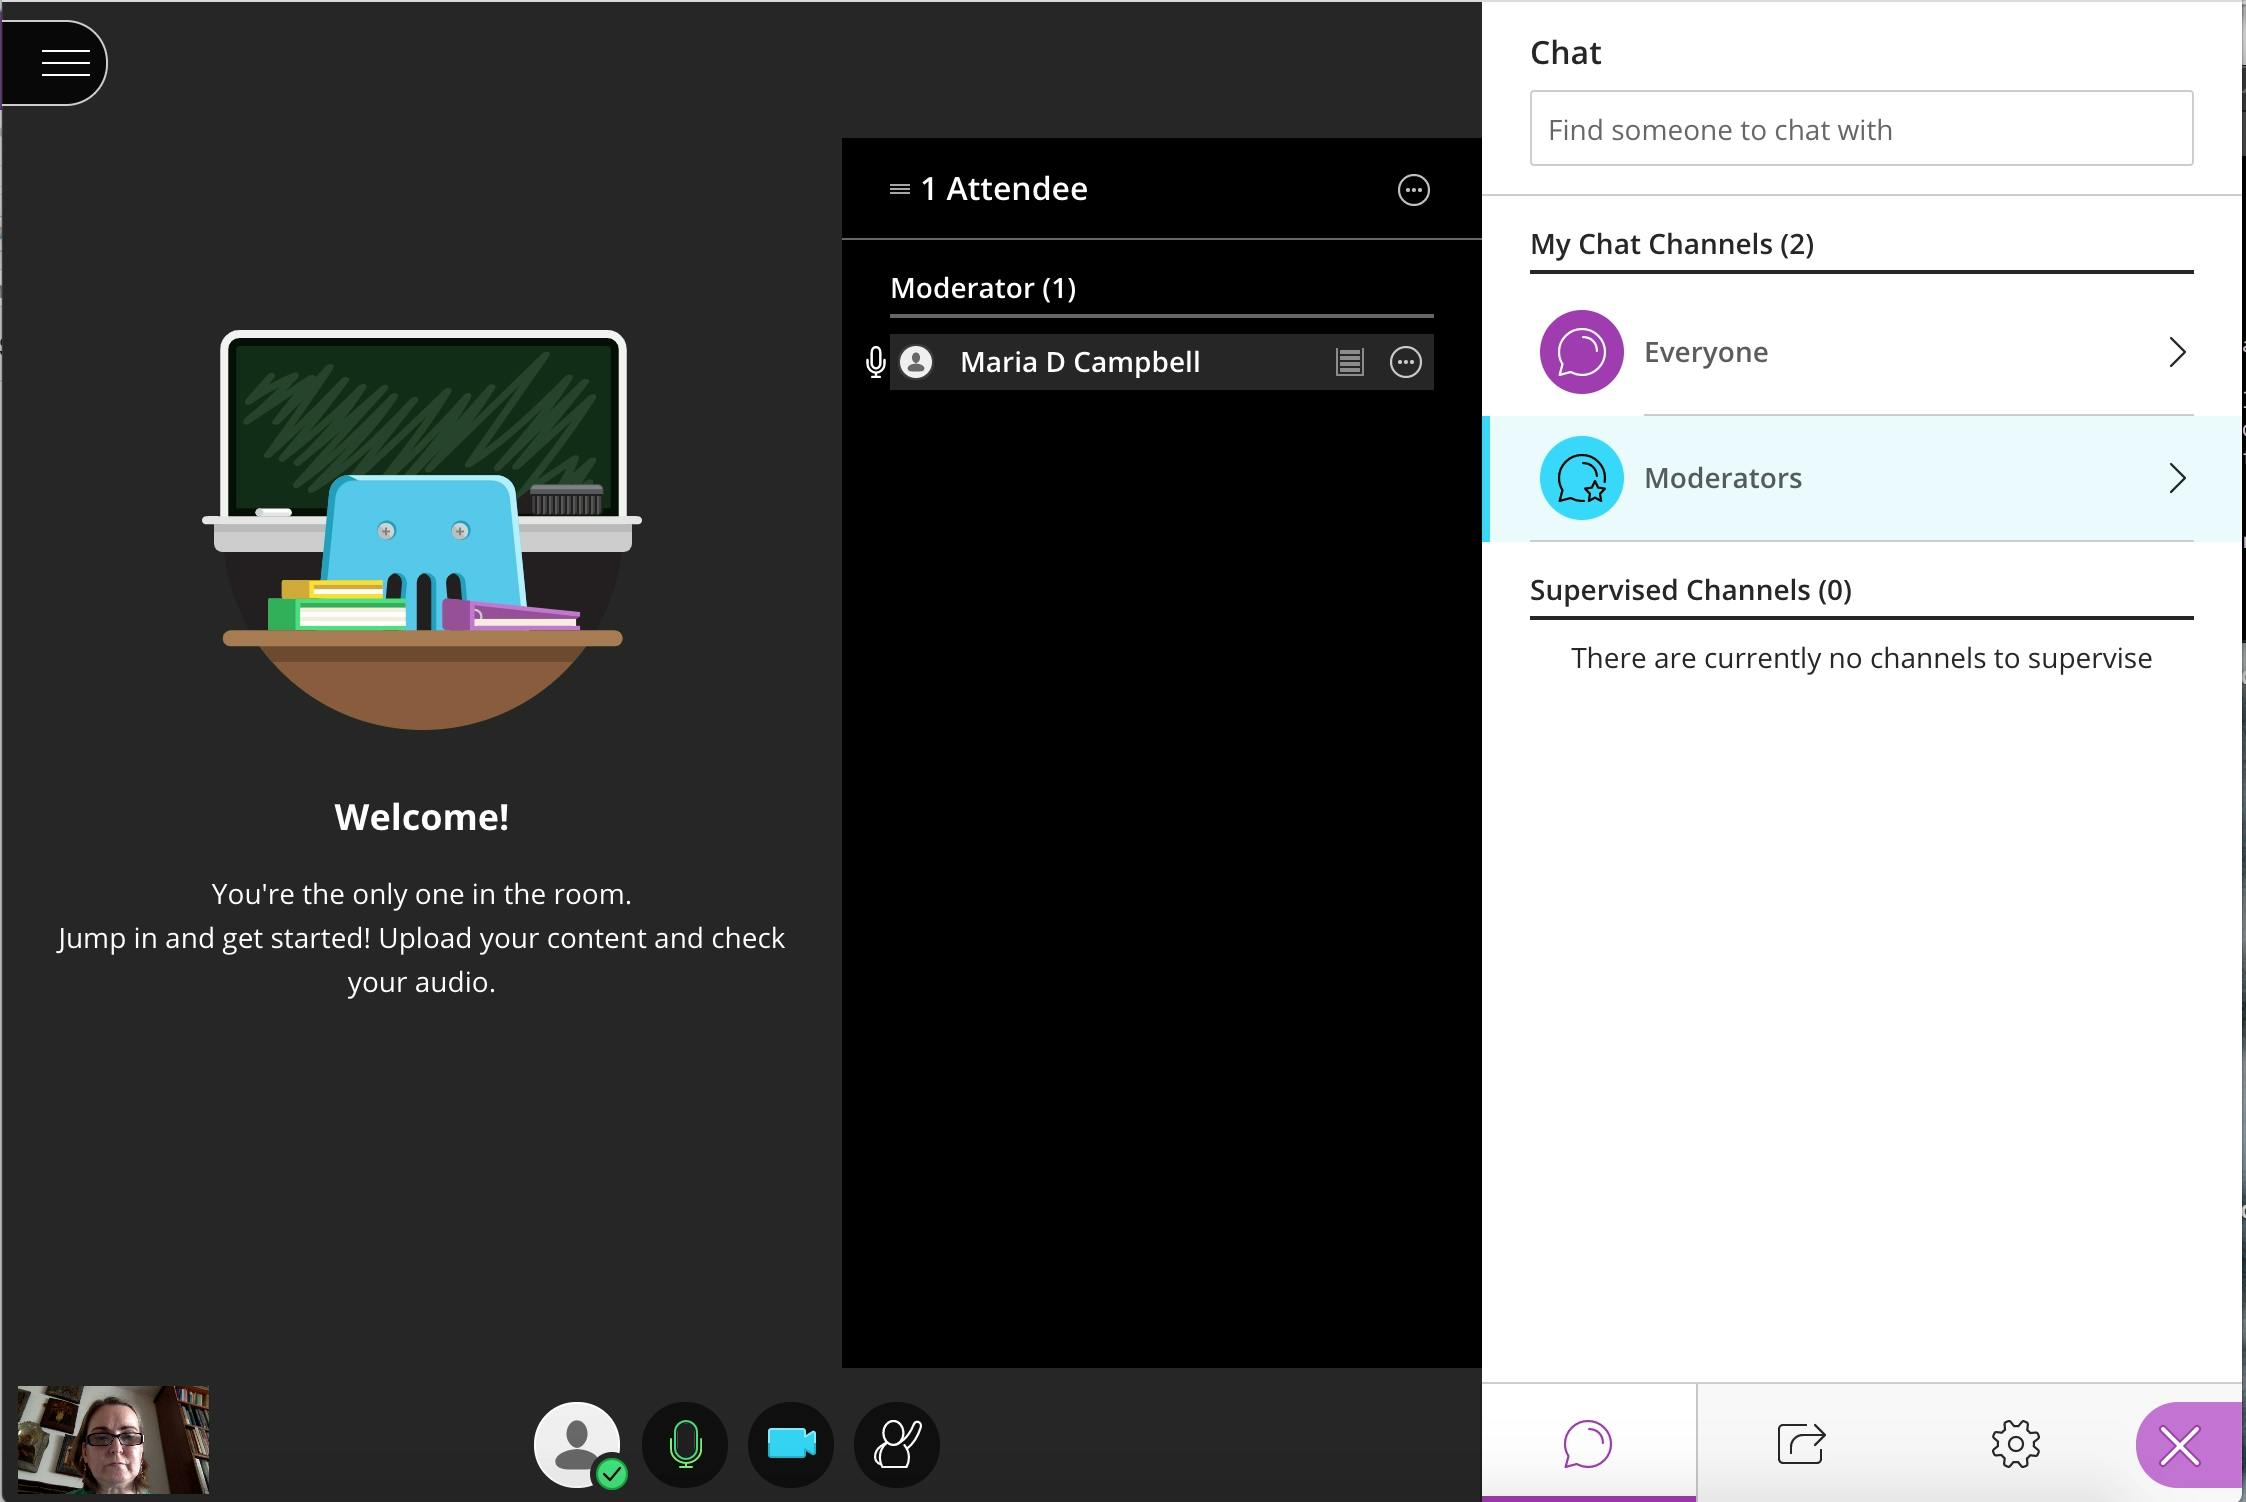
Now, at the bottom to the right are several icons. The first is a Chat icon, the second a Share Content icon, and the third is your Audio and Video Settings icon.
The default active icon is the Chat icon, as shown right above. Now I can click on moderators (since I am the moderator/professor of the class), and this is what appears:
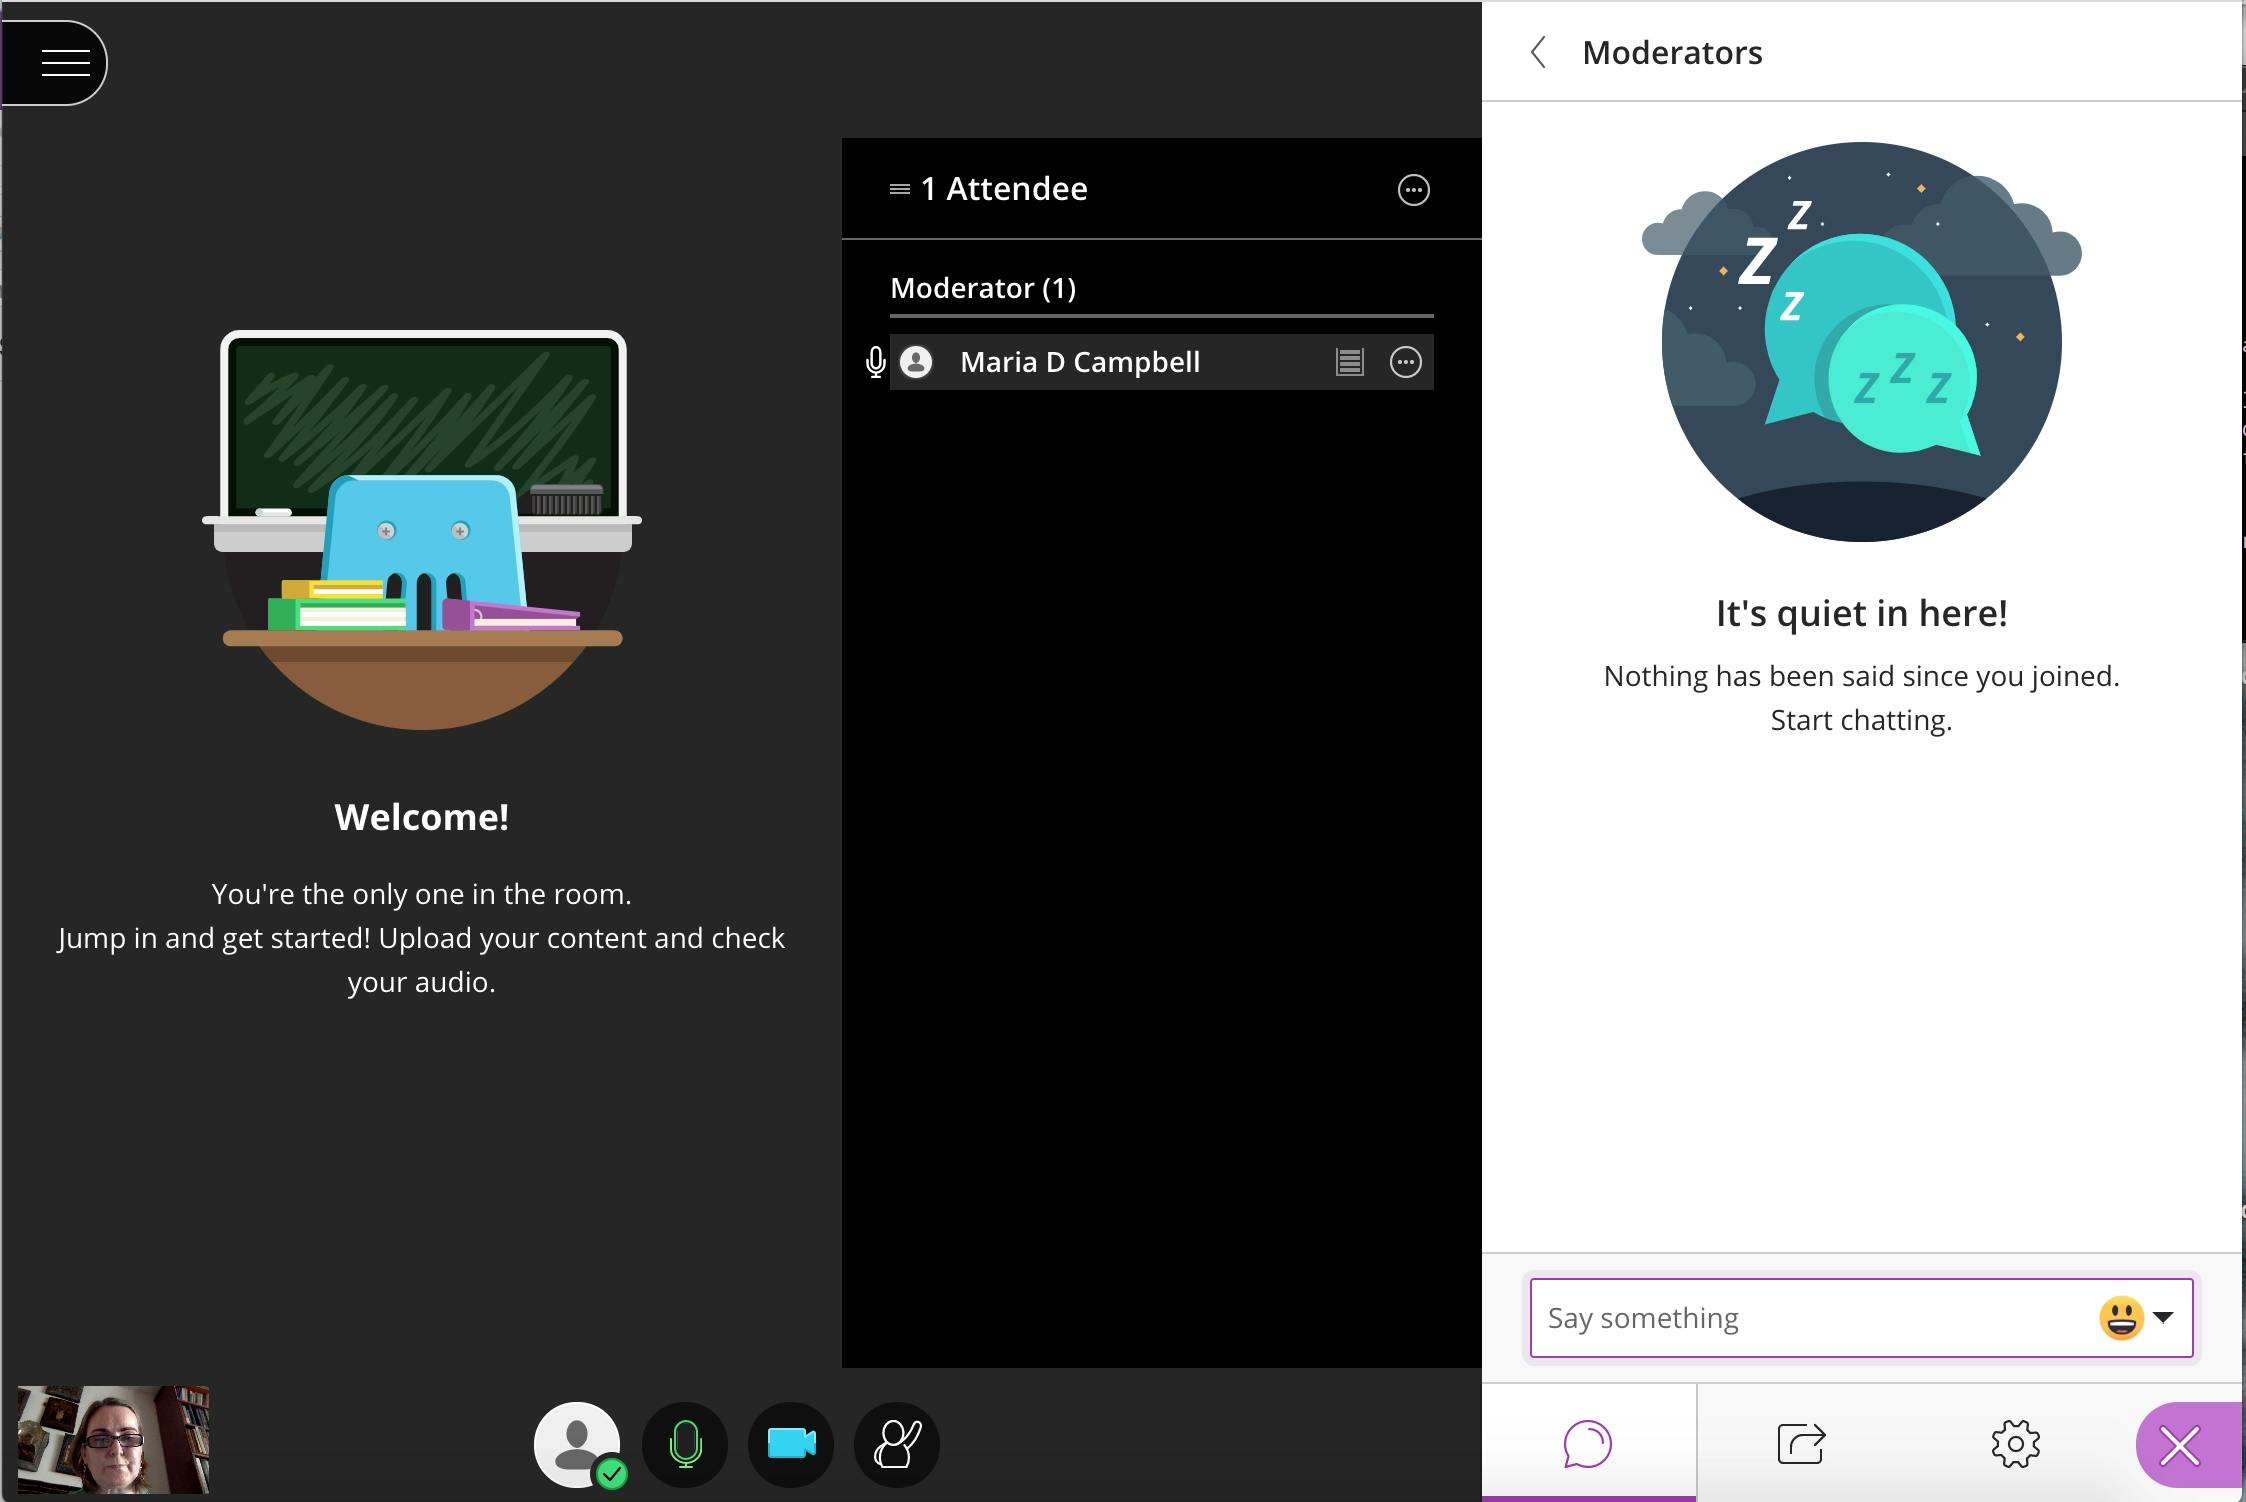
There is an input to the bottom right which has the placeholder "say something". There, I can just chat, or I can also share links from around the web. I choose to share links from around the web, and especially related to the topic(s) of the lecture. First, I may want to link to the slide deck related to my lecture. I will do that now.
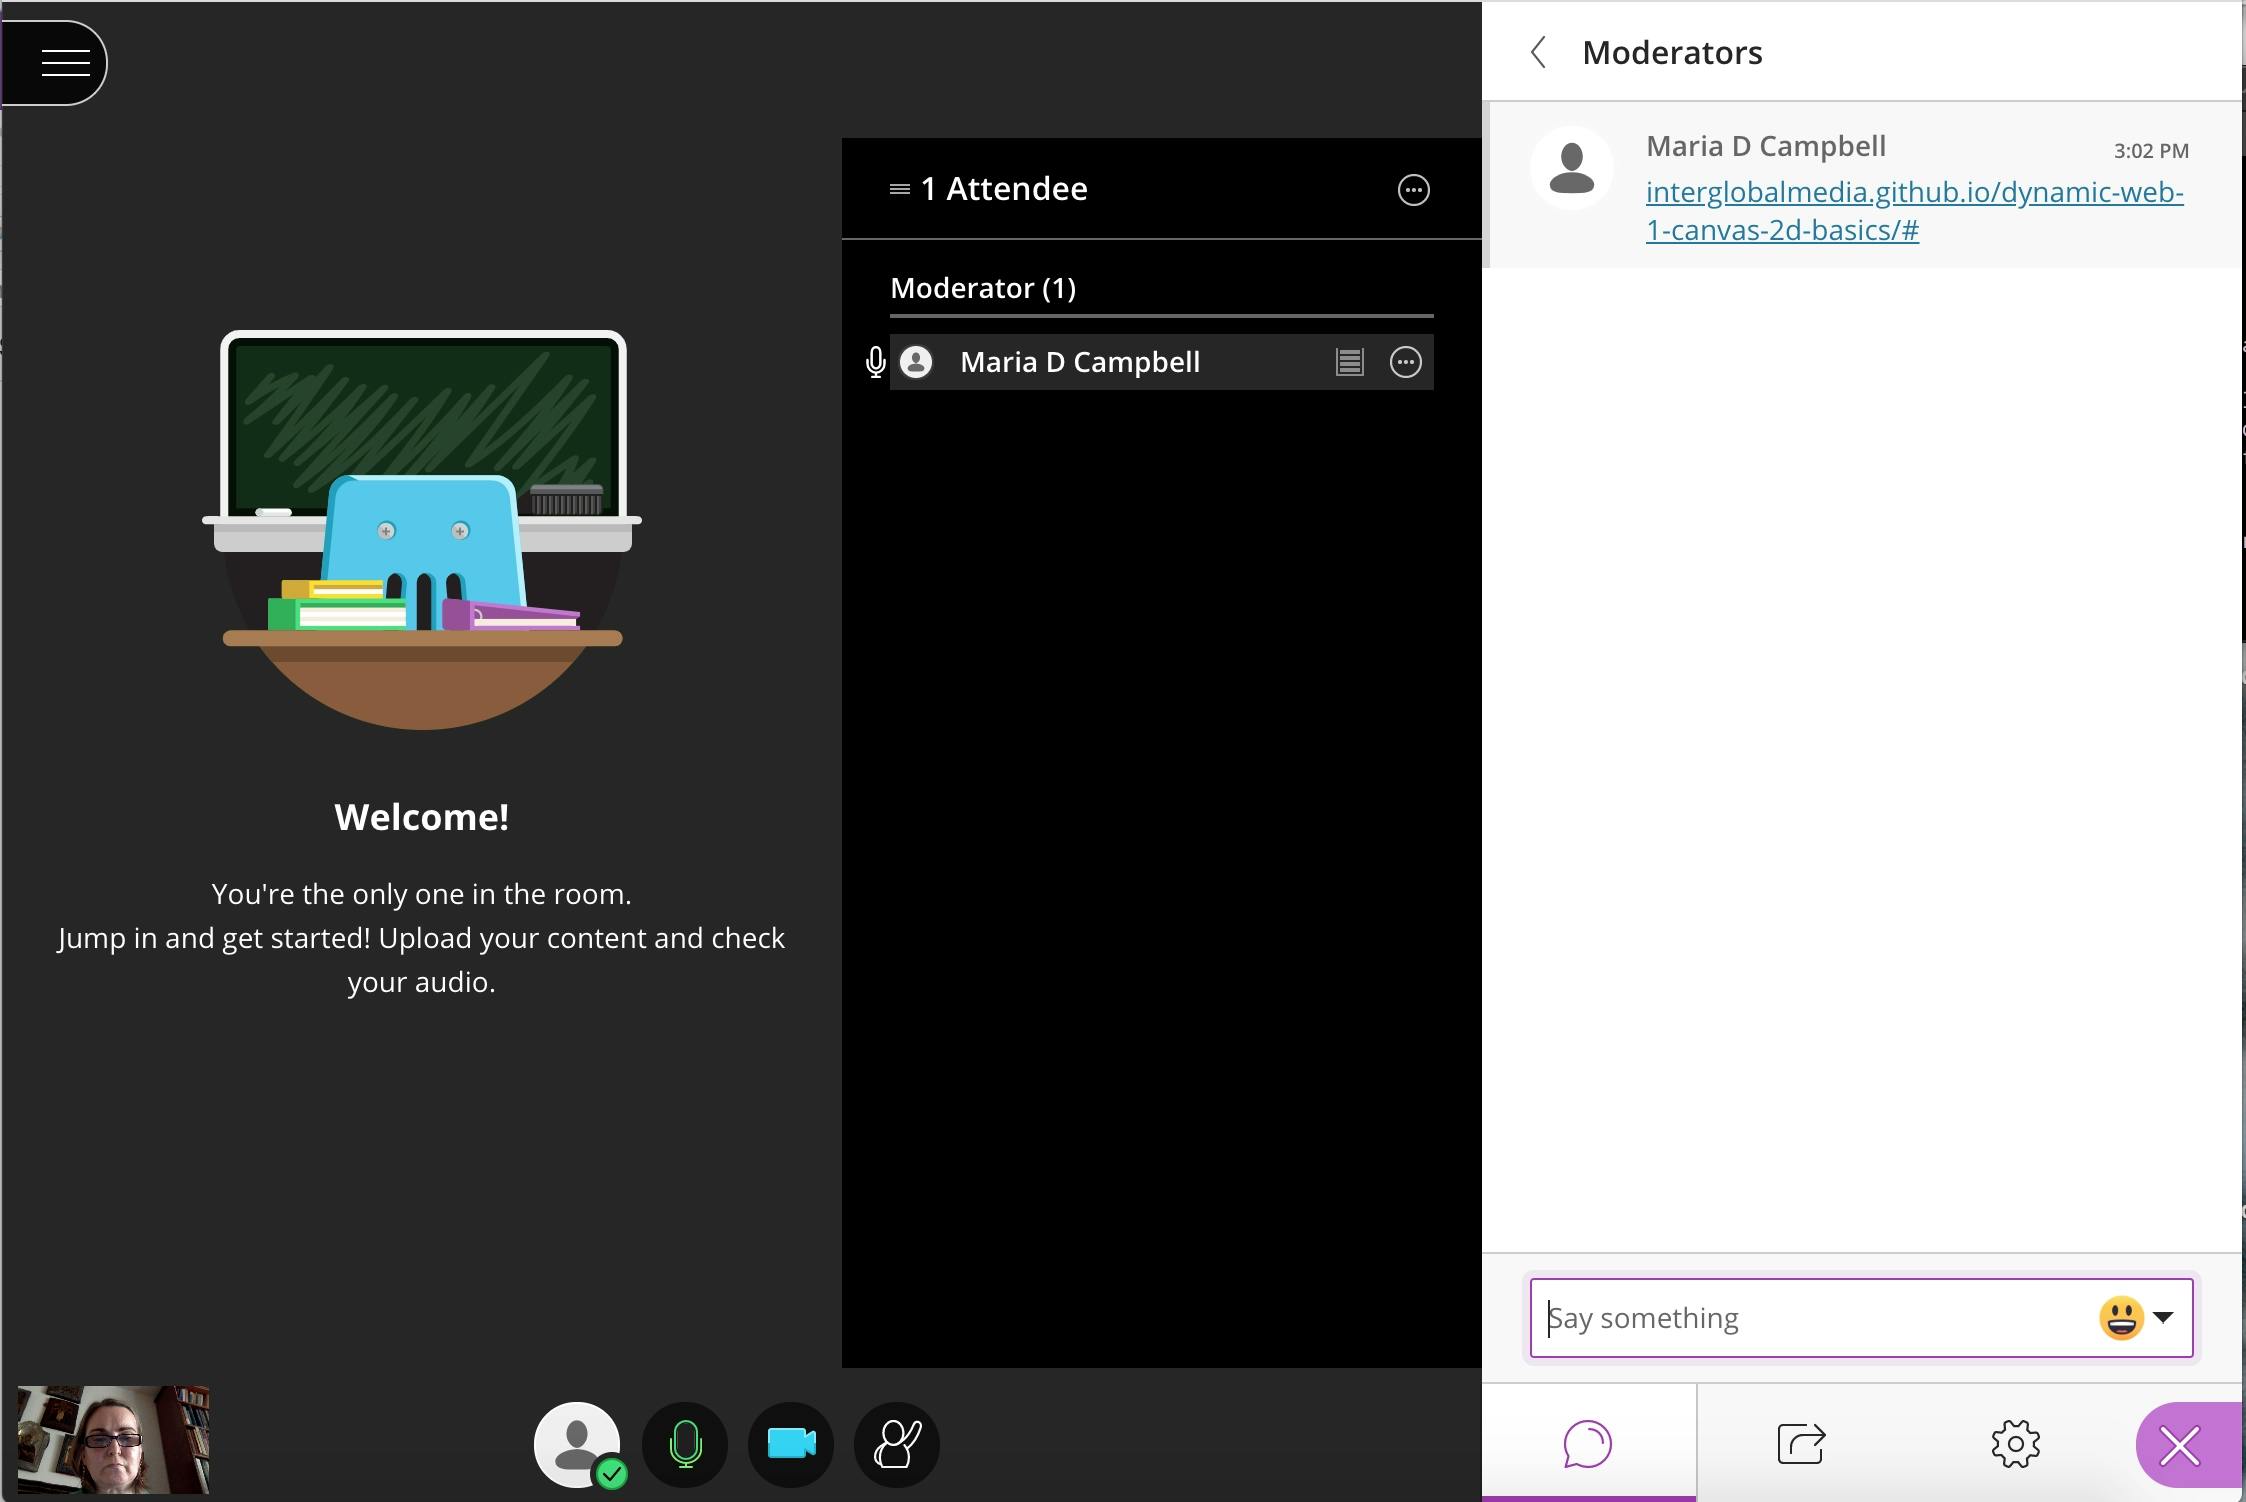
As you can see (above), I have just shared a link in the Moderators chat area. Now, if I click on that link to my slide deck hosted on Github gh-pages, I will be taken there, and my students will also see the contents of the slide deck. Now I can start my lecture.
If I want to share any other content, I can share more links. This way, they also have reference to the links later when they download the session. That's why chat is good as well. There is written reference and possibly links to content to refer back to later.
Next I can click on the Share icon. I could have done this earlier. In fact, right at the beginning, if it had been appropriate.
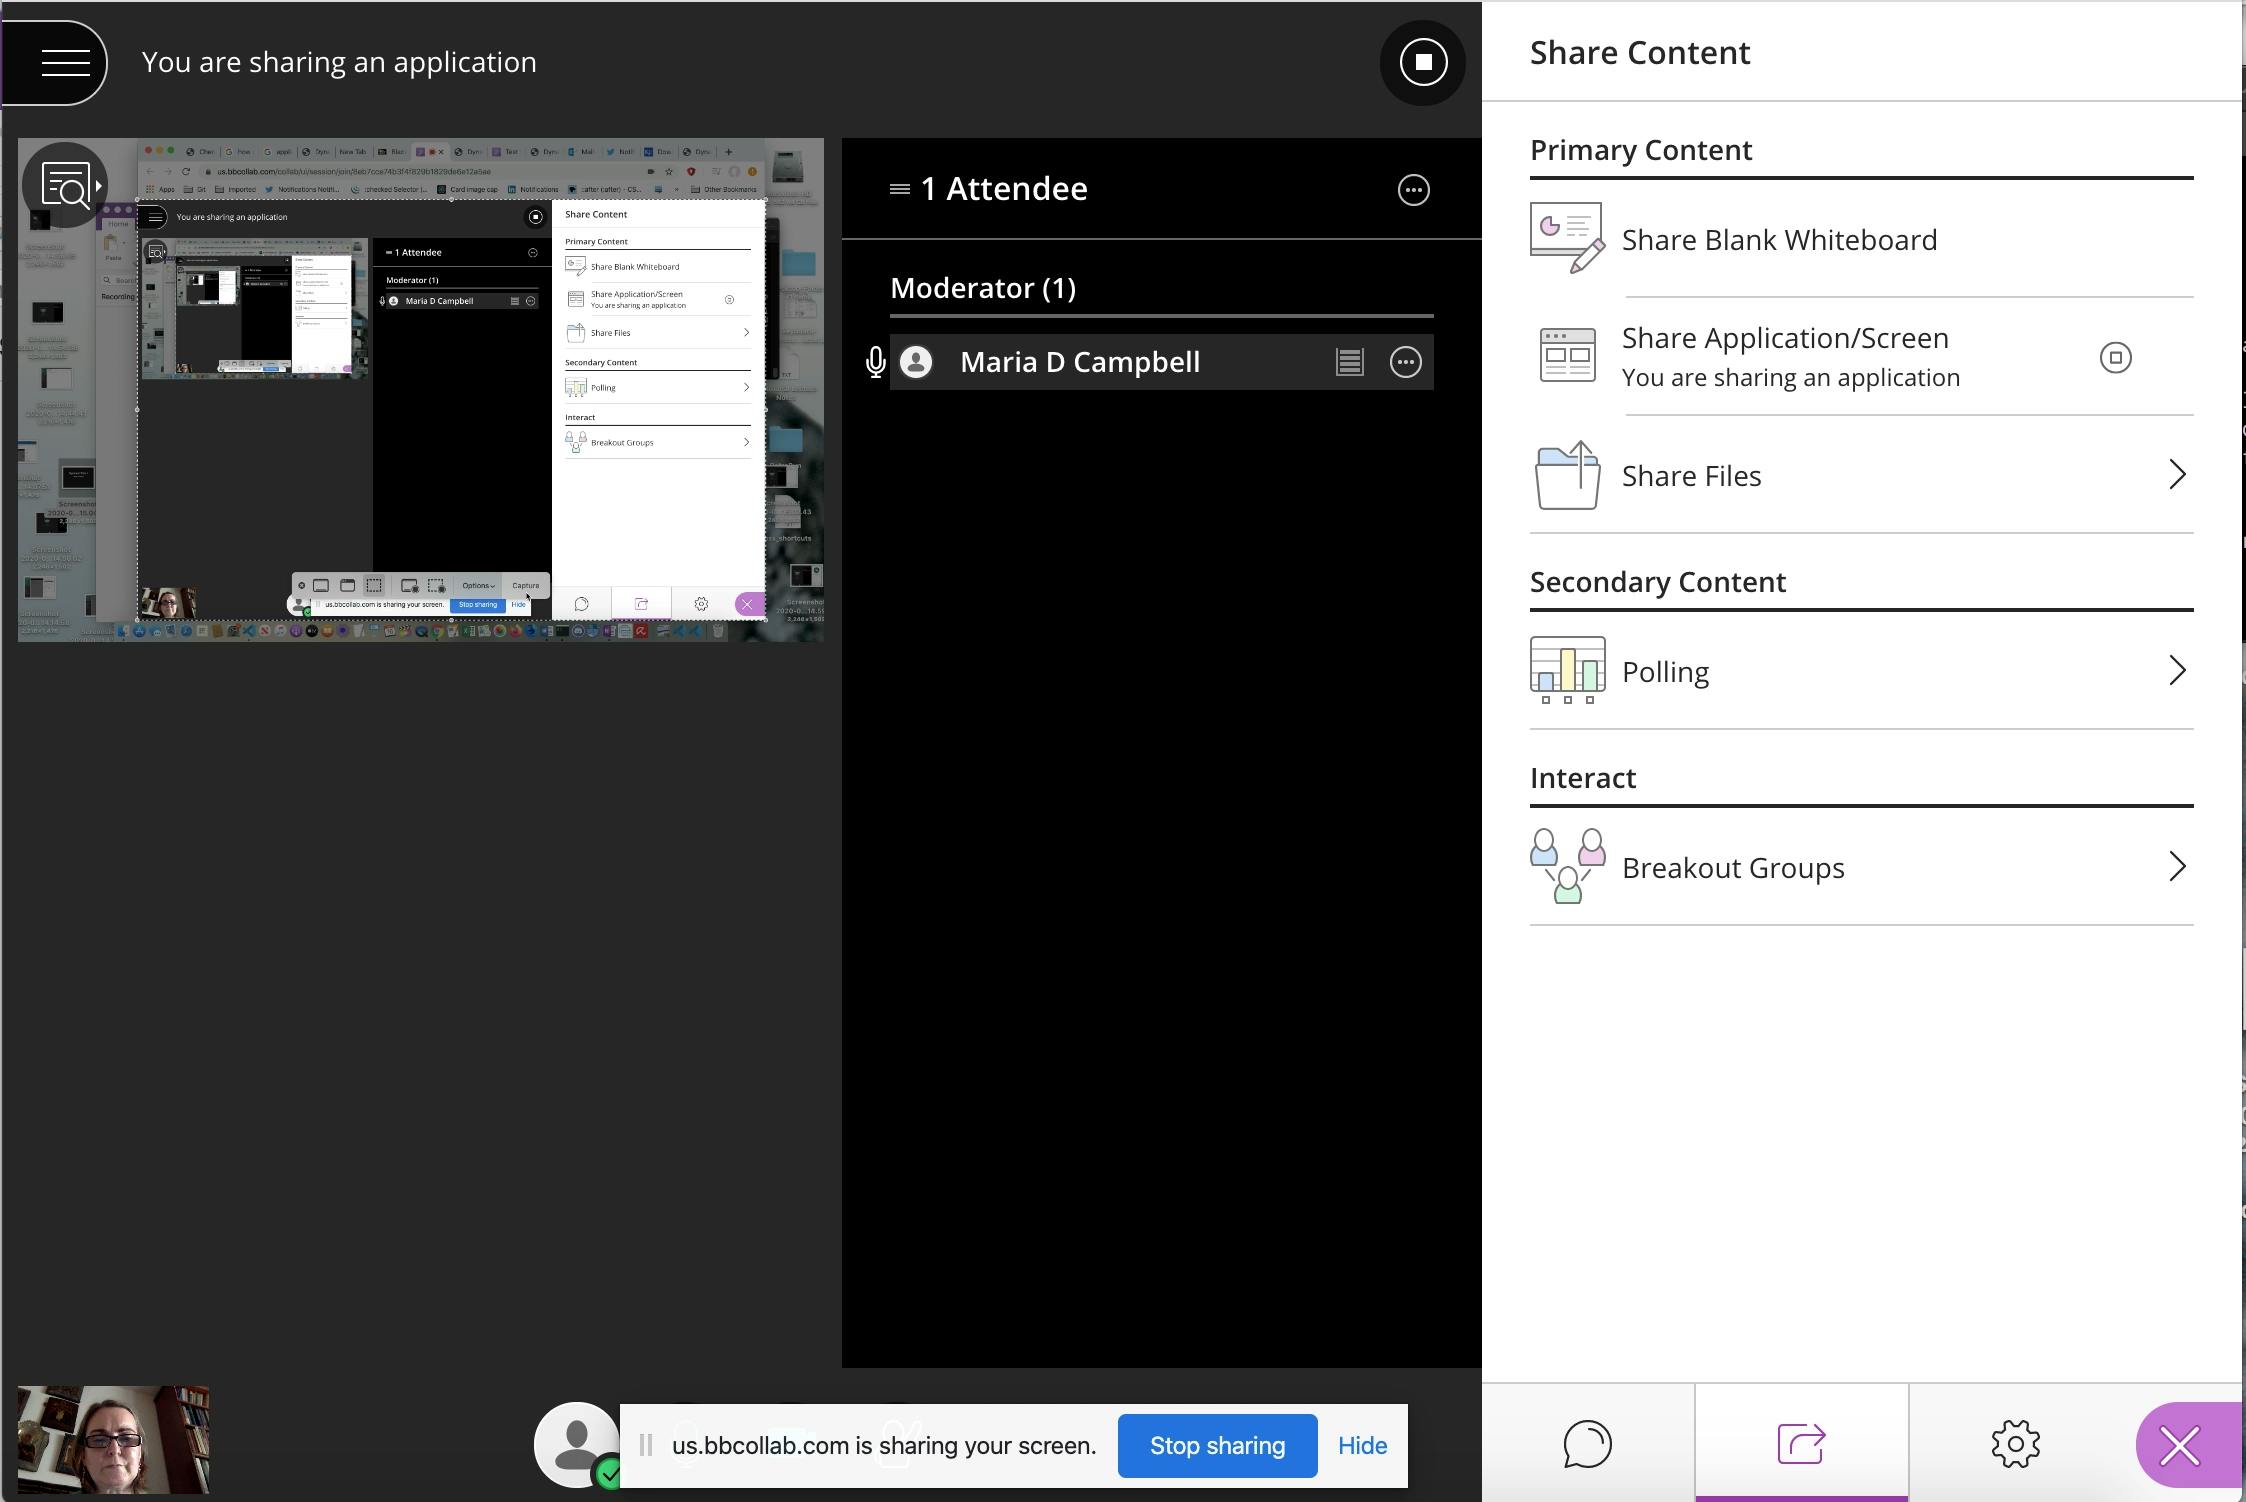
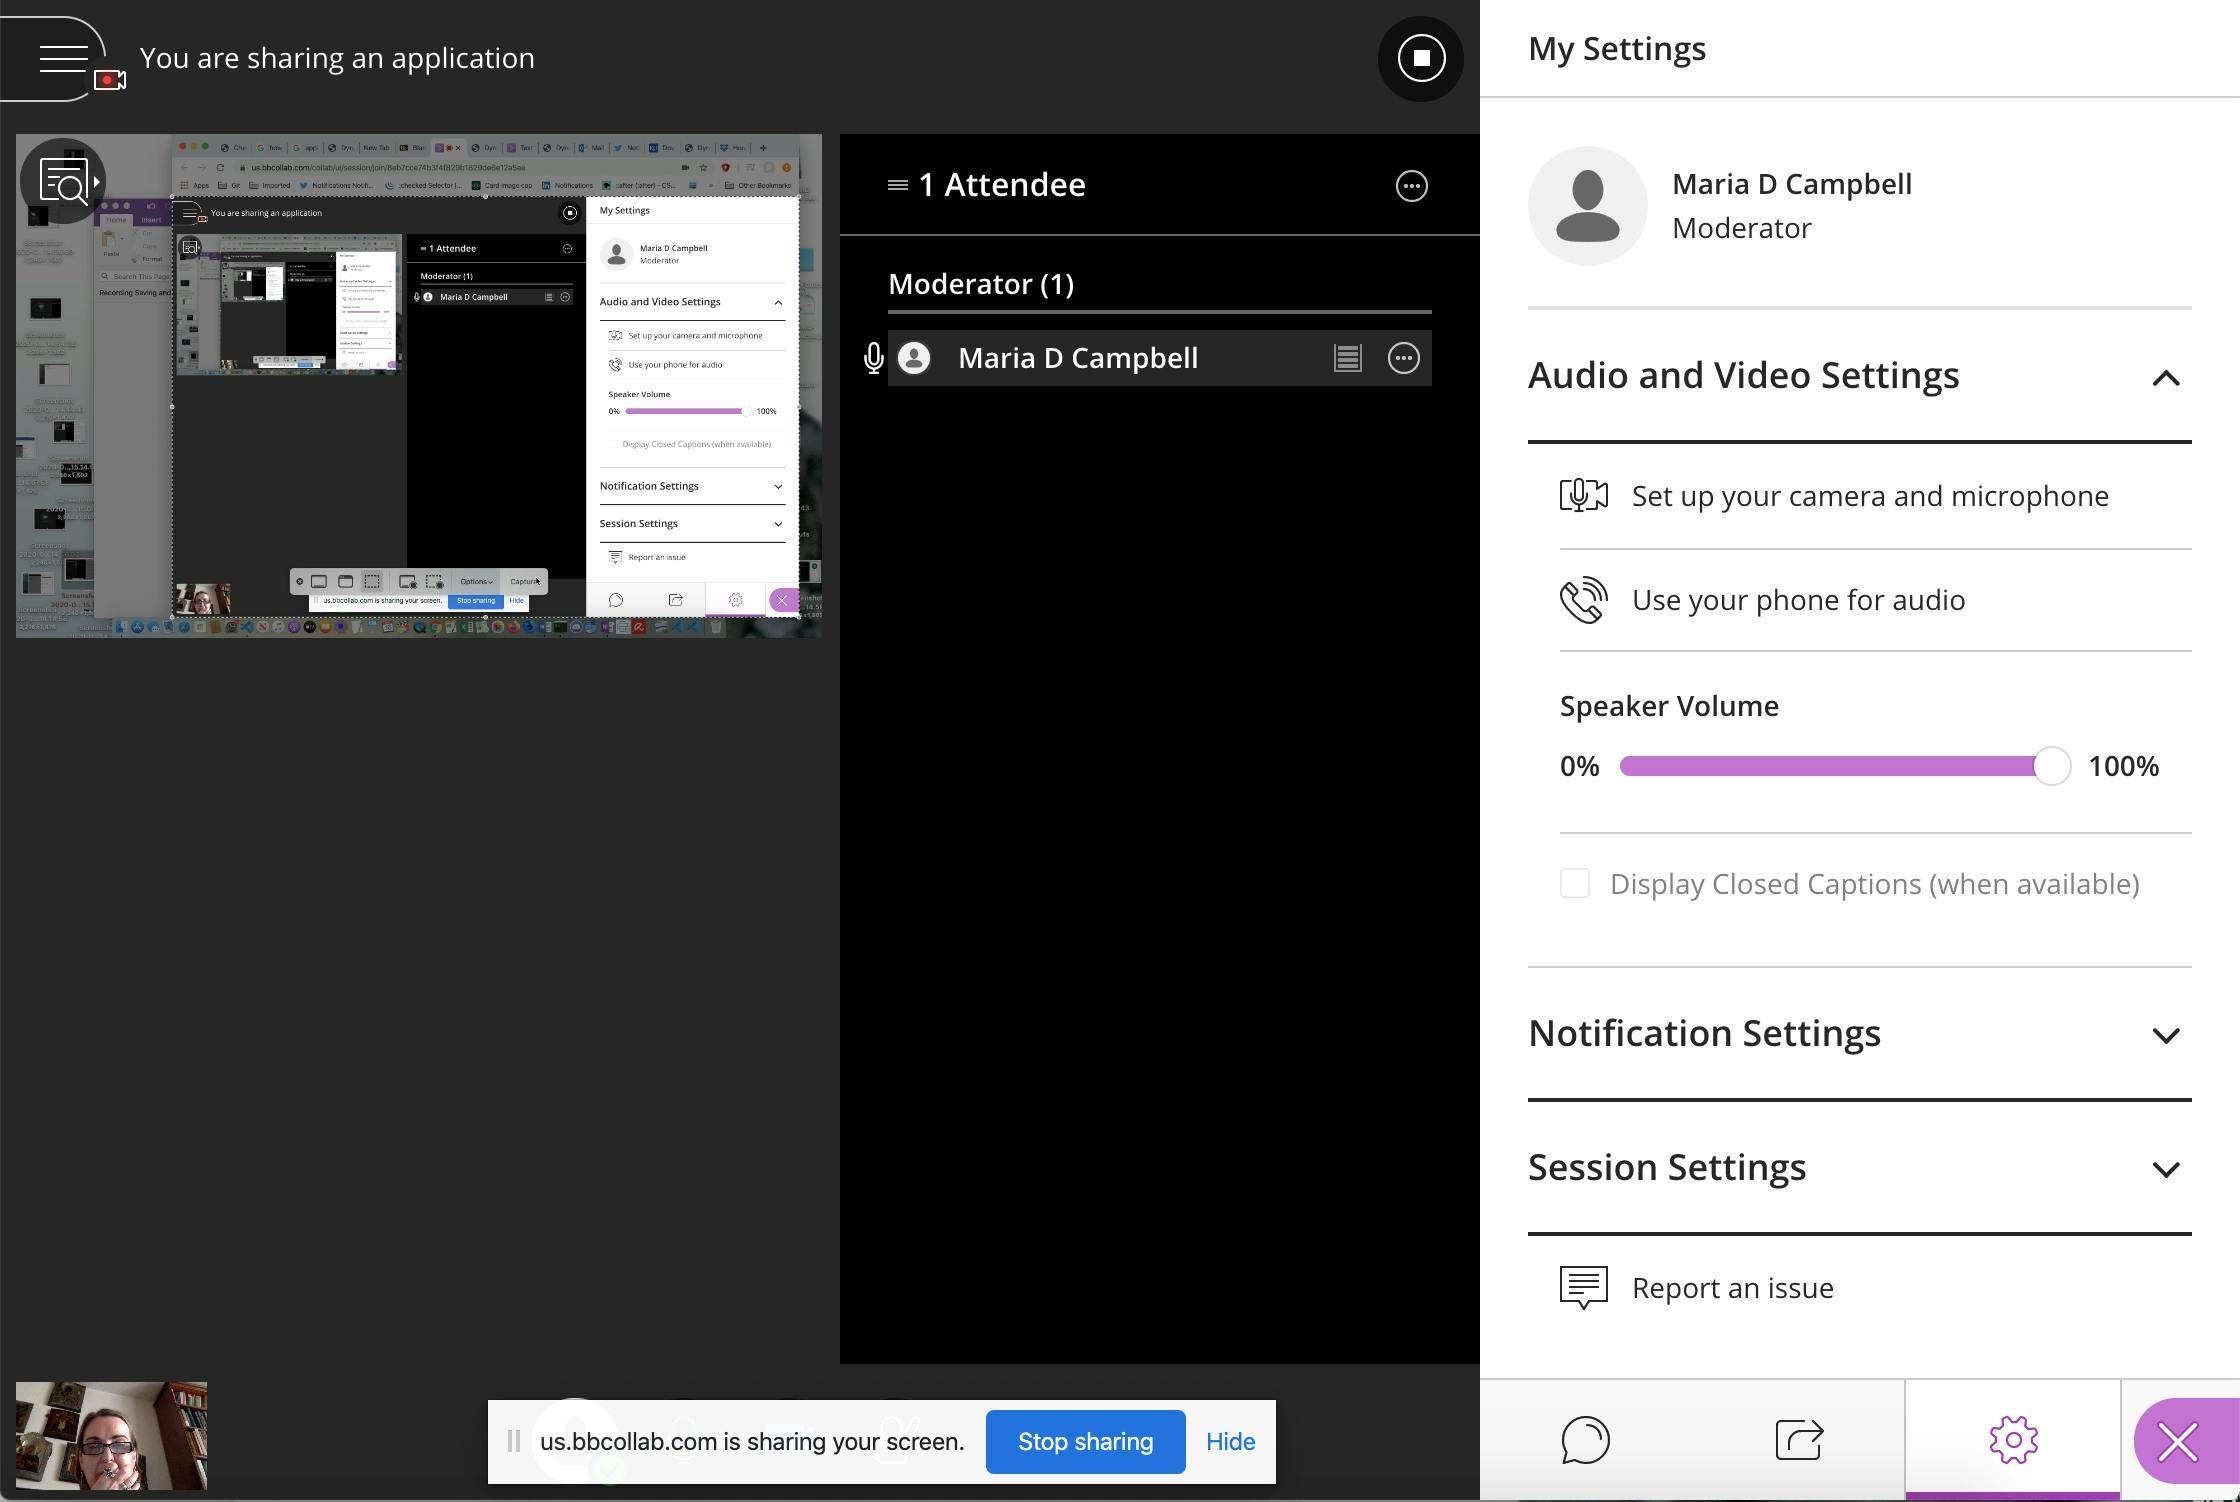
You see the "Share Application/Screen" and then below that, "You are sharing an application". Before the second line appears, there is a "Share Application/Screen" button you have to click if you want to share your screen with your session participants. Once the button has been clicked, and the screen looks something like the above, you are good to go! It really does not matter if you have shared the screen at this point, because that part is only necessary when you want people to see what is on your screen. Perhaps you were not even ready until this point. I know that I was not!
The Audio and Video Settings looks something like this:

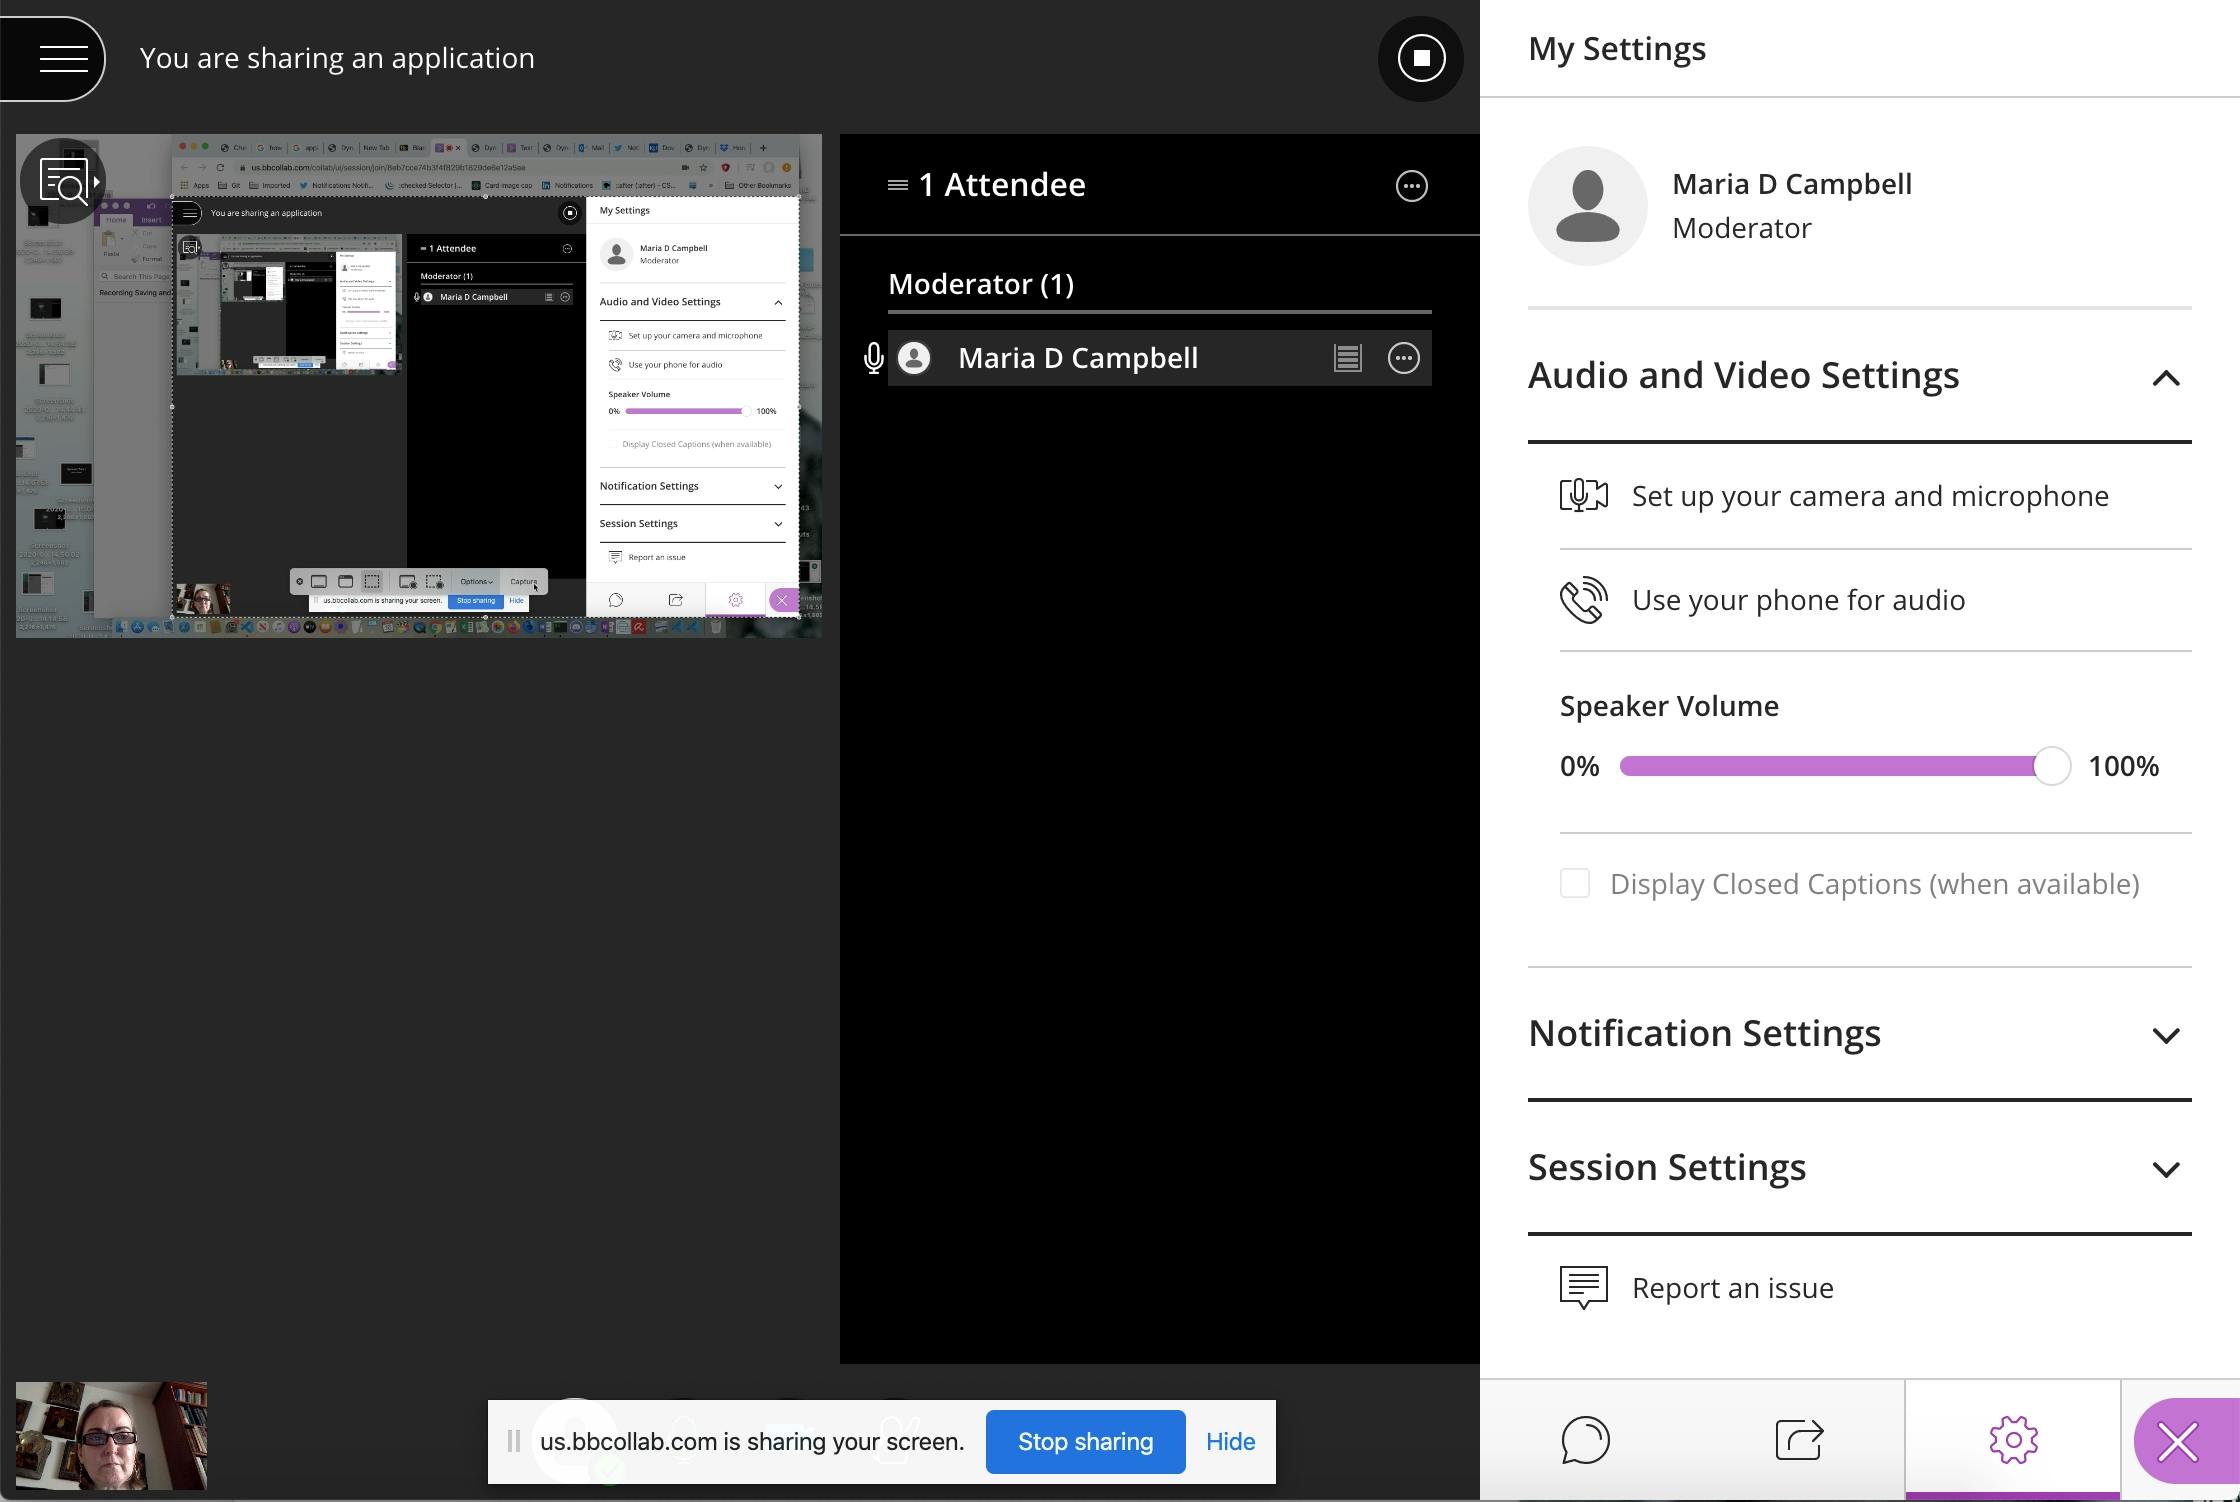
At this point, the main thing I would want to adjust is the Speaker volume. It seems that mine is on max here. However, if I want it to be louder, I could make the volume on my computer louder!
Now I will say something so that I can see how my audio is doing. And then after that, I will end the session.
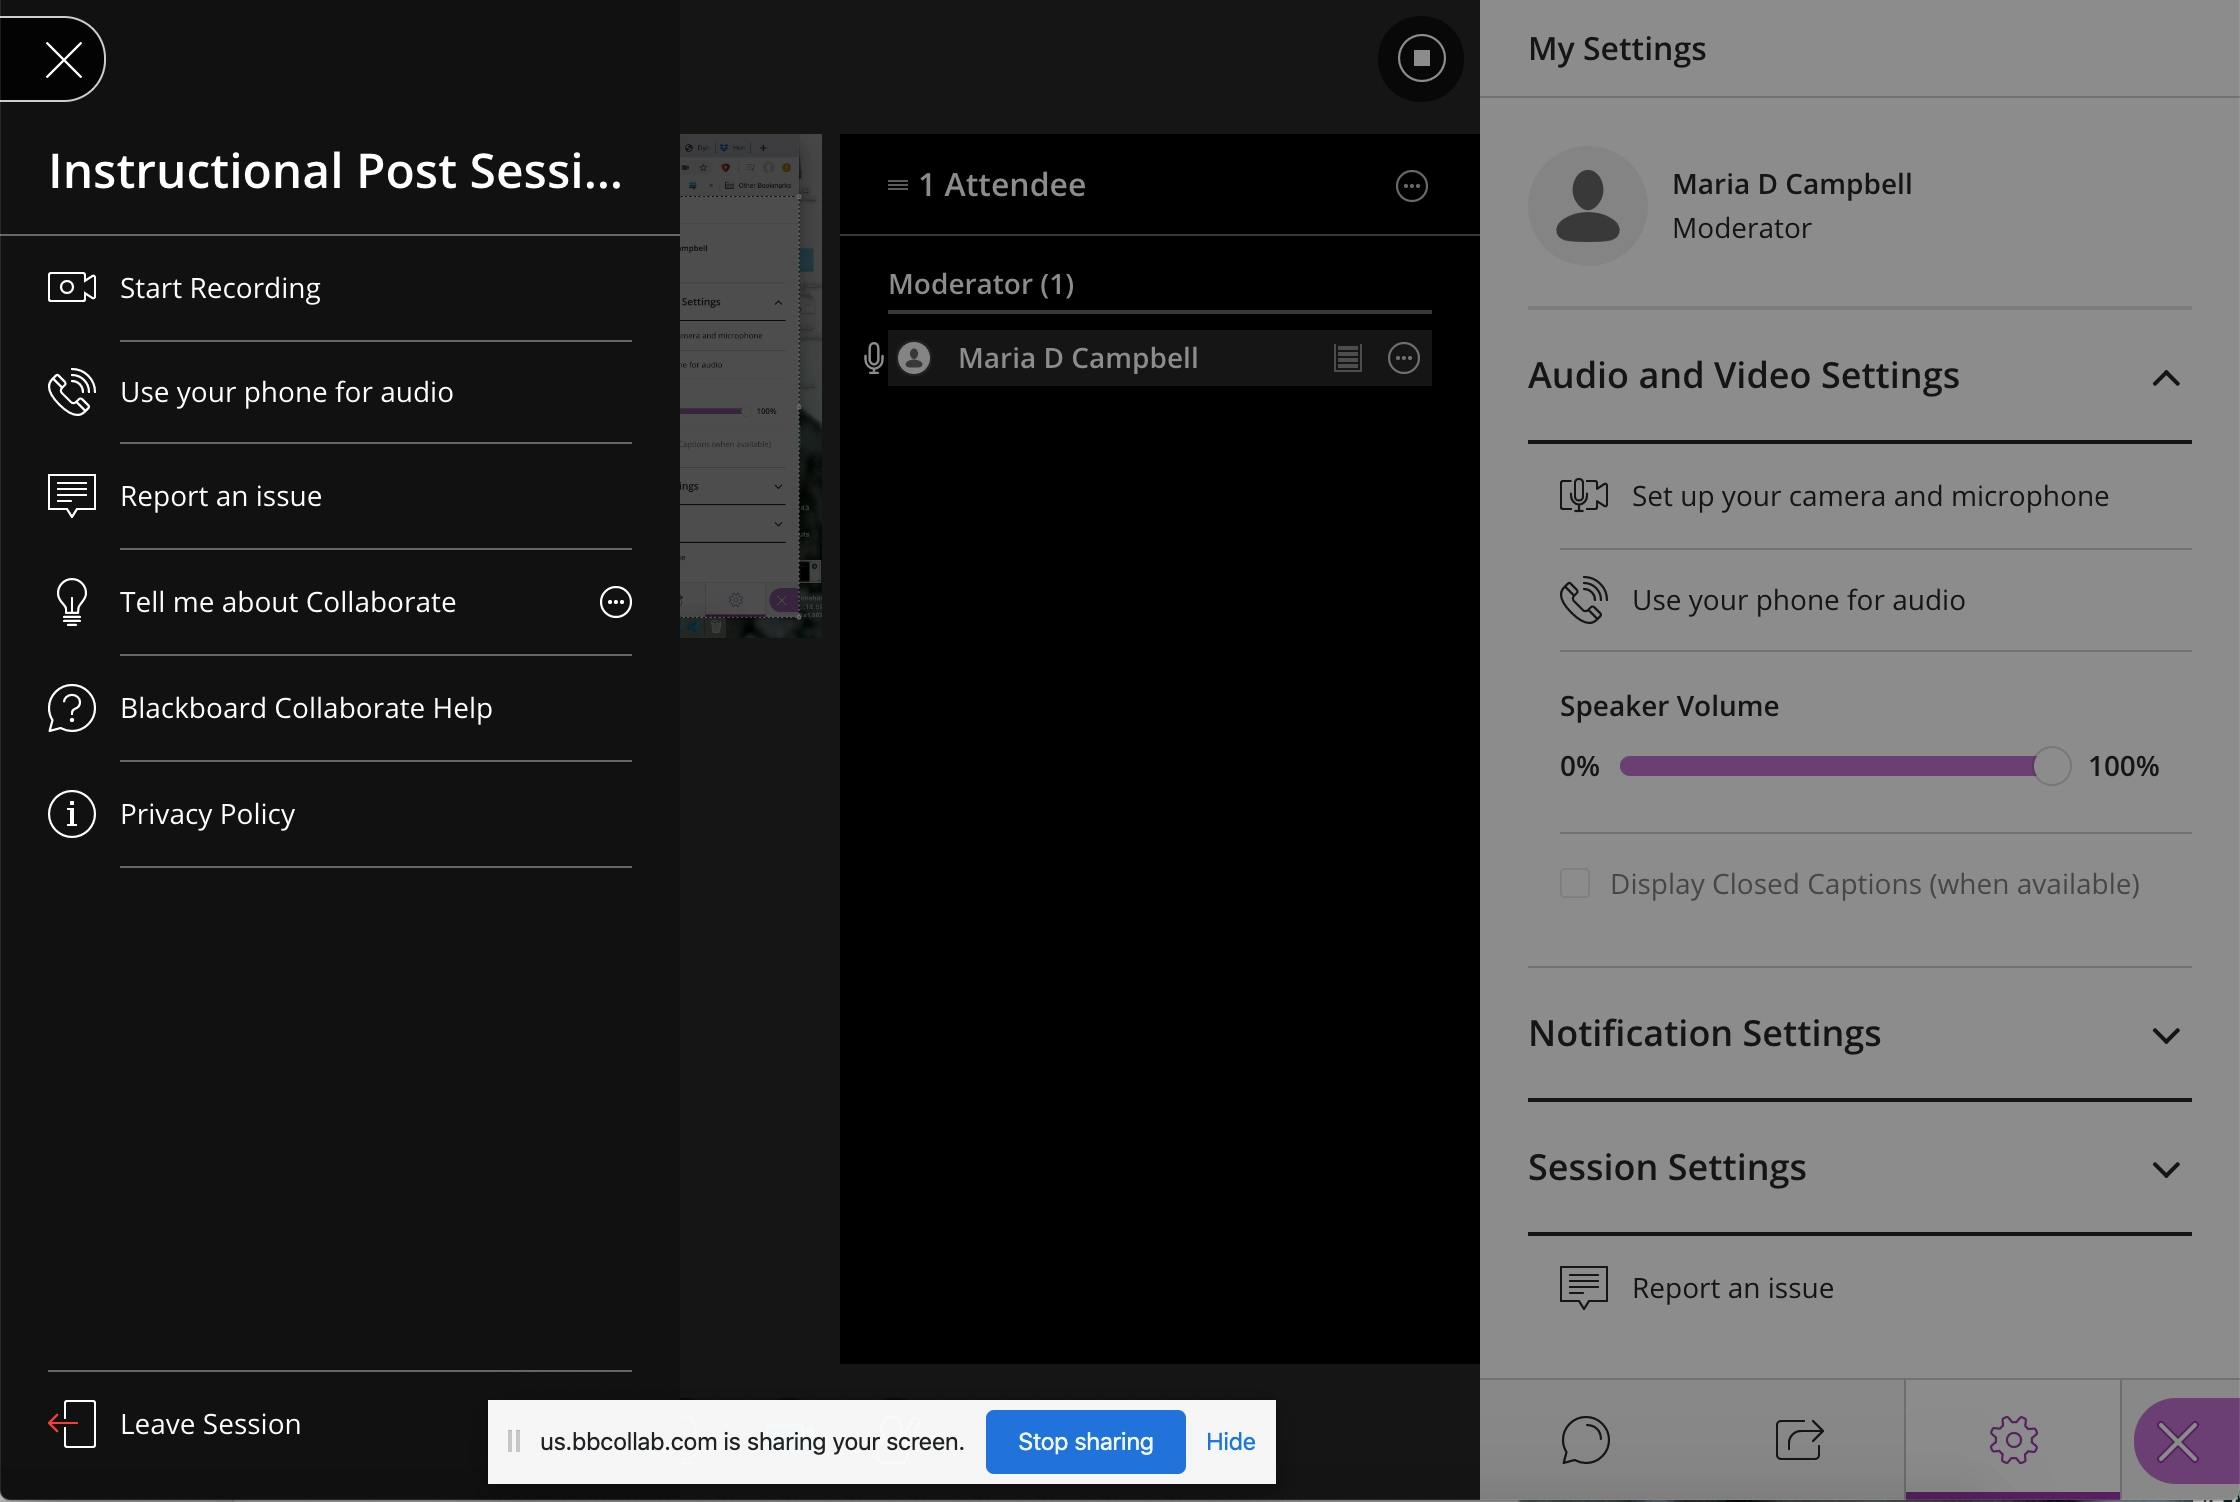
So what I did is click on a hamburger icon (shown in the screenshot prior to this one), and this is what appeared in the responsive menu after clicking on the hamburger icon (screenshot right above). So what are the options there?
First it says Start recording. Well, I didn't do that previously either. So now I can click on "Start recording". All I had set up before, was sharing video. My participants can hear me. I can hear them. But we are not recording our session yet. By clicking on "Record Session", and making sure that screen share is enabled, video share is enabled, and audio is enabled, we are ready to start recording our session.
In the screenshot right below here, you will see a small video camera icon in the upper left corner of the screenshot with a little red dot in its center. That indicates that a recording of the session is taking place.
I don't need to make a long recording of this instructional test of Blackboard Collaborate Ultra. I want to end the session and subsequently leave it now.
First I click on the hamburger icon again. Then I click on "Stop Recording". Now my screen looks something like this:
As you can see, in the top left corner, there no longer is a little video camera icon.
Now I want to leave the session. I click on the hamburger icon again. At the bottom left of the screen is a button called "Leave Session". I click on that to leave the session! And this is what I am taken to as a result:
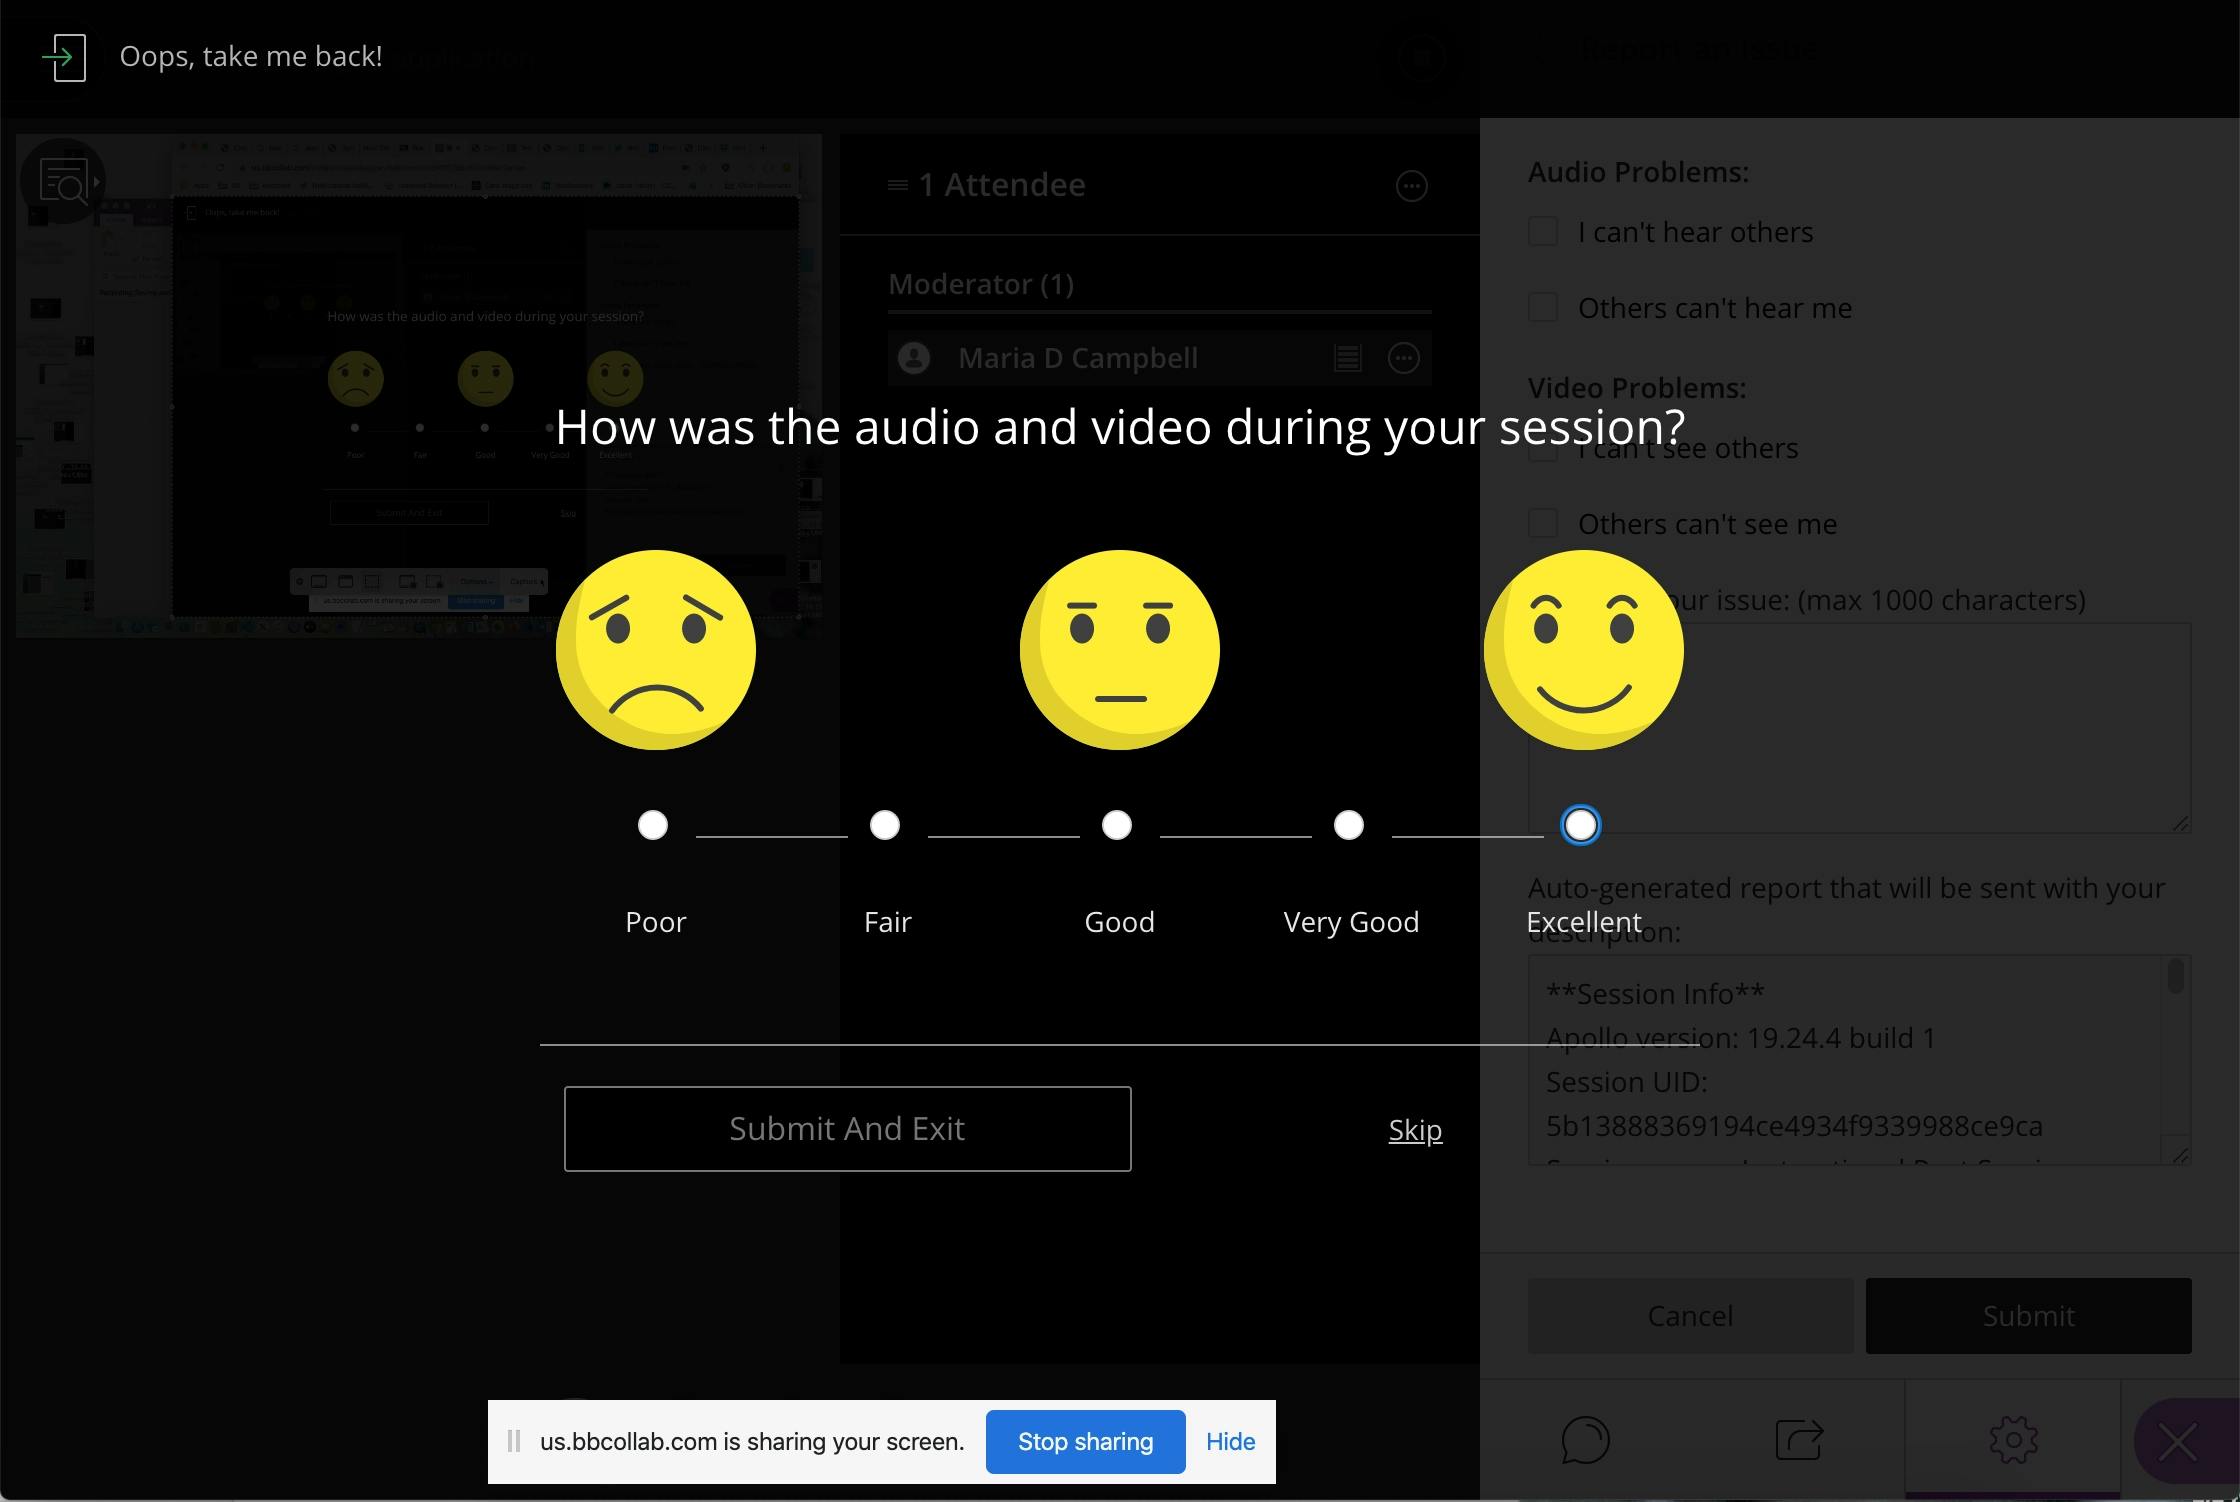
I was very satisfied with the session, and I select "Excellent" and then click the "Submit and Exit" button.
After I click the "Submit and Exit" button, I am taken to the following:

This confirms that I have left my session!
But now I want to be able to download my session! I go back into the Blackboard Collaborate Ultra tool for my course. I have kept that window open the whole time so that I can easily get back to it when I need it! As a reminder, this is what it looks like/where it is:

Now comes the fun part! Accessing the saved video and downloading it to my laptop.
Again, there is a hamburger icon (three lines) that you have to click on in order to access any saved sessions for download.
When I click on the hamburger icon, the following appears:

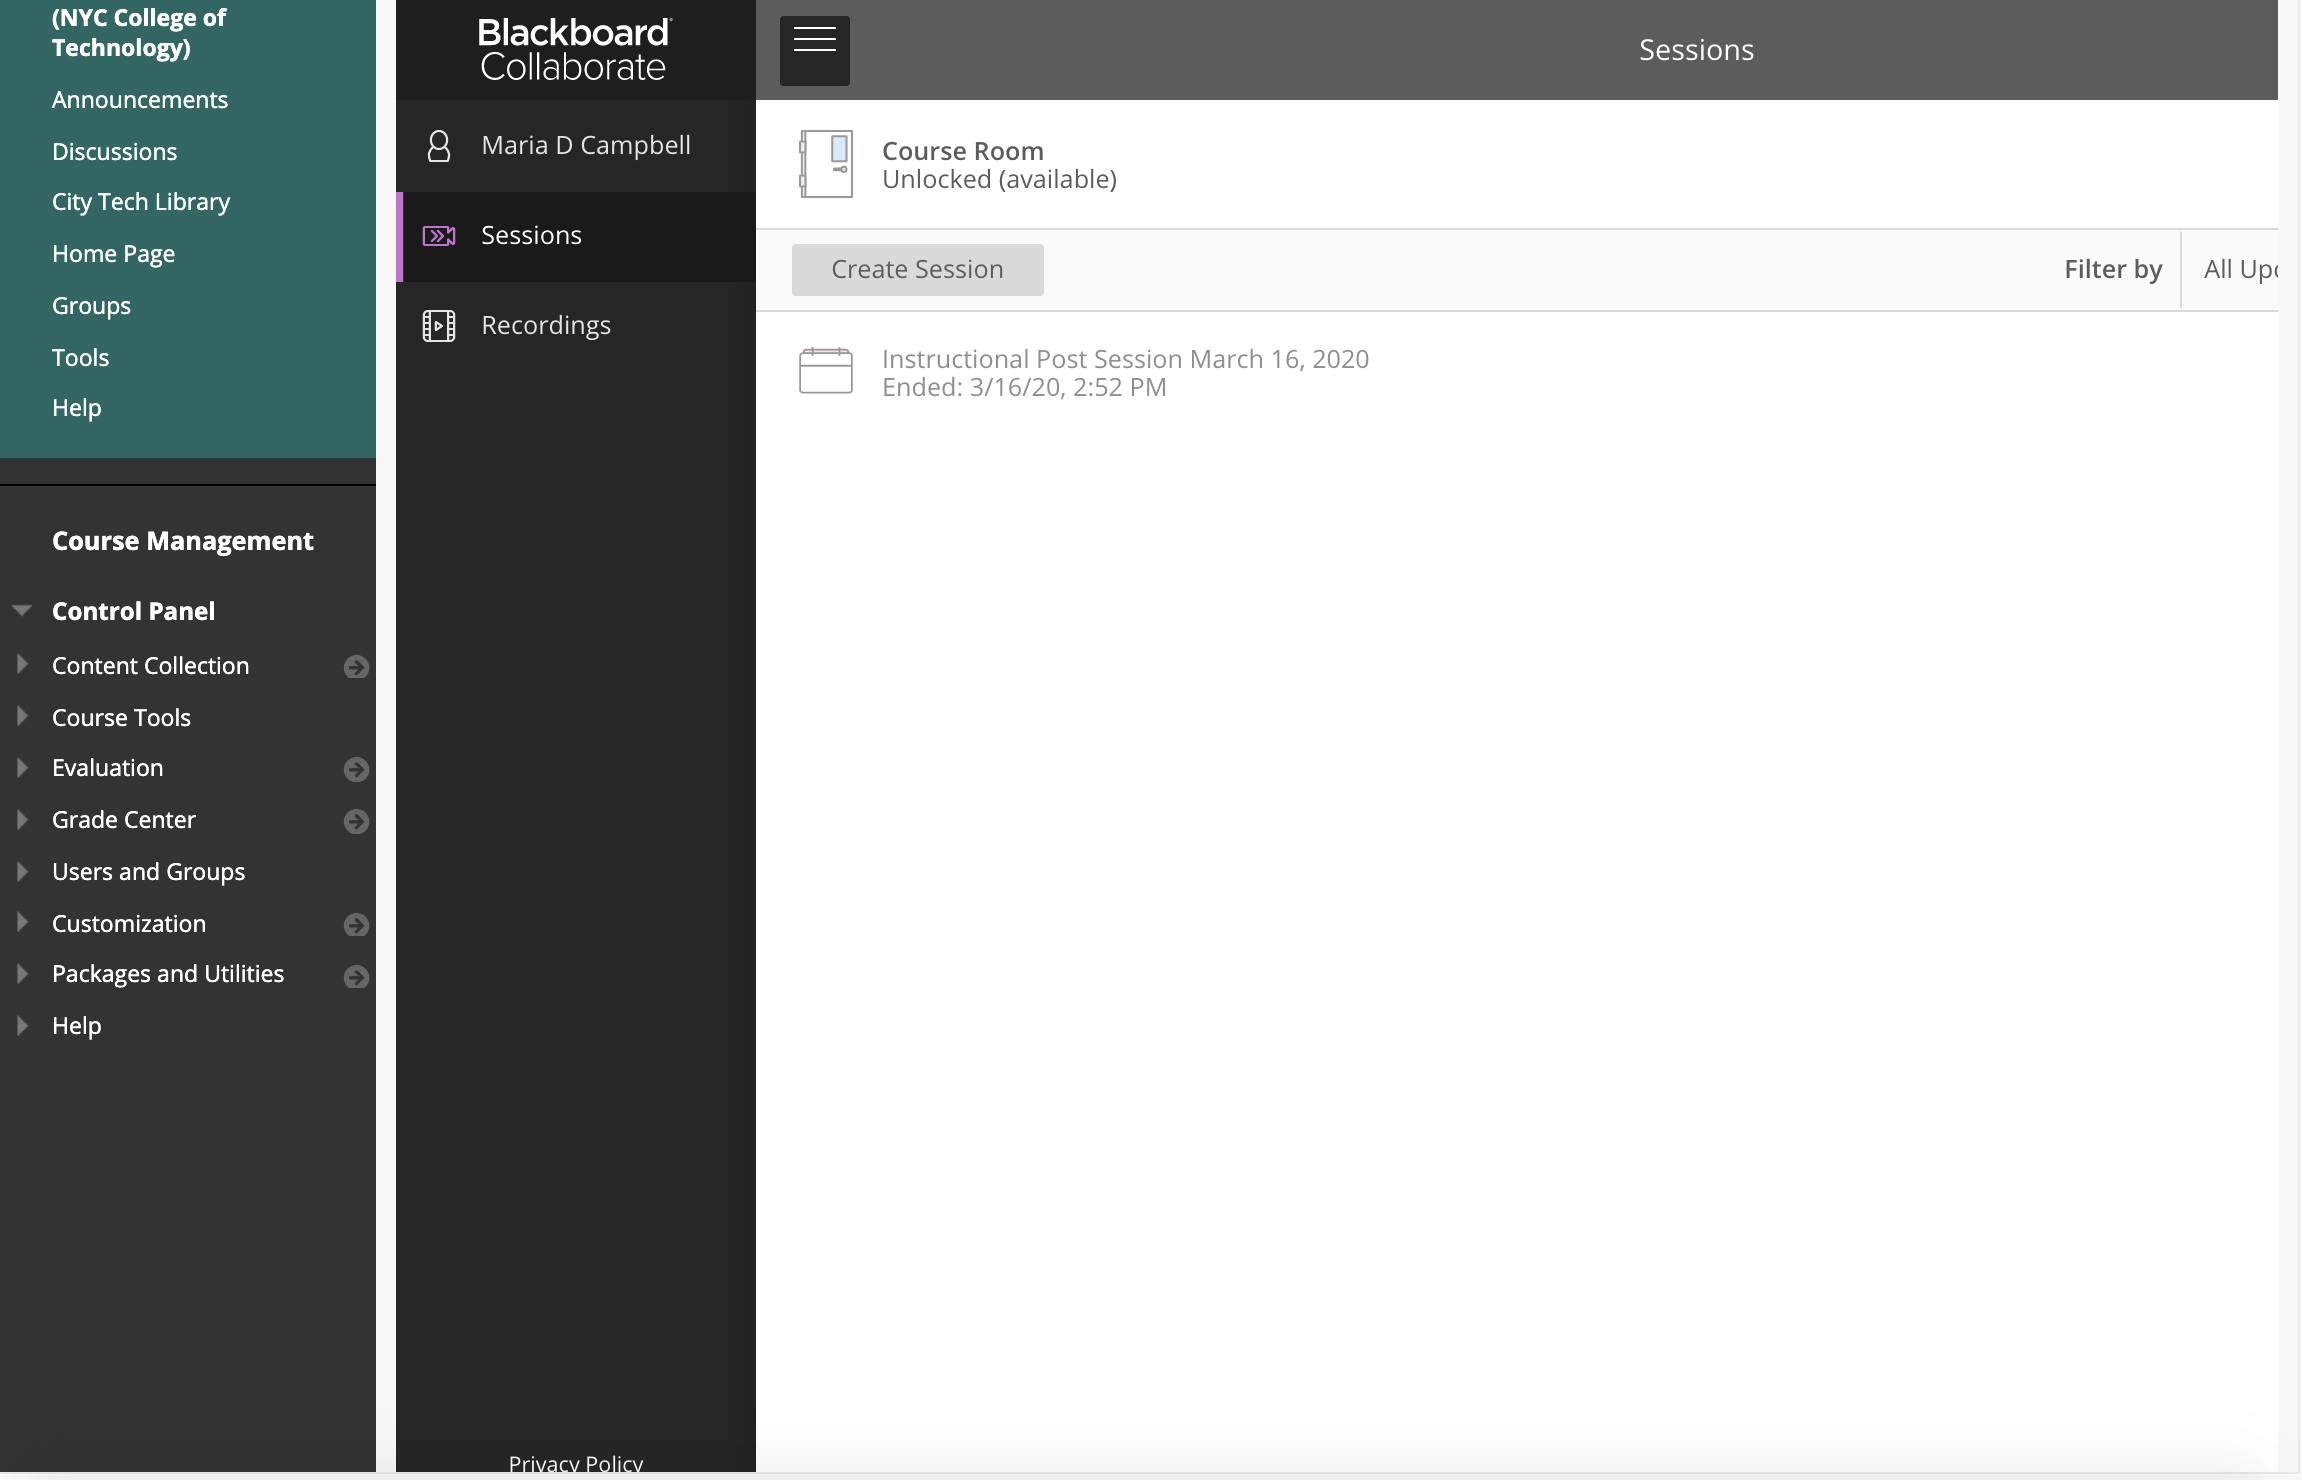
There are two links to choose from on the left. The first is "Sessions", and the second is "Recordings". I choose "Recordings".
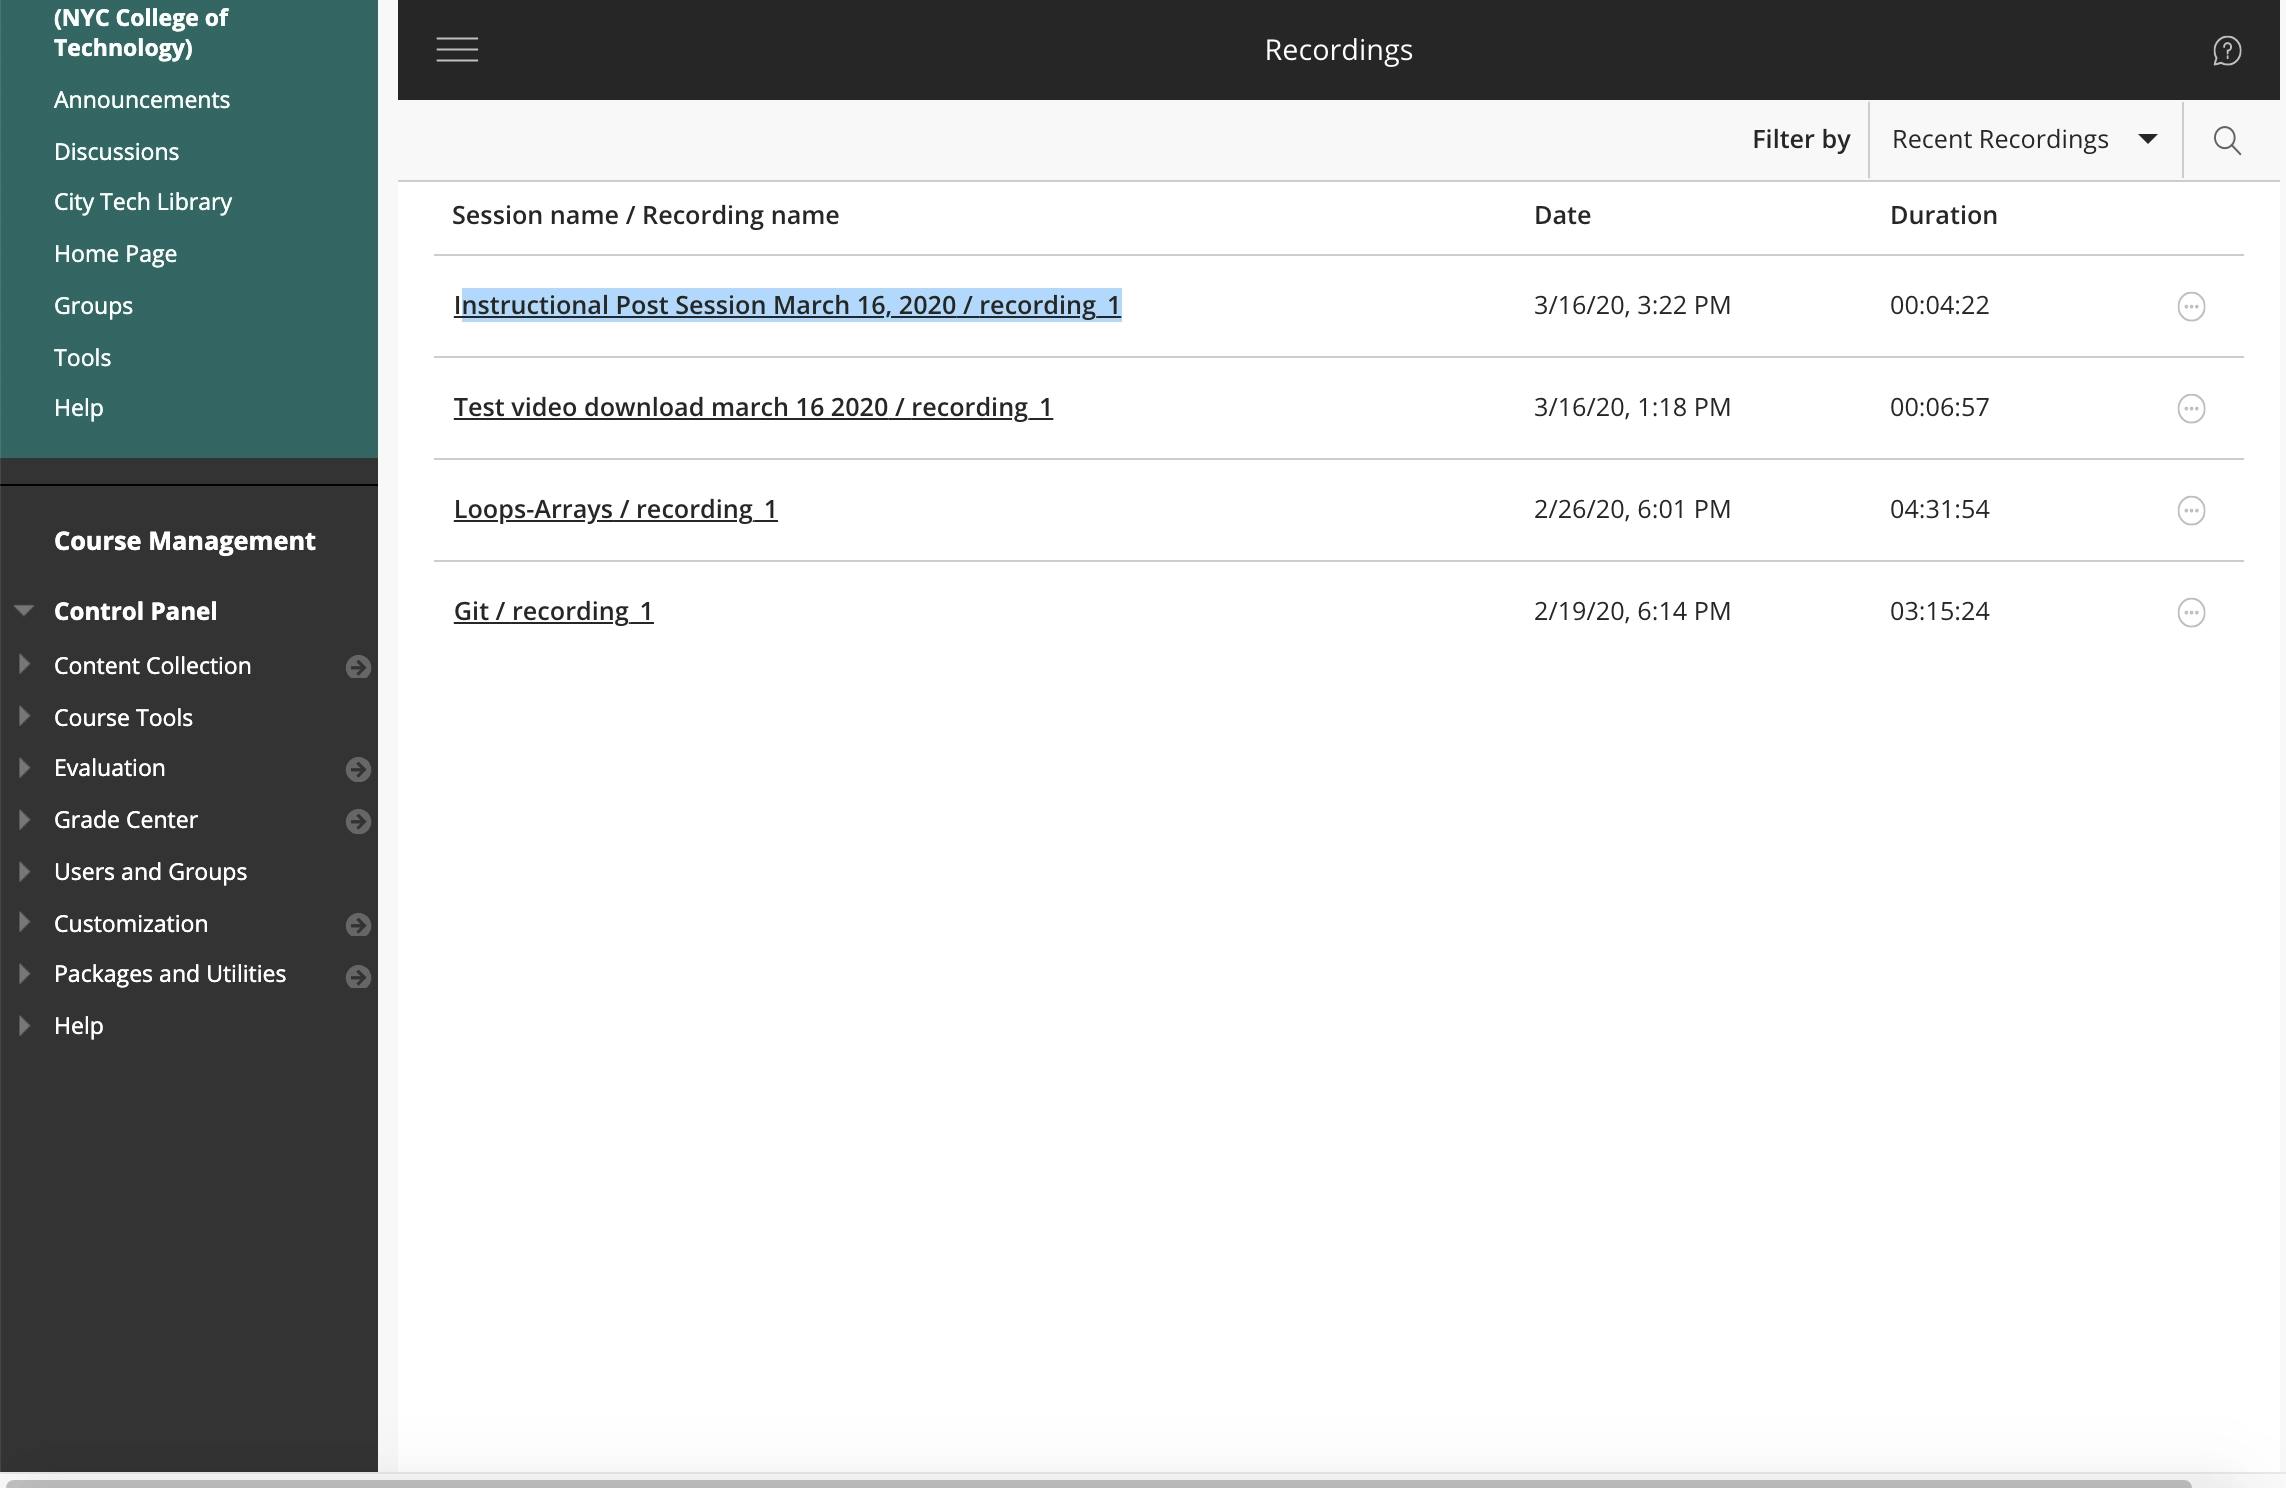
A very important detail to remember and note: just because you have recorded a session does NOT mean that it will be available for download after. You must make sure that you have selected the "Allow recording download" checkbox in order for the recording to be downloadable later. For example, I have a whole bunch of recordings here, but only the most recent recording (this current session recording entitled Instructional Post Session March 16, 2020 / recording_1) is available for download.

To the right, you will see little circles with dots in the center. If you click on one of those, you will get the following recording options:

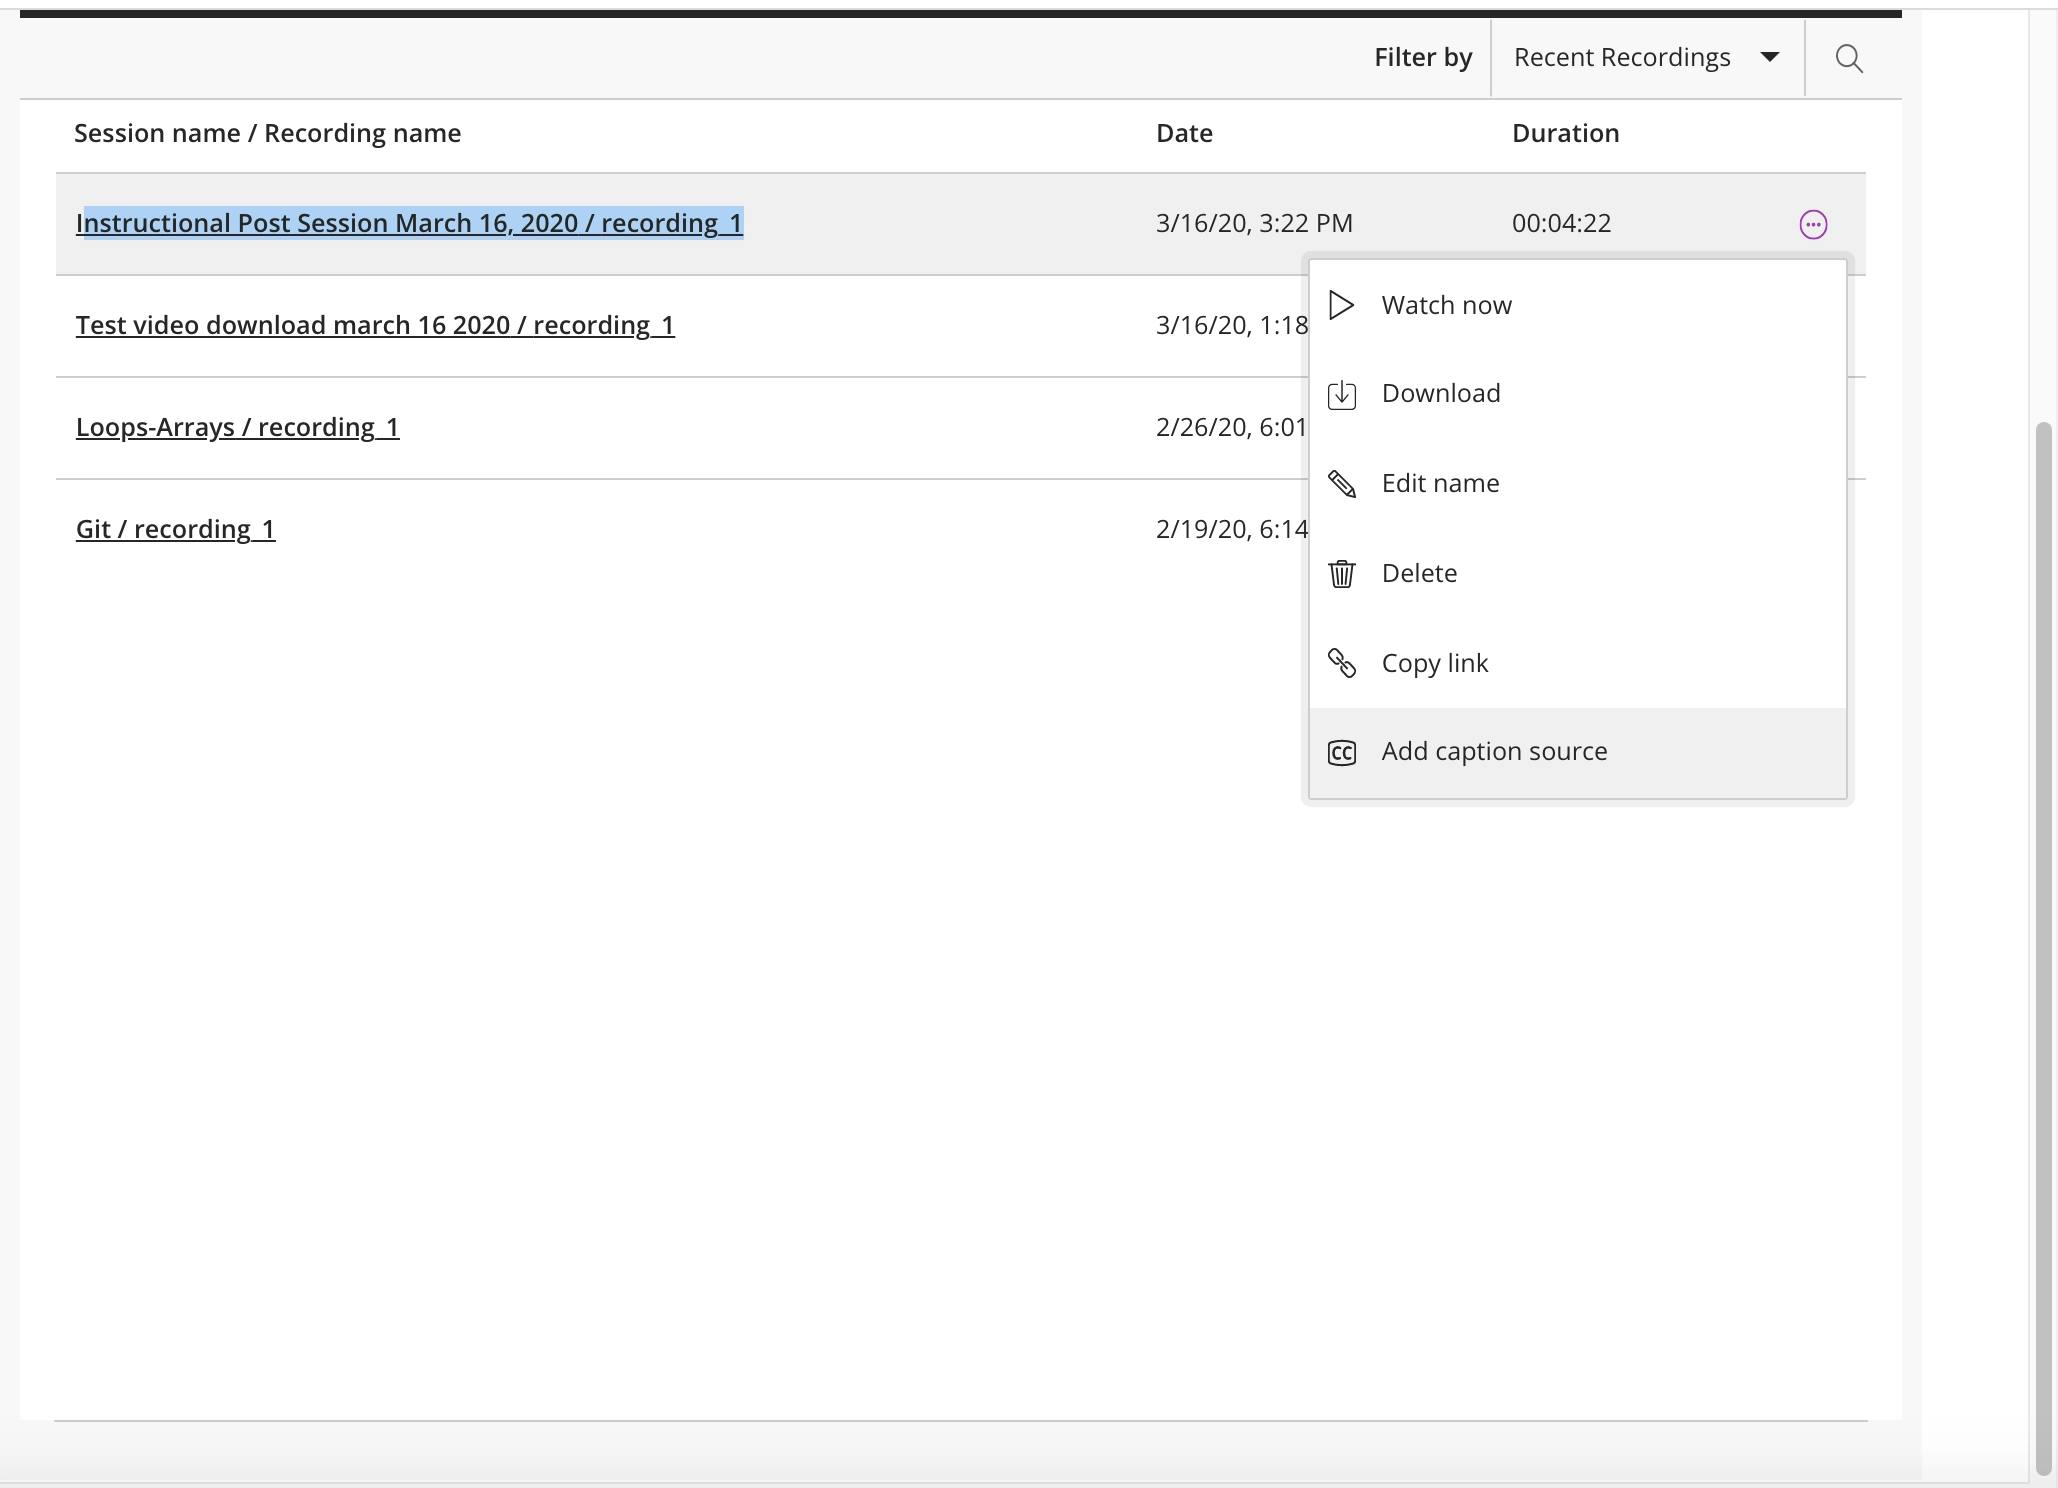
I purposely clicked on the session I created for this post to prove a point. Here, there is a download option available. If I click on that, I can download the video and view it on my laptop. However, if I click on another circle related to a video which I did not make downloadable, the following recording options will appear:
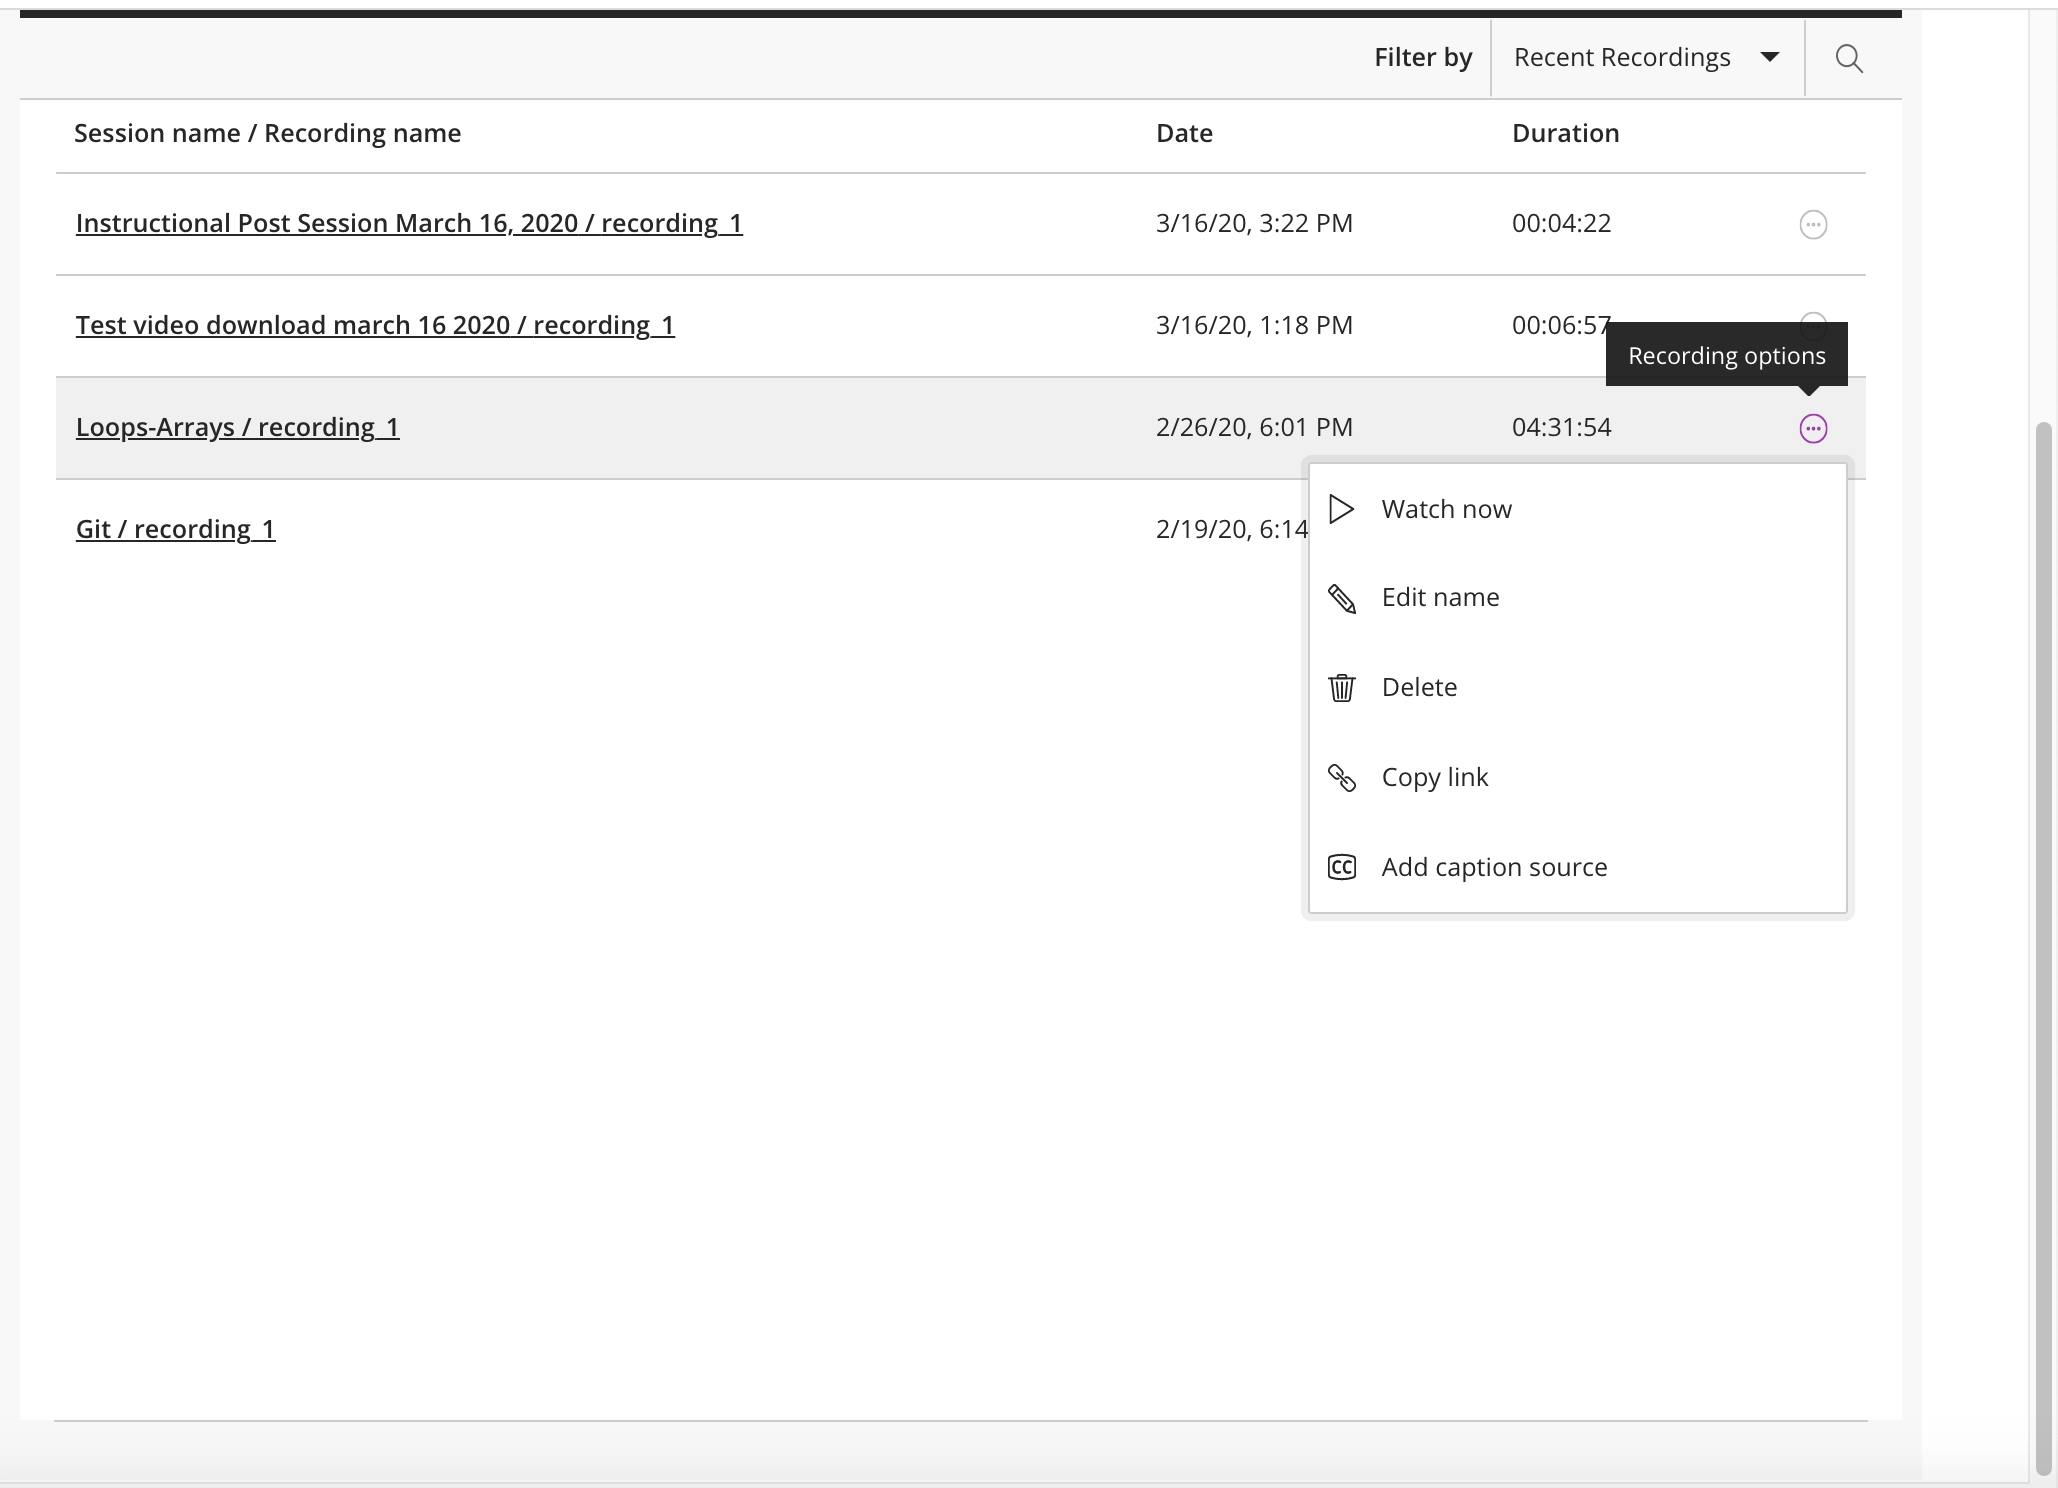
There is NO download option here! I know this to be a fact, because I never tried to make any of my previous lectures downloadable. However, I did record them.
When I click on the download option for this session, I am taken to my downloads area on my laptop and the following appears:

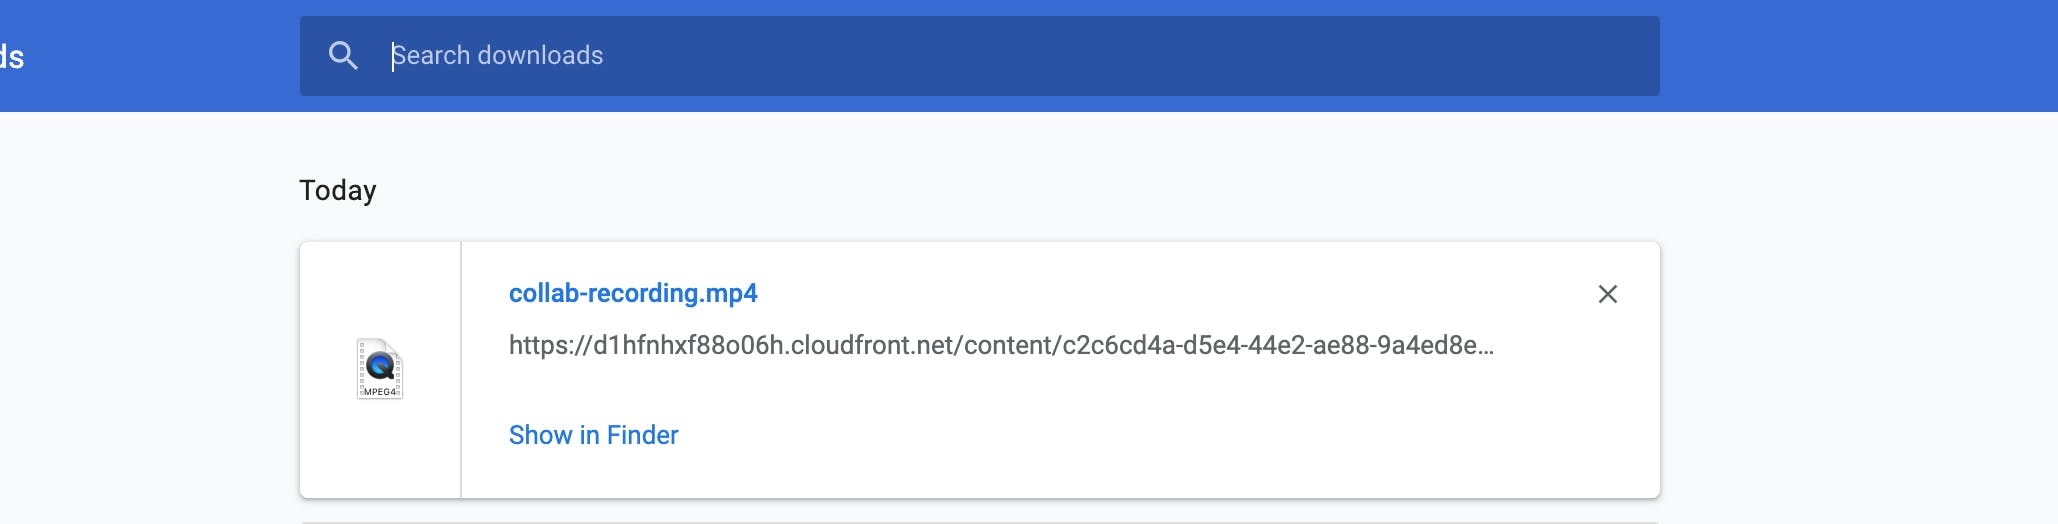
And success! I have successfully downloaded my session!
On another note, Discord is currently undergoing massive server outages. Many of us will not be able to get in for a while. That means I will be making an increased number of announcements on Blackboard to communicate with my students! Thank God for Github as well!
I will be embedding this episode of Plugging in The Holes along with a transcript in the form of a post on interglobalmedianetwork.com for your hearing and reading pleasure. I will be including the related resource links mentioned in the podcast of course. Always do. Bye for now!